


A few weeks ago, I decided to set up a WireGuard VPN on my Raspberry Pi 5. I wanted a fastand lightweight way to securely access my home network whiletraveling, without relying on third-party VPN services. Since I already had the Pi set up and running 24/7, it just made sense to let it handle the job. What surprised me most was how quick and painless the whole process was — under 30 minutes from start to finish.
If you’ve ever needed to access files at home, stream from your own server, or just want peace of mind on public Wi-Fi, running your own VPN is absolutely worth it. With WireGuard and a Raspberry Pi, you get full control over your connection and data without sacrificing speed or security. It’s a weekend project that pays off big time in day-to-day use.

Related
5 unconventional uses for a Raspberry Pi
Tired of building NAS, retro gaming systems, and Pi-hole projects with your Raspberry Pi? Here are some useful, lesser-known alternatives
Why you might want to do this too
It’s not just a fun project, but also vital to your home network security
There are a few solid reasons to set up your own VPN, and they go beyond just being a cool Raspberry Pi project. I have my own goals, obviously, but I’m sure some of these reasons will resonate with you, too. Let’s take a look, and you can decide for yourself how many of these reasons coincide with your needs.
Privacy and remote access on your terms
For me, privacy was a big motivator. I wanted to keep my data away from commercial VPN services and know exactly what’s being logged (spoiler: nothing, with WireGuard). With WireGuard running on my own Pi, I get end-to-end encryption and total control over who connects and what gets shared. On top of that, having remote access means I can connect to my home network from anywhere, whether I’m at a coffee shop or visiting family out of town.

Related
The definitive guide to protecting your home network from cyber threats with a Raspberry Pi
Your adorable Raspberry Pi can be outfitted with enough tools to detect and eradicate the threats targeting your home network
Unblock and use local-only services
Another big perk is being able to access self-hosted services that normally only work at home. I run a few things like Jellyfin, Home Assistant, and a NAS. Without a VPN, I’d have to punch holes in my firewall or rely on clunky workarounds. With WireGuard, everything behaves just like it does when I’m physically at home — no weird configs, no open ports beyond the VPN itself.
Enjoy faster, smoother connections
Running my own setup is noticeably faster than using commercial VPNs. There’s less latency, no bandwidth caps, and no slowdowns from shared servers. WireGuard is super efficient and optimized for speed, especially on lightweight hardware like the Pi. Whether I’m transferring files, streaming media, or just browsing, the connection feels fast and responsive.
What I used to build my Raspberry Pi-powered VPN
You probably have everything you need already
To get started, I used some essential hardware.


Lexar E-Series 512GB Micro SD Card
You’ll also need some additional software and settings enabled on your network router.
- Raspberry Pi OS (Bookworm, 64-bit), fully updated
- Static IP address on my local network
- Dynamic DNS so I can access my network from anywhere
- Port forwarding enabled on my router at UDP port 51820
- PiVPN to automate the WireGuard setup process
I used SSH for the whole setup, but you could also hook up a monitor and keyboard if needed.
Drawbacks of using WireGuard on a Raspberry Pi
Evaluating the pros and cons of a home-hosted VPN
Even though running WireGuard on a Raspberry Pi has been a great experience overall, it’s not without a few limitations. These aren’t deal-breakers for me, but they’re worth knowing about before you dive in.
SD card reliability is a weak point
Like most Raspberry Pi projects, the whole system usually runs from a microSD card. While that’s convenient, SD cards aren’t built for heavy-duty or long-term reliability. A corrupted card could unexpectedly take down your VPN.
You can minimize the risk by using a high-endurance SD card or, better yet, switching your Pi to boot from an SSD if you’re comfortable with the setup. In my case, I have Raspberry Pi OS running from an M.2 NVMe SSD attached via the official M.2 HAT.
Limited CPU and multitasking ability
The Raspberry Pi 5 is the most capable model yet, but it still has its limits. If you’re running other services, like Pi-hole, a media server, or Docker containers, alongside WireGuard, you may start to notice performance drops. WireGuard itself doesn’t use much CPU, but the combined load could impact overall responsiveness, especially under network stress or while streaming.
With this in mind, you might consider deploying more resource-intensive apps, such as your media server or Docker containers, to their own Raspberry Pi. I dedicate one Pi to networking tasks, with Pi-hole running alongside WireGuard.
No built-in internet redundancy
Since the VPN server lives on your Pi at home, you’re completely dependent on your home internet connection. If your ISP goes down or your router reboots while you’re away, you won’t be able to connect to the VPN. There are ways to add some redundancy with dual-WAN setups or automatic reboots, but they add complexity. For most people, occasional downtime is just something to live with.
Still, the benefits outweighed the drawbacks for my needs. The Pi is cheap, silent, and energy-efficient. Plus, WireGuard’s tiny resource footprint means I can still run other services on the same Pi without issues.
How I did it in under 30 minutes
And how you can follow in my footsteps
Once I had my Raspberry Pi 5 set up and updated, here’s how I got WireGuard up and running:
-
I updated my Raspberry Pi using
sudo apt update && sudo apt upgrade -y -
Next, I installed PiVPN with the WireGuard option. This was easy using the Terminal command
curl -L https://install.pivpn.io | bash.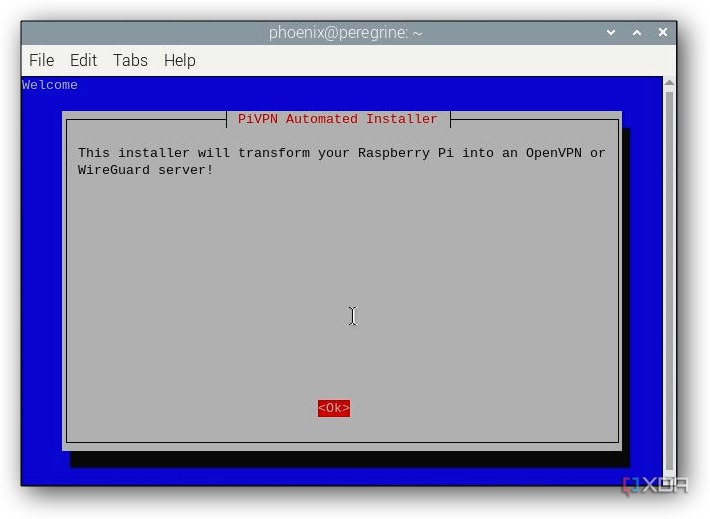
-
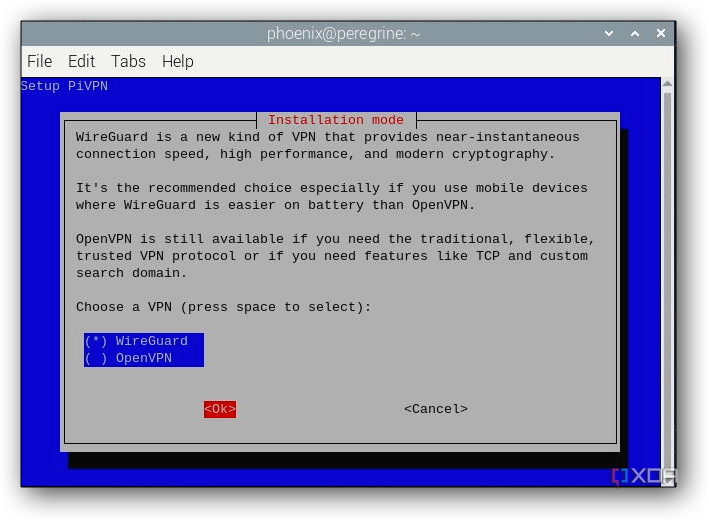
When prompted, I chose WireGuard for my VPN.

- I chose my default user (yours is probably pi), picked a DNS provider, and let it assign a static IP.
- Next, I chose to enable unattended security updates.
- I forwarded UDP port 51820 to my Pi’s local IP address.
-
Now it was time to reboot the Pi. Easy enough; just type
sudo reboot

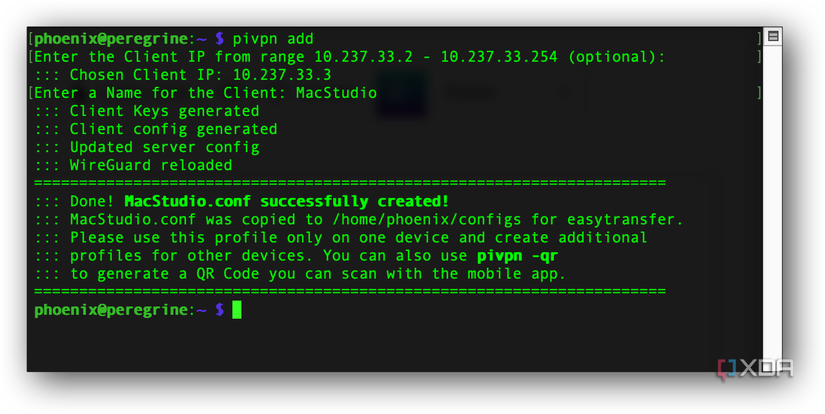
With PiVPN and WireGuard installed, I added a client profile for my iPhone.
-
To add a client profile, just issue this command in Terminal or your SSH session:
pivpn add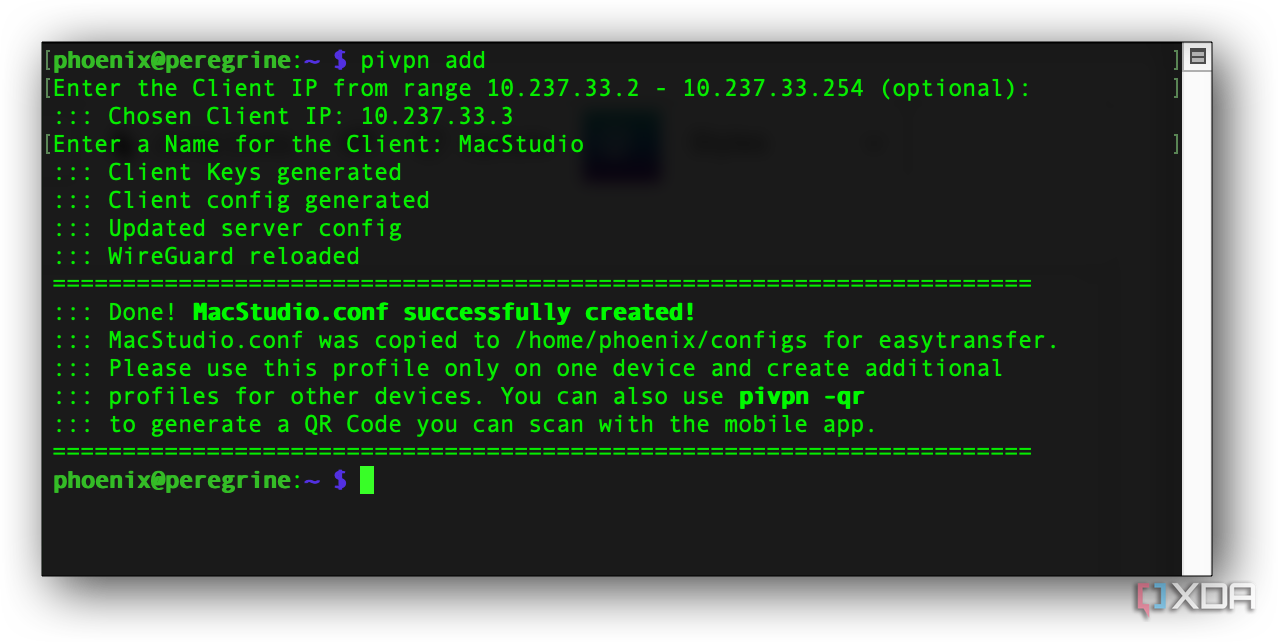
I named the profile after the device I was creating it for. Common choices here could be a laptop, a desktop, a phone, and so forth.
-
To connect my device to the VPN, I scanned the QR code from the WireGuard app on my iPhone. From my SSH session, I entered the command
pivpn -qron the Raspberry Pi and chose the client I wanted to connect to.
-
Next, on my iPhone, I scanned the code. You can also use
.conffile created by step 1 above. - To make sure it all worked, I opened the WireGuard app and tapped Activate. Just like that, I was tunneling through my home network using WireGuard VPN.

Why it’s totally worth doing
Opening your home lab to use outside the home has distinct benefits
Running a WireGuard VPN on my Raspberry Pi 5 has been one of the most useful networking projects I’ve done. It gives me remote access to everything at home, boosts my privacy on public networks, and runs quietly in the background with barely any maintenance. The setup was dead simple thanks to PiVPN, and WireGuard’s performance has been rock-solid.
If you’ve got a Raspberry Pi sitting around and want a private, fast, and secure way to access your home network, I highly recommend giving this a try. It’s one of those rare projects that feels more like an upgrade than a chore — and once it’s up, you’ll wonder how you ever lived without it.


