


If you are like me, you probably switch between multiple command-line tools for your work, such as Command Prompt, Windows PowerShell, and WSL for Linux workflows. Individually, these tools are powerful enough and work well once you get used to them. However, when you need to use them simultaneously, jumping between separate windows feels unproductive. That’s where Windows Terminal helps you.
Unlike most users assume, Terminal is technically not a command-line tool itself. It’s actually a container that lets you run popular Windows command-line tools like CMD or PowerShell. On the Terminal app, you can open these tools separately in a single window, together in different tabs, or in a horizontal or vertical split view. Essentially, it saves you from opening multiple windows and constantly alt-tabbing, ultimately saving a considerable amount of time. Once you set it up, you get a smoother and more organized workflow that’s genuinely more enjoyable.

Related
5 tips and tricks for improving Windows Terminal
You can make use of Windows Terminal like a pro
What is Windows Terminal, and why should you care?
A modern command-line tool that centralizes your workflows

As mentioned, the Windows Terminal is a container or interface that lets you run all your command-line environments from one place. That means you don’t need to open a CMD or a PowerShell window separately anymore. Just launch the Terminal app and access any shell you like.
Windows Terminal features a tabbed interface that lets you launch as many sessions as possible in a single window. Further, there are split panes to view and work on multiple shells side-by-side. Unlike other command-line tools, you get a lot of customization options in Terminal to change themes, shortcuts, and profiles, whatever best suits your workflow.
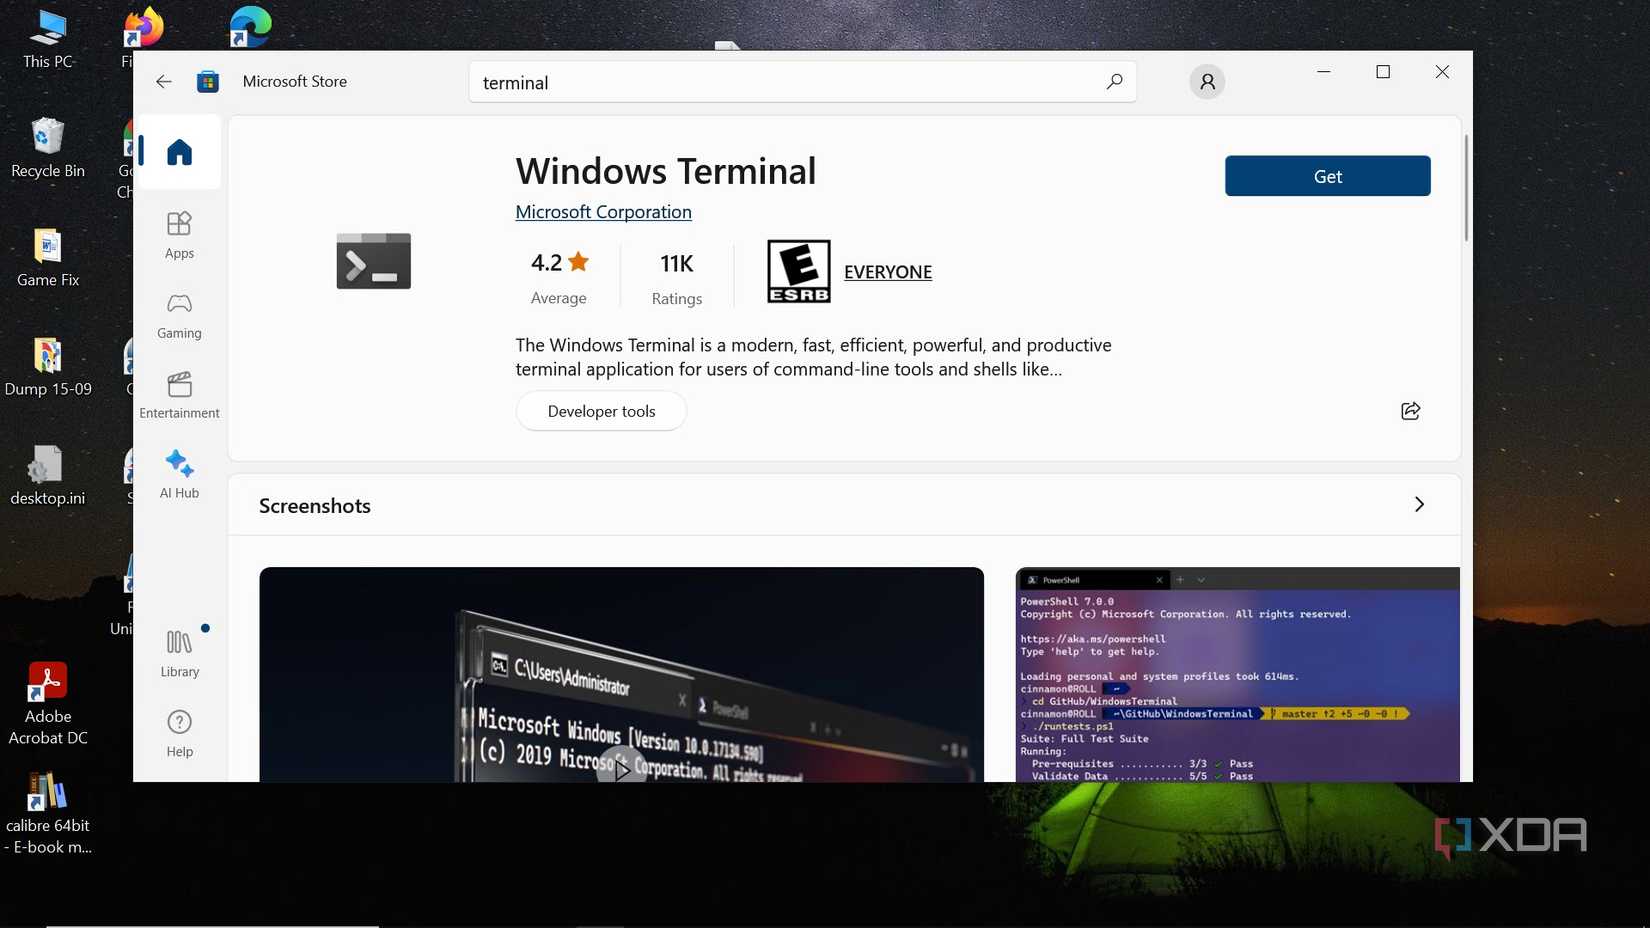
If you run Windows 11 version 22H2 or later, Terminal will come pre-installed and already set as the default command-line experience. For versions below 22H2, you can download it manually from the Microsoft Store. The app doesn’t come pre-installed on Windows 10, but if you run Windows 10 version 1903 or later, you can easily install it from the Microsoft Store and set it up.
Related
4 ways Windows Terminal and PowerShell are different
They are nothing alike
Setting up Windows Terminal
Get started by installing or checking if you already have it
Setting up and getting started with the Terminal app is pretty straightforward. If you are a Windows 11 user, you don’t have to do anything other than right-click the Start button and select Terminal or Terminal (Admin) from the power menu.
If you are a Windows 10 user and don’t have the Terminal app yet, here’s how to install it:
- In the search box, type Microsoft Store and click its icon to launch it.
- Search for the Windows Terminal on the Microsoft Store.
- Click the Get/Install button and let the program download and install.
- After it’s installed, you can optionally pin it to the taskbar for quick access.
After successfully installing the Windows Terminal, you are now ready to bring all your shells together.
2:53

Related
New to the Windows command line? These 10 useful commands are a great way to get started
You can use your keyboard alone for all kinds of things
Adding WSL, PowerShell, and CMD to Windows Terminal
Bring all your environments into a single workspace.
After successfully installing the Windows Terminal, it generally automatically detects your installed shells, such as Command Prompt, PowerShell, and any WSL distribution. For example, in my case, it auto-detected Ubuntu and Azure Cloud Shell.
However, if any of your shells aren’t there, or you want to add more, here’s how you can do that:
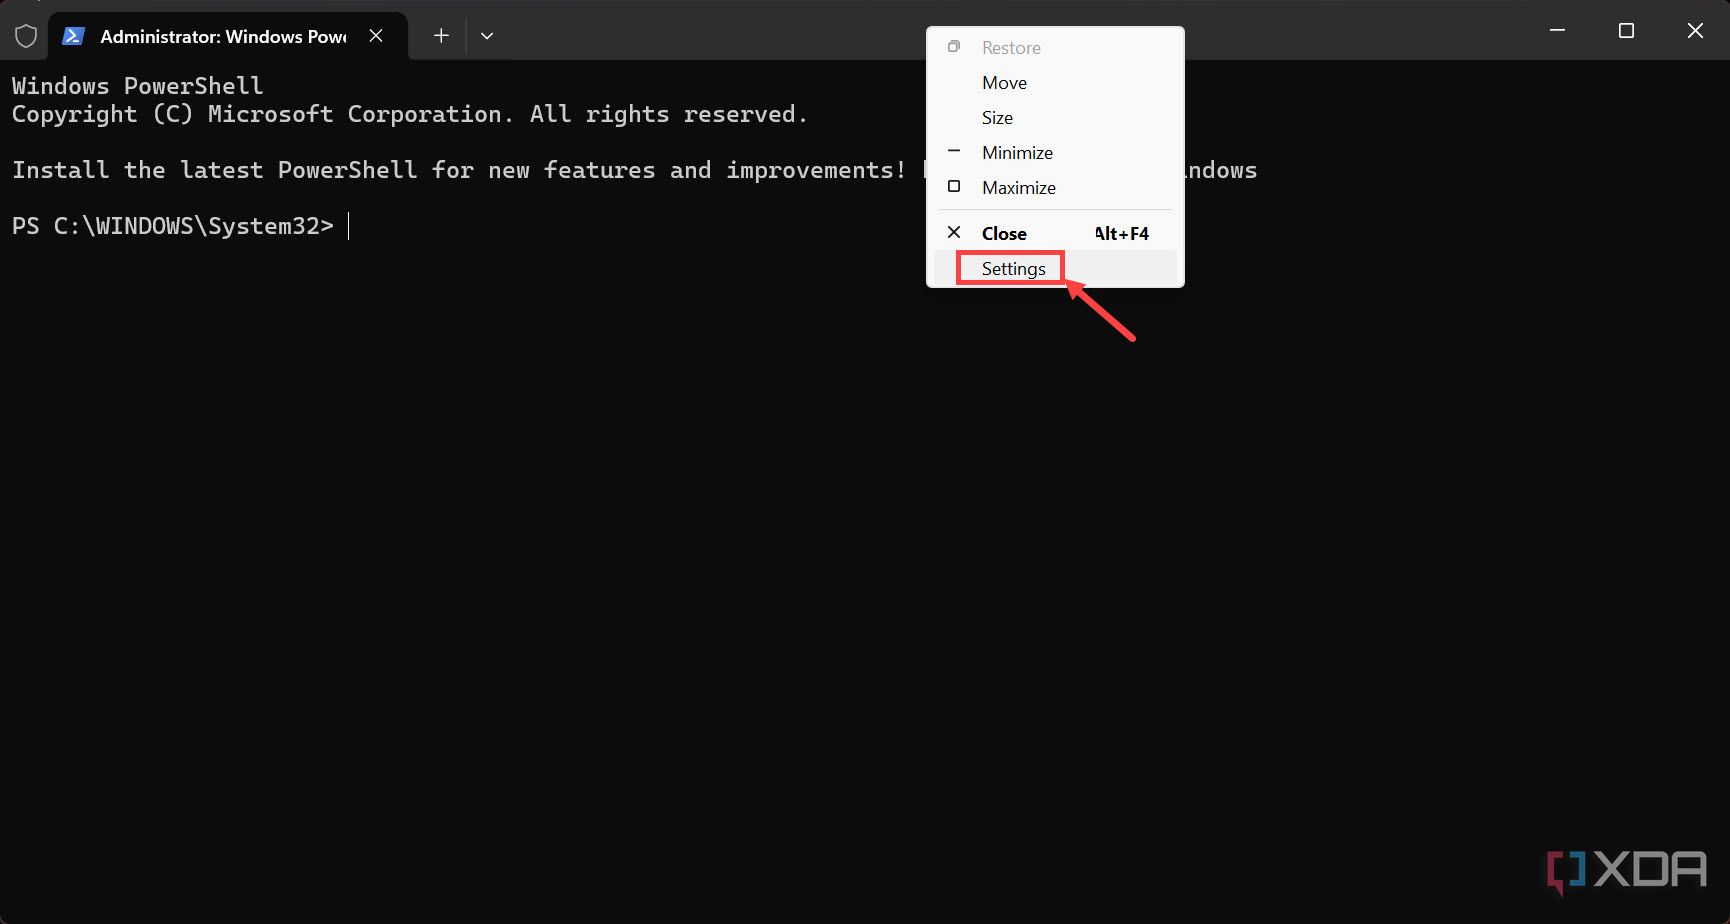
- Launch the Terminal or Terminal (Admin) app.
-
Right-click on its title bar and select Settings.
-
On the left pane, scroll down and click the Add a new profile option.
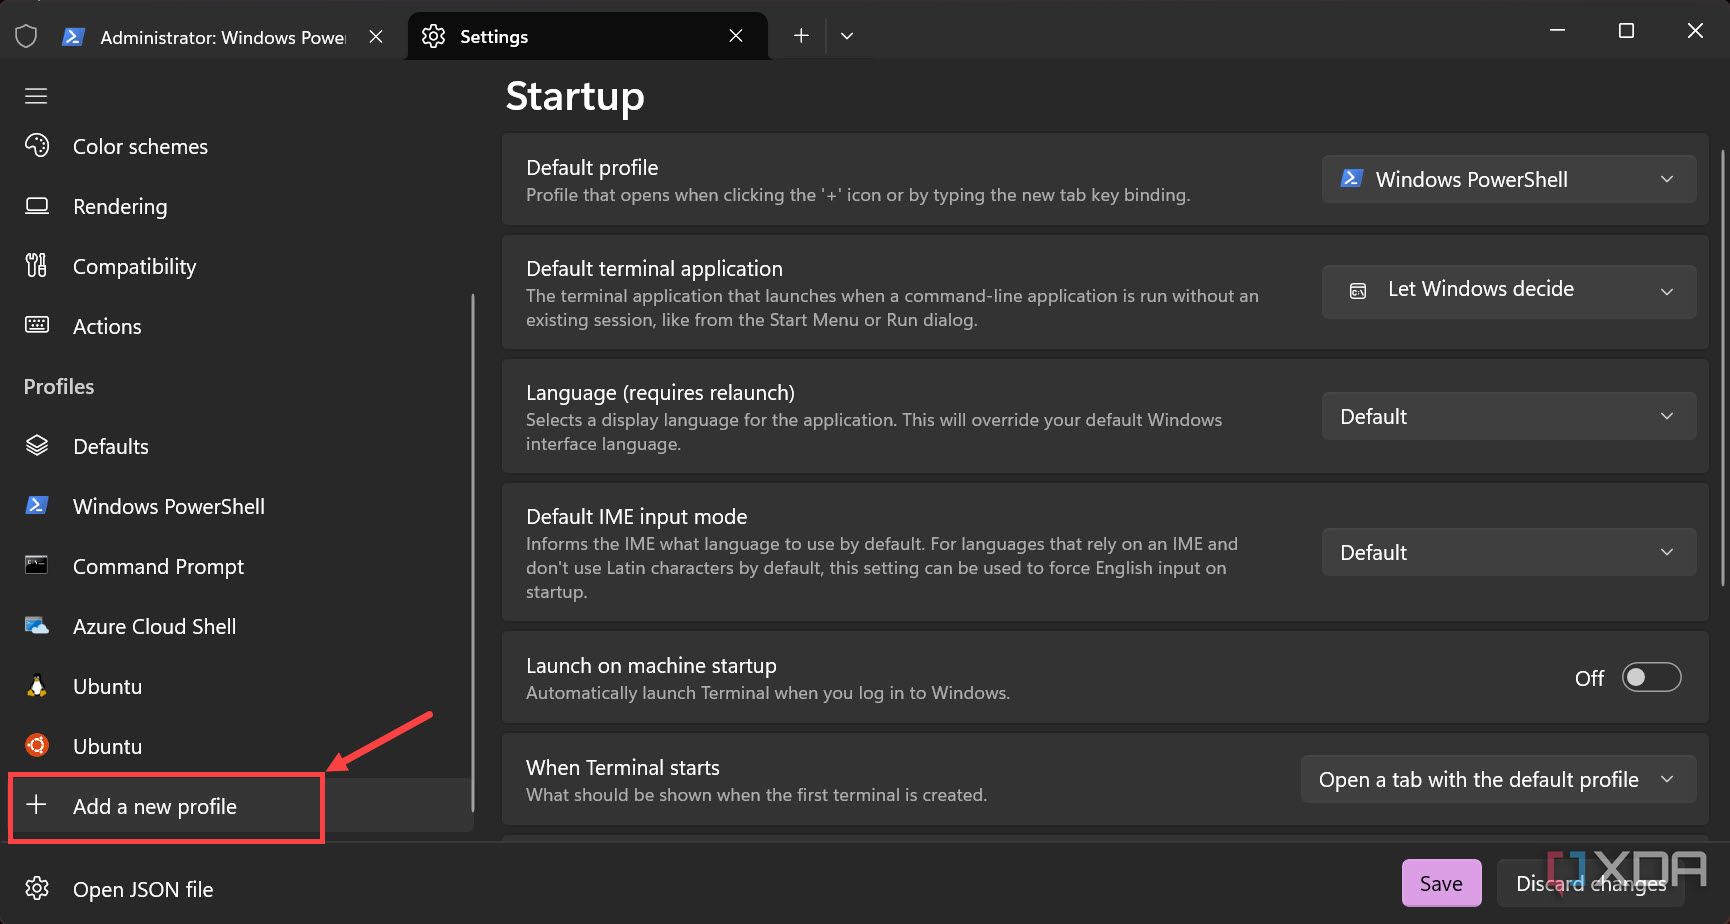
-
Next, click the New empty profile button to continue.
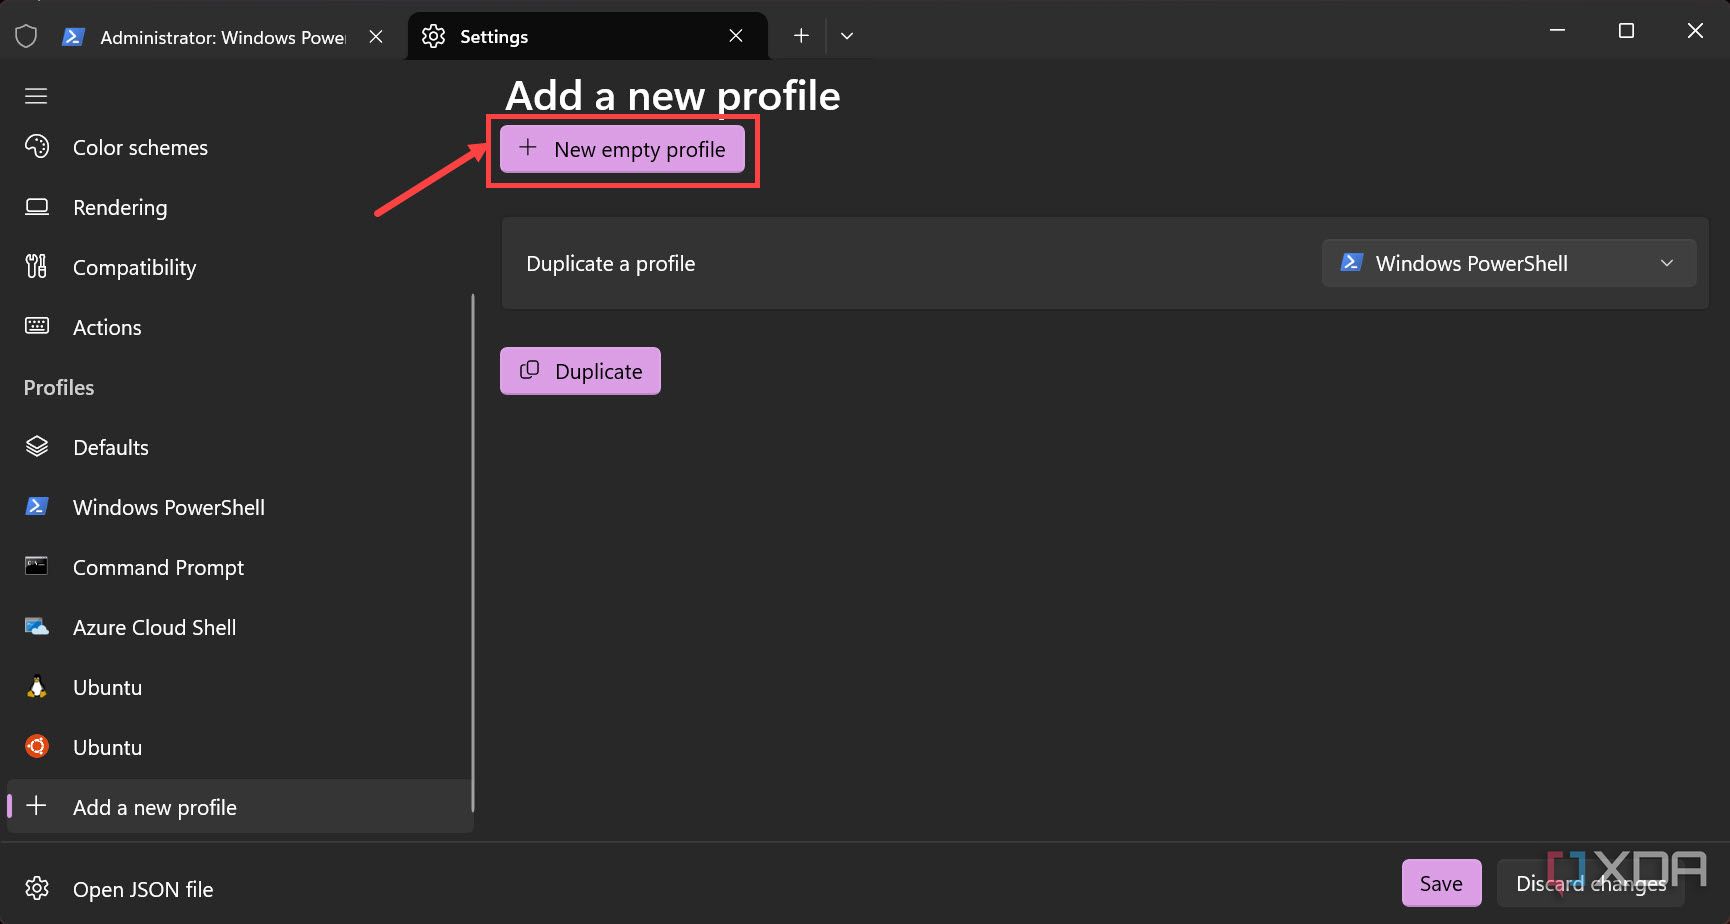
-
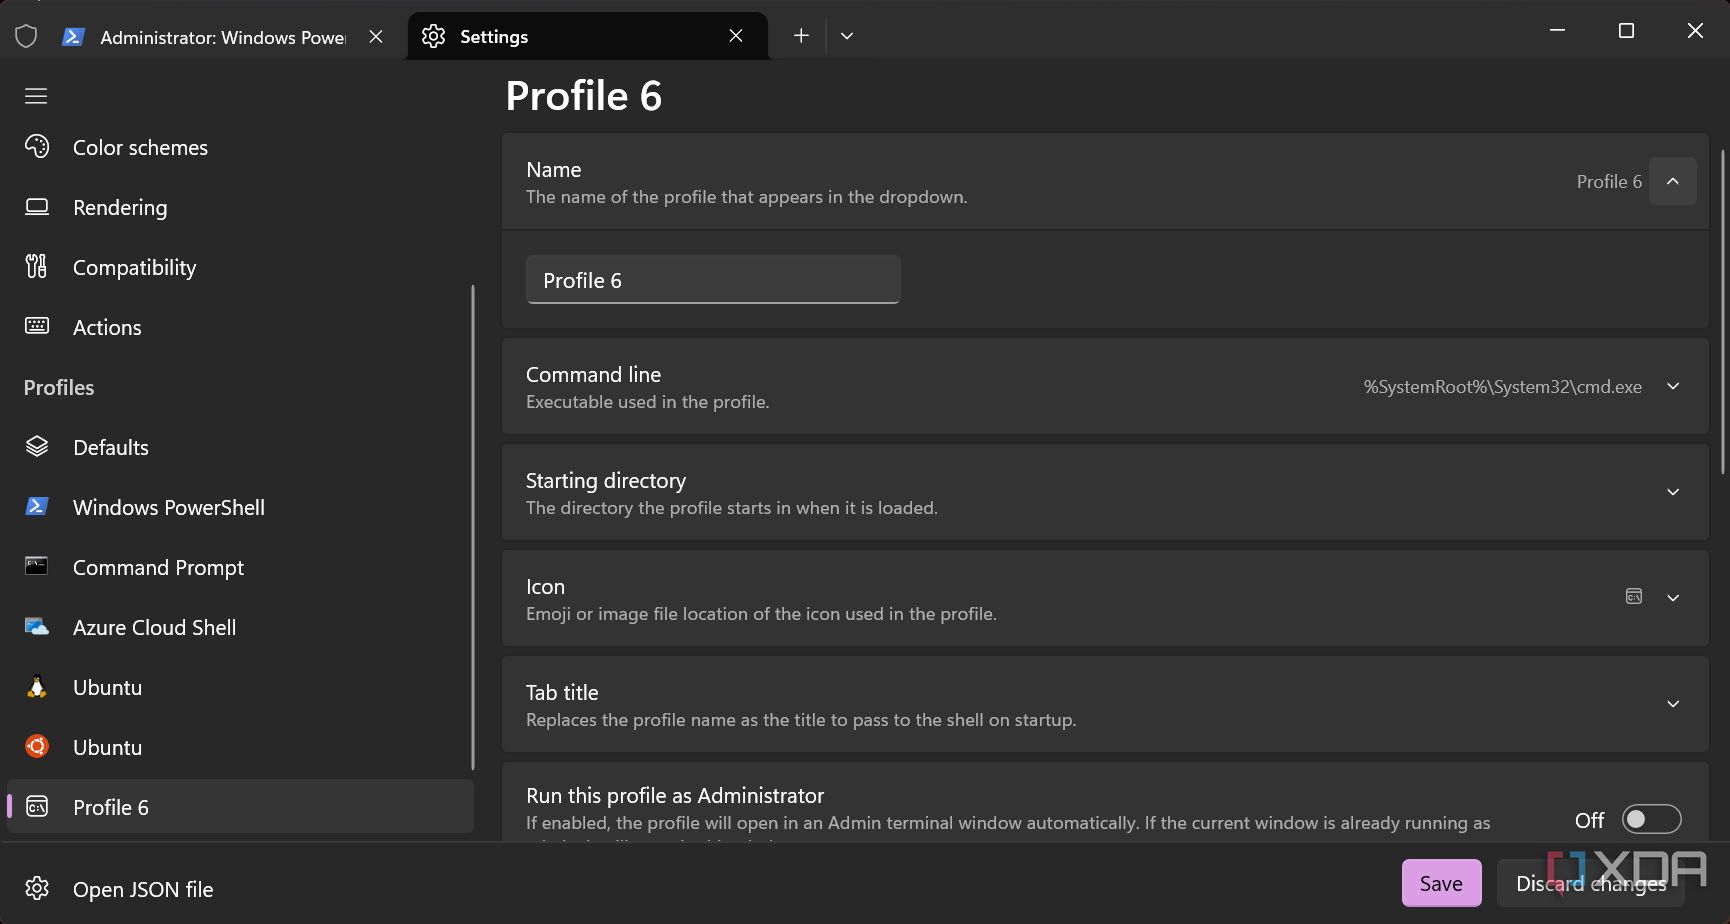
On the next window, complete the setup of the newly created profile. Add its name, select the executable file for the profile, starting directory, icon, tab title, whether you want to run this profile as an administrator, and more. Finally, click the Save button.


Your new profile will be ready to use.

Related
10 Windows PowerShell commands you need to be using
PowerShell can be a powerful tool, if you know what to use it for.
Boosting productivity with Terminal
Tabs for different tasks

Windows Terminal supports multiple tabs under a single window, just like a browser. It keeps your different tasks separate but quickly accessible. So, you can open Command Prompt in one tab for running commands, PowerShell in another tab for running scripts, and WSL in another tab for development.
To open a new tab, use Ctrl + Shift + T or click the + icon on the title bar. This will open a new tab with the default profile, such as Windows PowerShell. However, if you would like to open a new tab with a different profile, click the drop-down icon in the title tab and select one of the shells you would like to open in a new tab.
To switch between tabs, use Ctrl + Tab to move forward and Ctrl + Shift + Tab to move backward.
Split panes for side-by-side work
Terminal also supports multiple panes under the same window if you want to work side by side. You can split your window into two or more panes and work simultaneously on those. You don’t have to juggle between windows or switch between tabs. Panes give you better control over your workspace, even better than tabs in some cases.
Here is how you can utilize the panes in the Terminal app:
- Open a duplicate pane: Alt + Shift + D
- Open a duplicate pane split down: Alt + Shift + Minus
- Open a duplicate pane split right: Alt + Shift + Plus
- Close a pane: Ctrl + Shift + W
Utilize keyboard shortcuts

Windows Terminal comes with numerous keyboard shortcuts to make your work easier and quicker and to make you more efficient. You can access the shortcuts and get used to them by clicking the drop-down menu on the title bar and selecting the Command Palette option. A new section will open up, listing all the commands that the Terminal supports along with their keyboard shortcuts.
Related
16 lesser-known uses of Command Prompt
Do you know Command Prompt well? Think again! Check these 16-lesser known uses
Customizing Terminal for efficiency
You can further customize Windows Terminal as per your preference by adjusting the following settings.
Change themes and appearance

Under Settings > Appearance:
- Switch between Light, Dark, or Custom themes.
- Adjust font size for readability.
- Enable background transparency for a sleek look.
Configure startup actions

Set your favorite profile (like WSL) to open by default:
- Go to Settings -> Startup -> Default profile.
Define custom keybindings

You can create shortcuts for frequent tasks:
- Open Settings -> Actions.
- Add new bindings for tasks like splitting panes or opening new profiles.
Personalize profiles

Set different color schemes or icons for CMD, PowerShell, and WSL so you can instantly recognize them at a glance.
These small changes make the Terminal feel like your tool, not just another default Windows app.

Related
5 tweaks every developer should make in Windows 11
Development on Windows can be a pain, but it doesn’t have to be
Windows Terminal changes the game
Once you switch, you won’t want to go back
Windows Terminal is one of the most productive features of Windows 11 for me. Ever since I started using Terminal, my workflow has sped up as I spend less time opening and closing windows of my shells and more time on actual tasks. Everything I need is just a tab or pane away. If you are a multitasker like me, you’ll love it and won’t be able to go back to your usual way of using multiple shells simultaneously. It’s a simple, straightforward, and easy-to-use application.


