From executing commands over SSH to installing packages inside a resource-intensive GUI environment, you’ve got a couple of options for accessing your Raspberry Pi. But if your DIY projects involve using the Raspberry Pi as a home server, a web UI accessible from any device on your network serves as a great companion on your tinkering journey. Cockpit is my favorite web-based interface for the job, and here are four reasons why I recommend every Raspberry Pi user give it a shot.

Related
4 amazing projects you can build with a Raspberry Pi and an ESP32
Looking for some cool DIY ideas involving a Raspberry Pi and ESP32 combo? We’ve got you covered!
1
Tons of account, storage, and network options
And just as many monitoring provisions
Despite being a pain to configure, you’ll want the right combination of access privileges, network interfaces, and mount points to ensure your Raspberry Pi server is in tip-top form. Cockpit’s intuitive UI lets you manage every aspect of your Raspberry Pi – down to its user groups, storage drives, as well as network bridges, VLANs, bonds, and other essential settings.
As if that’s not enough, Cockpit leverages the Performance Co-Pilot service to provide detailed monitoring support for your Raspberry Pi’s hardware usage and resource consumption – and you can even configure PCP to export your data to self-hosted Redis, Valkey, and Grafana instances!
2
Solid troubleshooting provisions
Thanks to its built-in logging system
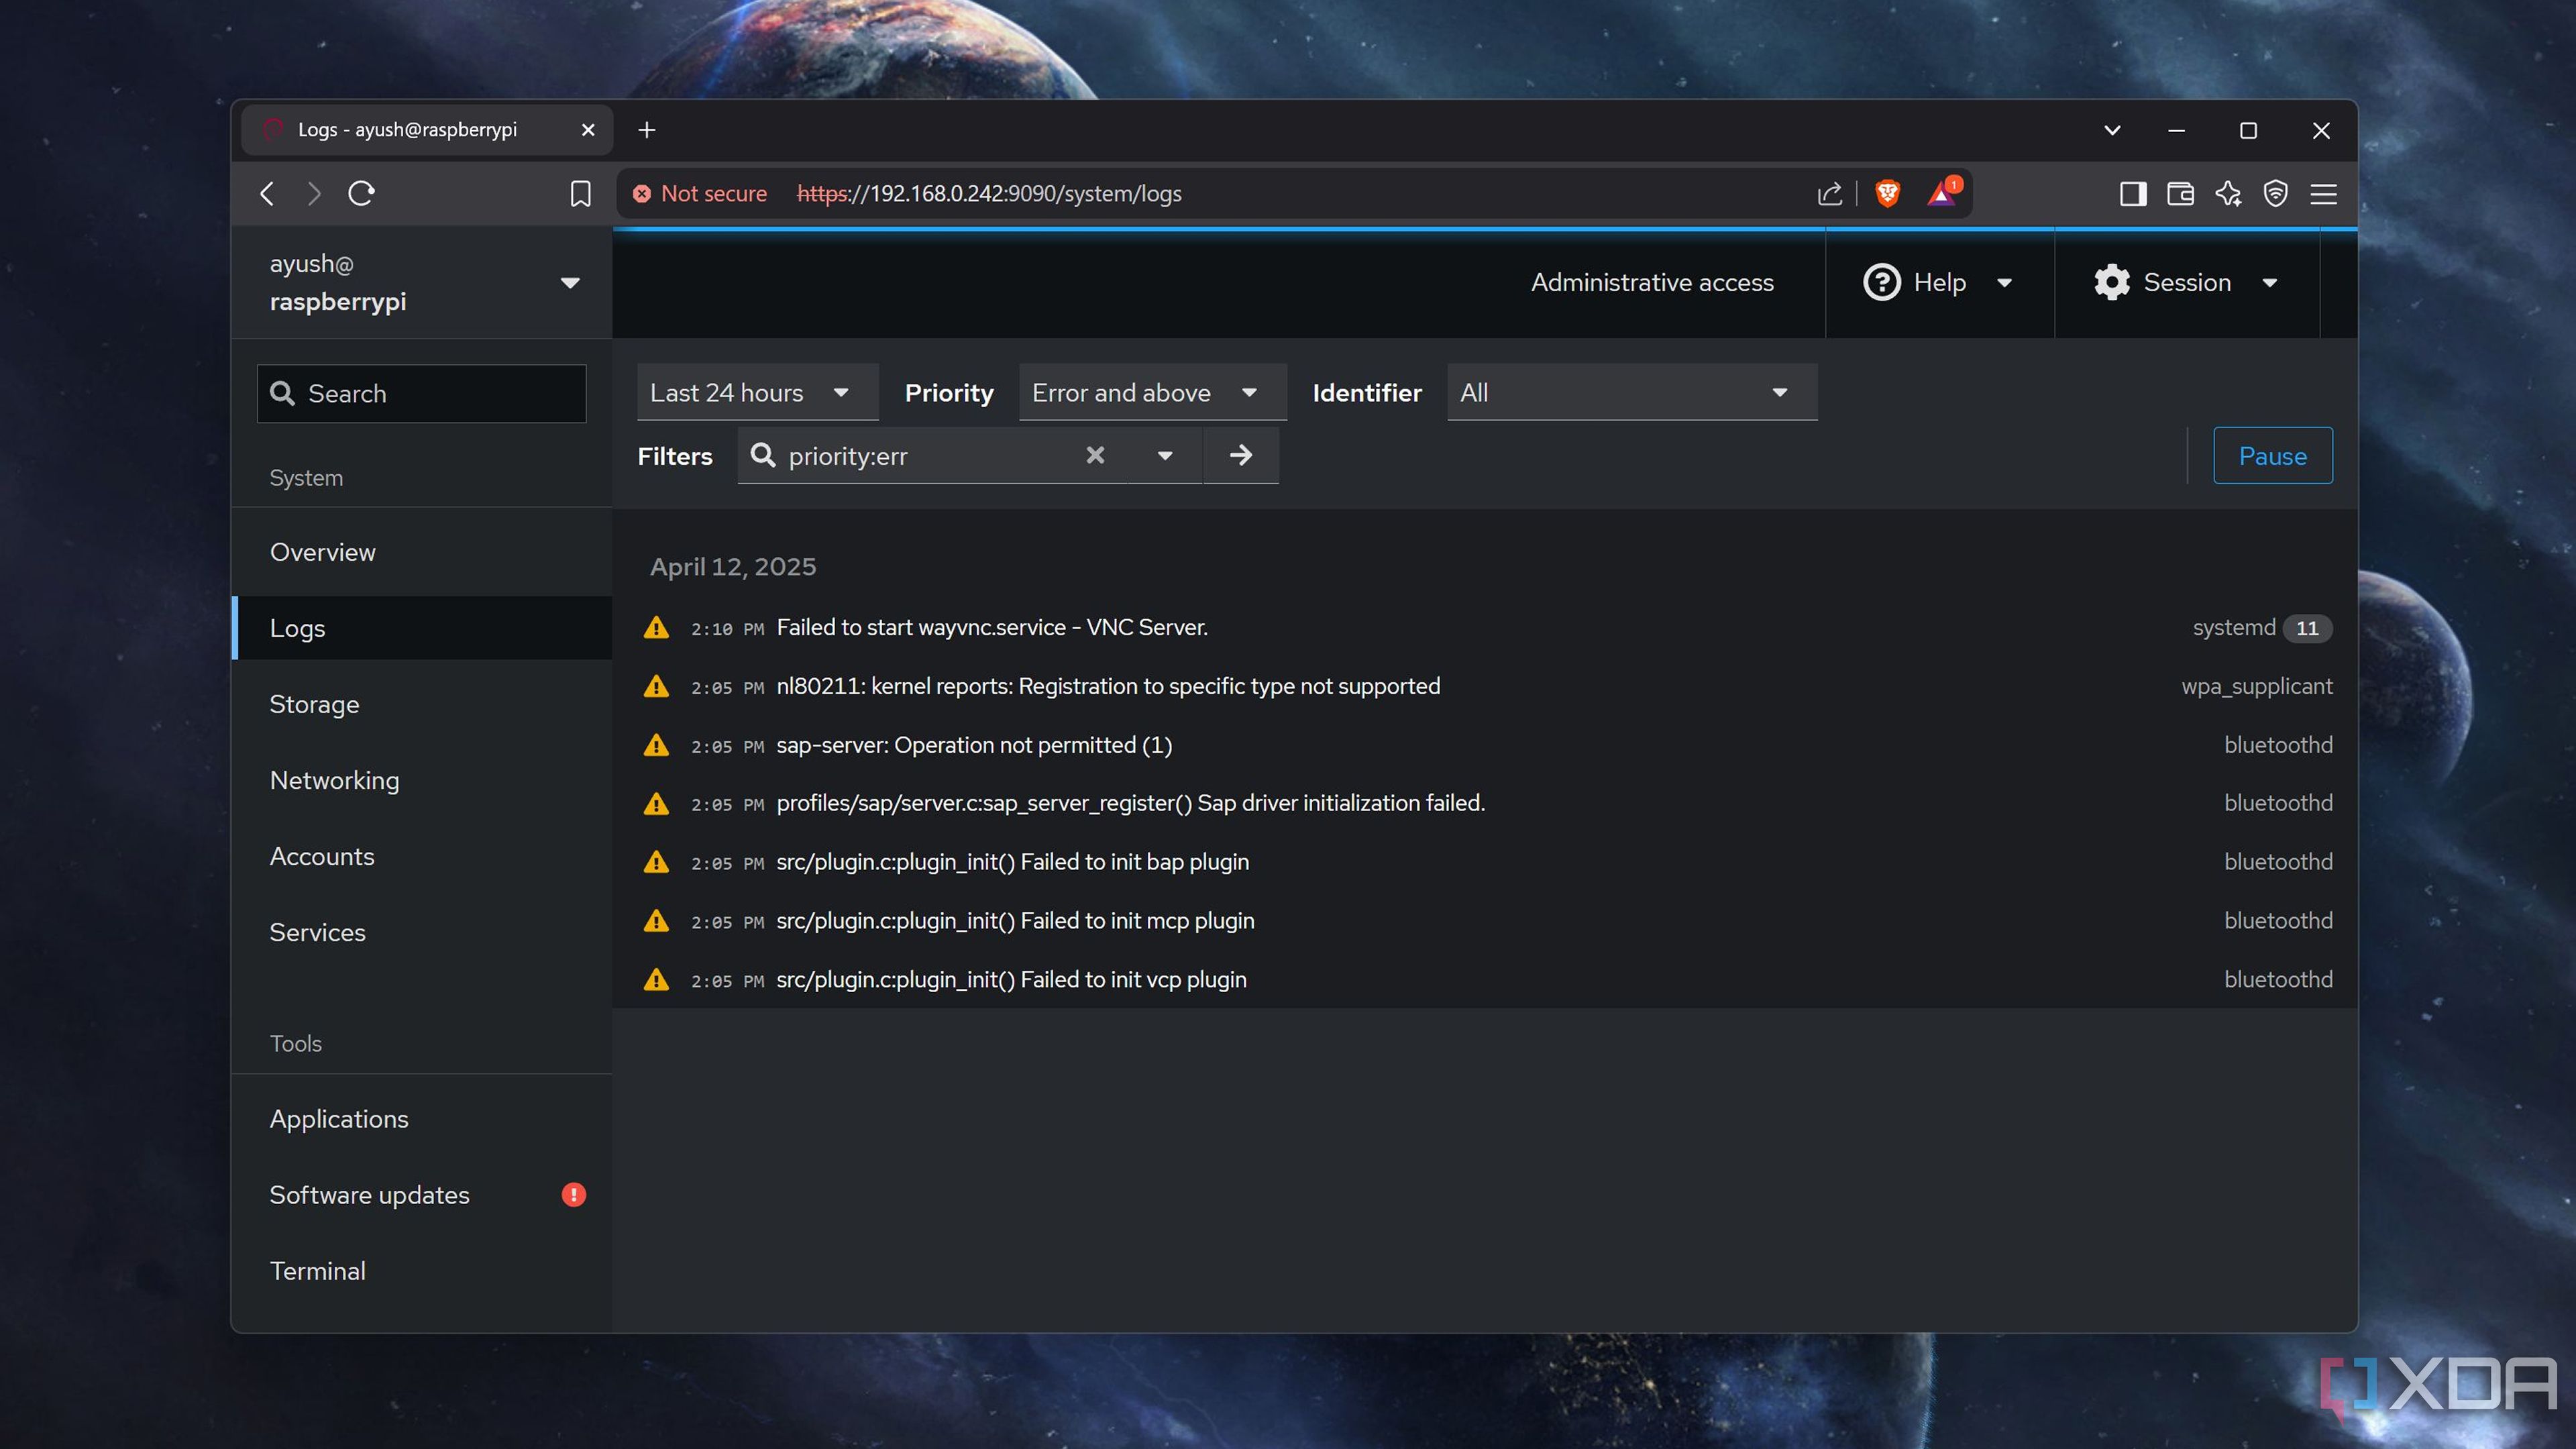
Whether you’re a newcomer to the world of SBCs or have years of experience as a project-building maestro, you’re bound to run into errors when bringing your DIY ideas to life. Going through error logs is the quickest and most reliable way to troubleshoot errors that stand in the way of your tinkering escapades – and Cockpit is well-equipped to help you deal with them.
The Logs tab inside Cockpit’s UI lets you scour through waves of error messages, and you can filter by priority to focus on the most important alerts. Alternatively, you can use specific identifiers to narrow down the troublesome services.
3
Built-in terminal
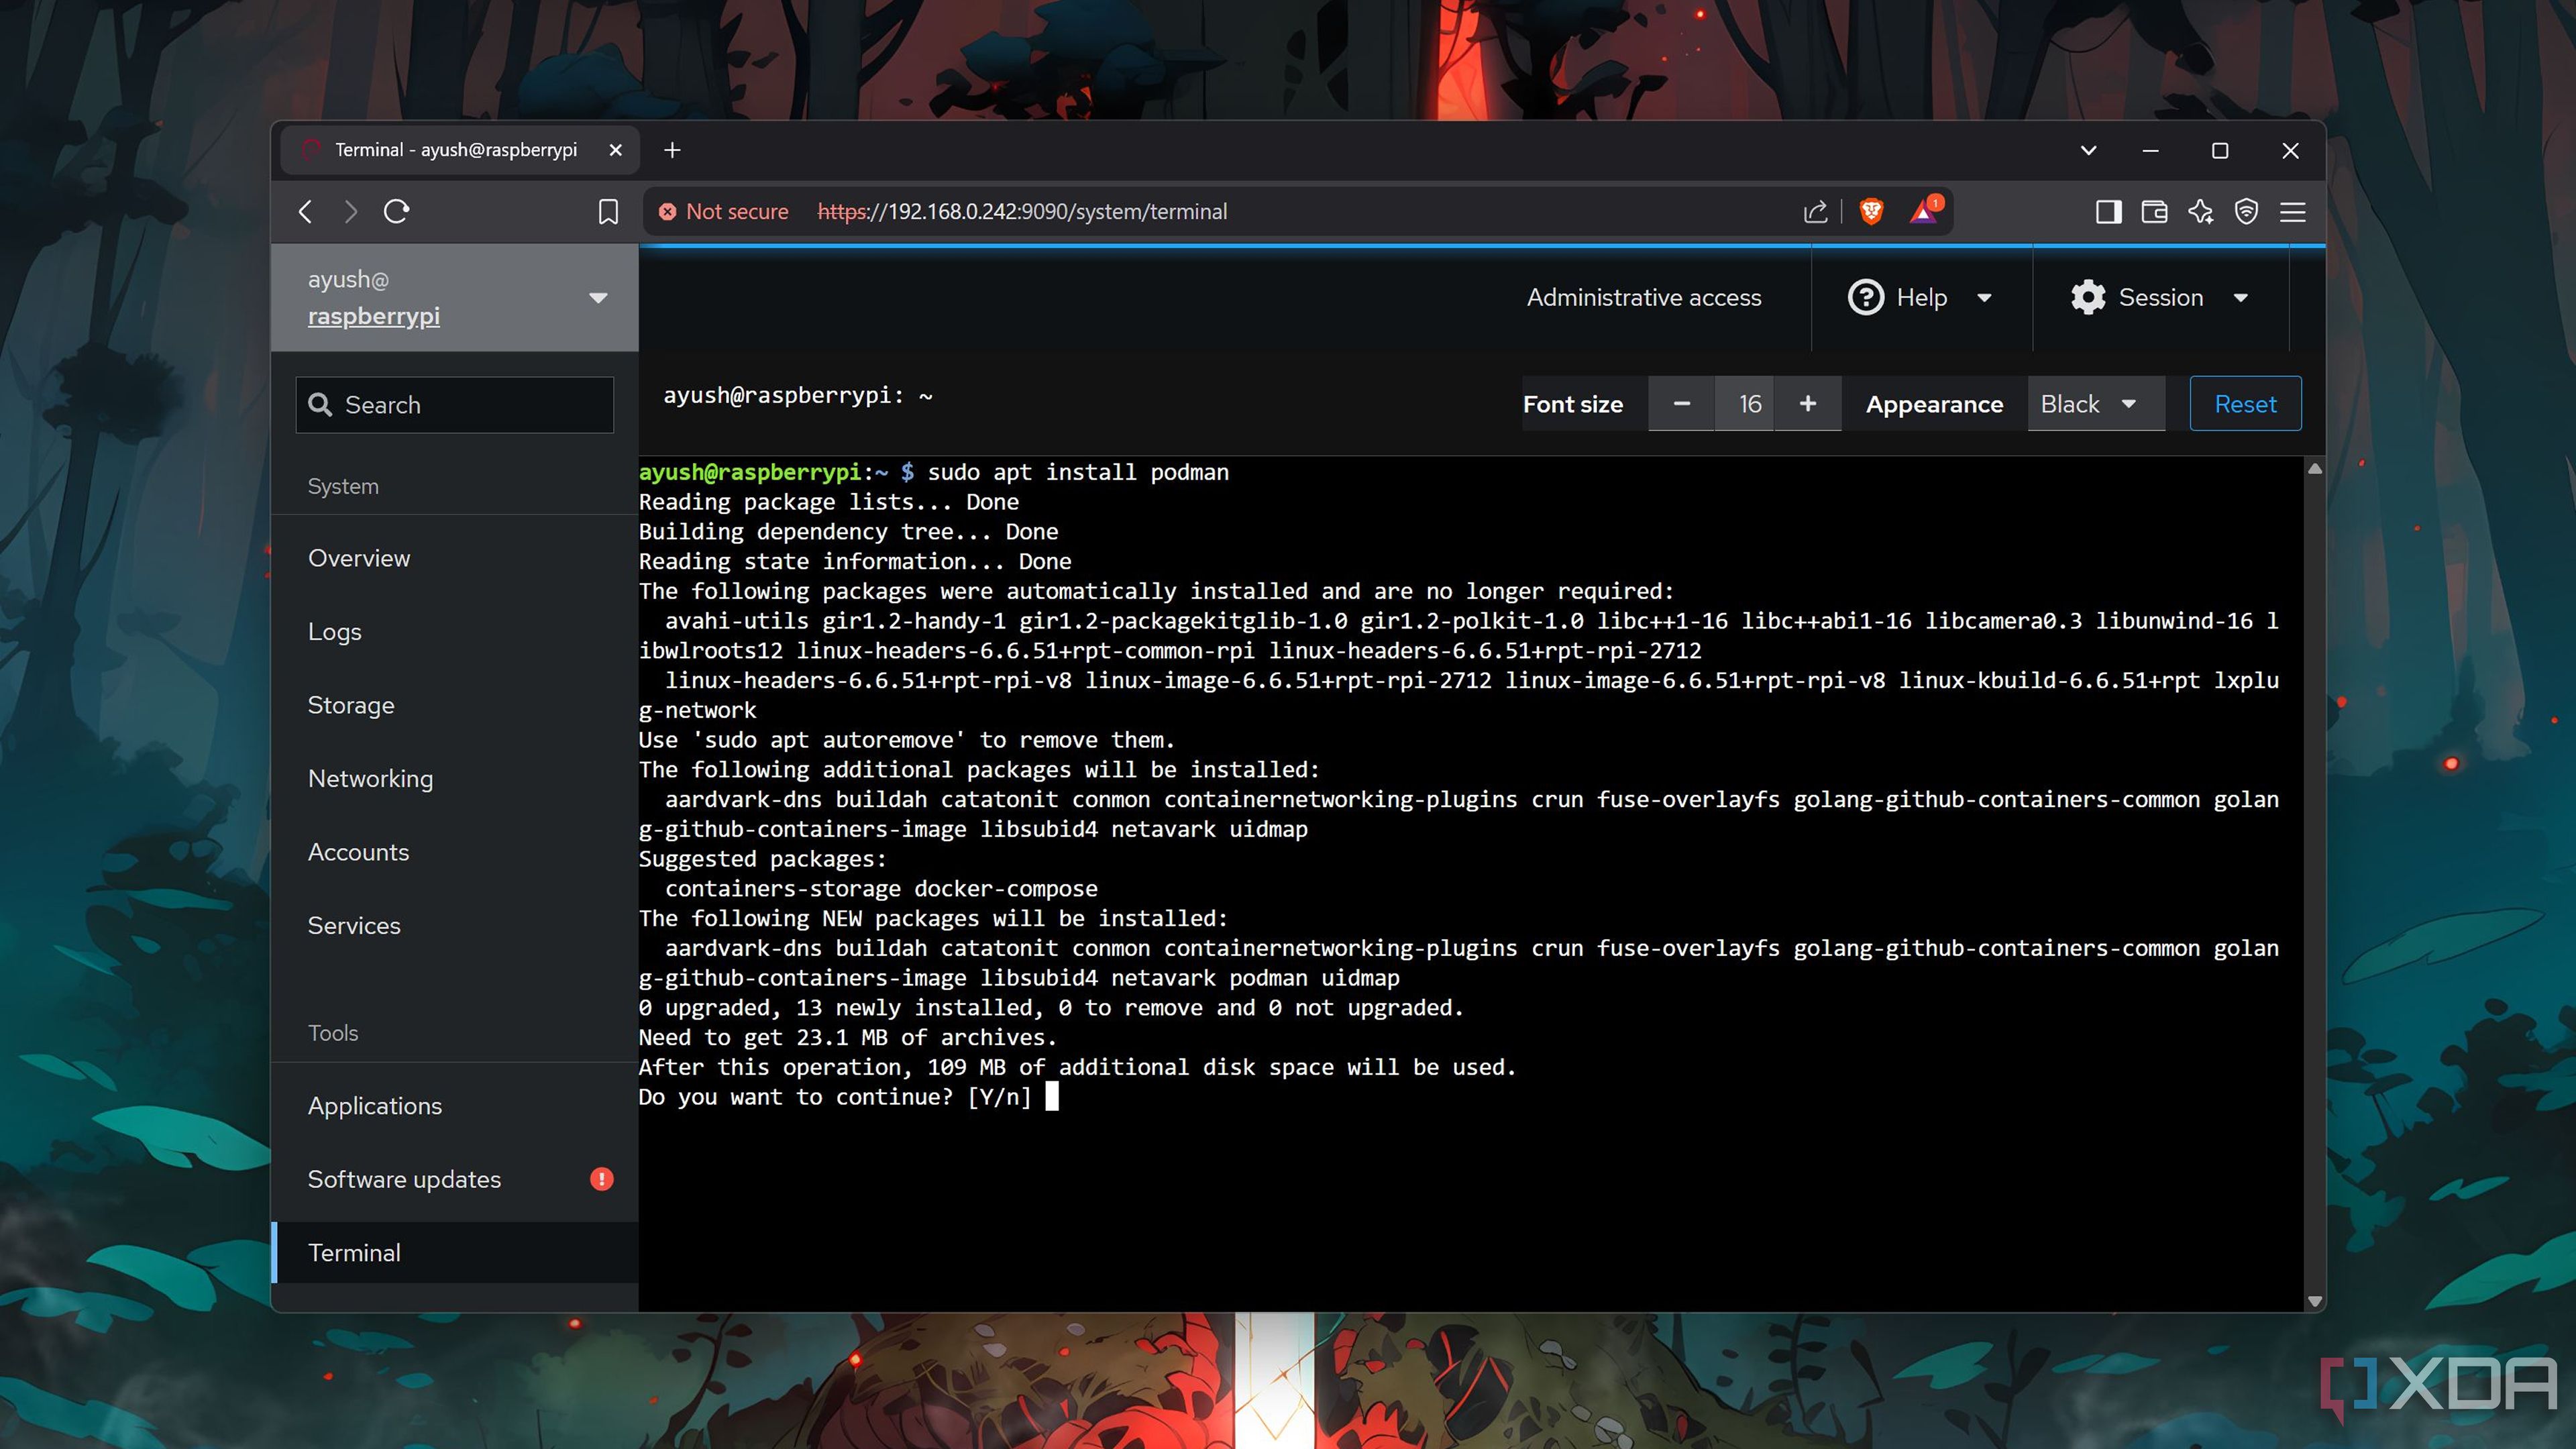
For folks whose workloads involve heavy usage of CLI commands, you’ll be glad to know that Cockpit lets you run terminal scripts from its convenient web interface via the good ol’ SSH protocol. As such, you don’t have to run another SSH tool just to access a terminal emulator for your Raspberry Pi server.
Plus, Cockpit includes a dedicated Service tab, where you can control everything from active daemon threads to interval timers and service schedulers – for both system processes and user applications.
4
Support for Raspberry Pi clusters
It’s a must-have when you’re running multiple K8s servers
While Cockpit is fairly useful for single SBC setups, its utility starts to shine when you bring multiple Raspberry Pi boards into the mix. Heck, you can even add non-Raspberry Pi devices to the Cockpit instance by editing a simple JSON file and storing the necessary SSH files on the host SBC.
As someone who often conducts Kubernetes experiments on a makeshift Raspberry Pi cluster, Cockpit’s monitoring, logging, and management features let me control every aspect of my K8s setup.
Build a reliable Raspberry Pi server stack with Cockpit at its center
What’s more, Cockpit meshes well with other services, especially those centered around server management. If you’re a containerization enthusiast, you can deploy a Portainer instance on your Raspberry Pi with Cockpit’s terminal emulator and use it to control your Podman and Docker containers. As I mentioned earlier, you can integrate Cockpit’s metrics framework with Grafana to chart detailed graphs about your Raspberry Pi’s resource consumption. Then there’s Tailscale, which offers an easy way to access your Cockpit instance from external networks.

Related
I regret working on these 4 Raspberry Pi projects
The Raspberry Pi family lies at the heart of many DIY projects, some more unsuccessful than others


