


Let’s say you’ve built a cutting-edge home server using enterprise-grade equipment and armed it with one of the best virtualization platforms on the block. If you’re into home labs, you’ll have a blast arming it with a battalion of containers and VMs. However, you’ll have to be connected to the server’s local network every time you wish to work on a project.
But what if you’re a frequent traveler and need to leave the comfort of your tinkering lab every now and then? A virtual private network can help you connect to your home server from untrusted external networks without compromising the security of your workstation. But if you’re not fond of spending hundreds of dollars every month on a paid VPN, you can host one on a budget-friendly Raspberry Pi!

Related
I use Terraform to automatically provision VMs on Proxmox – here’s how
While it may seem rather daunting, Terraform is an amazing automation tool for provisioning virtual machines on your home lab
What you’ll need for this project
Since a WireGuard server barely consumes any resources, you don’t need a top-of-the-line Raspberry Pi model and can go for a budget-friendly Zero board. I’ve used the desktop version of the Raspberry Pi OS in this tutorial, but you can also opt for the CLI version of the distribution if you want to optimize the resource consumption.
While there are a couple of ways to get WireGuard up and running on a Raspberry Pi, I’ve gone with the wg-easy package, as it offers a convenient web-based UI to manage the VPN. But since we’ll run wg-easy inside a container, you should install a container runtime beforehand. I’ve gone with Docker to keep things simple, and you can consult our beginner’s guide to setting up Docker Engine on the Raspberry Pi in case you run into trouble when configuring its packages.
Enabling port forwarding on your router
Before you can dabble in the Raspberry Pi terminal, you’ll have to set up port forwarding inside your router. Otherwise, you’ll only be able to access the VPN from local clients, which defeats the very purpose of this tutorial. While the exact steps may vary depending on your router, here’s a general outline of the overall procedure:
- Log into your router’s admin panel.
-
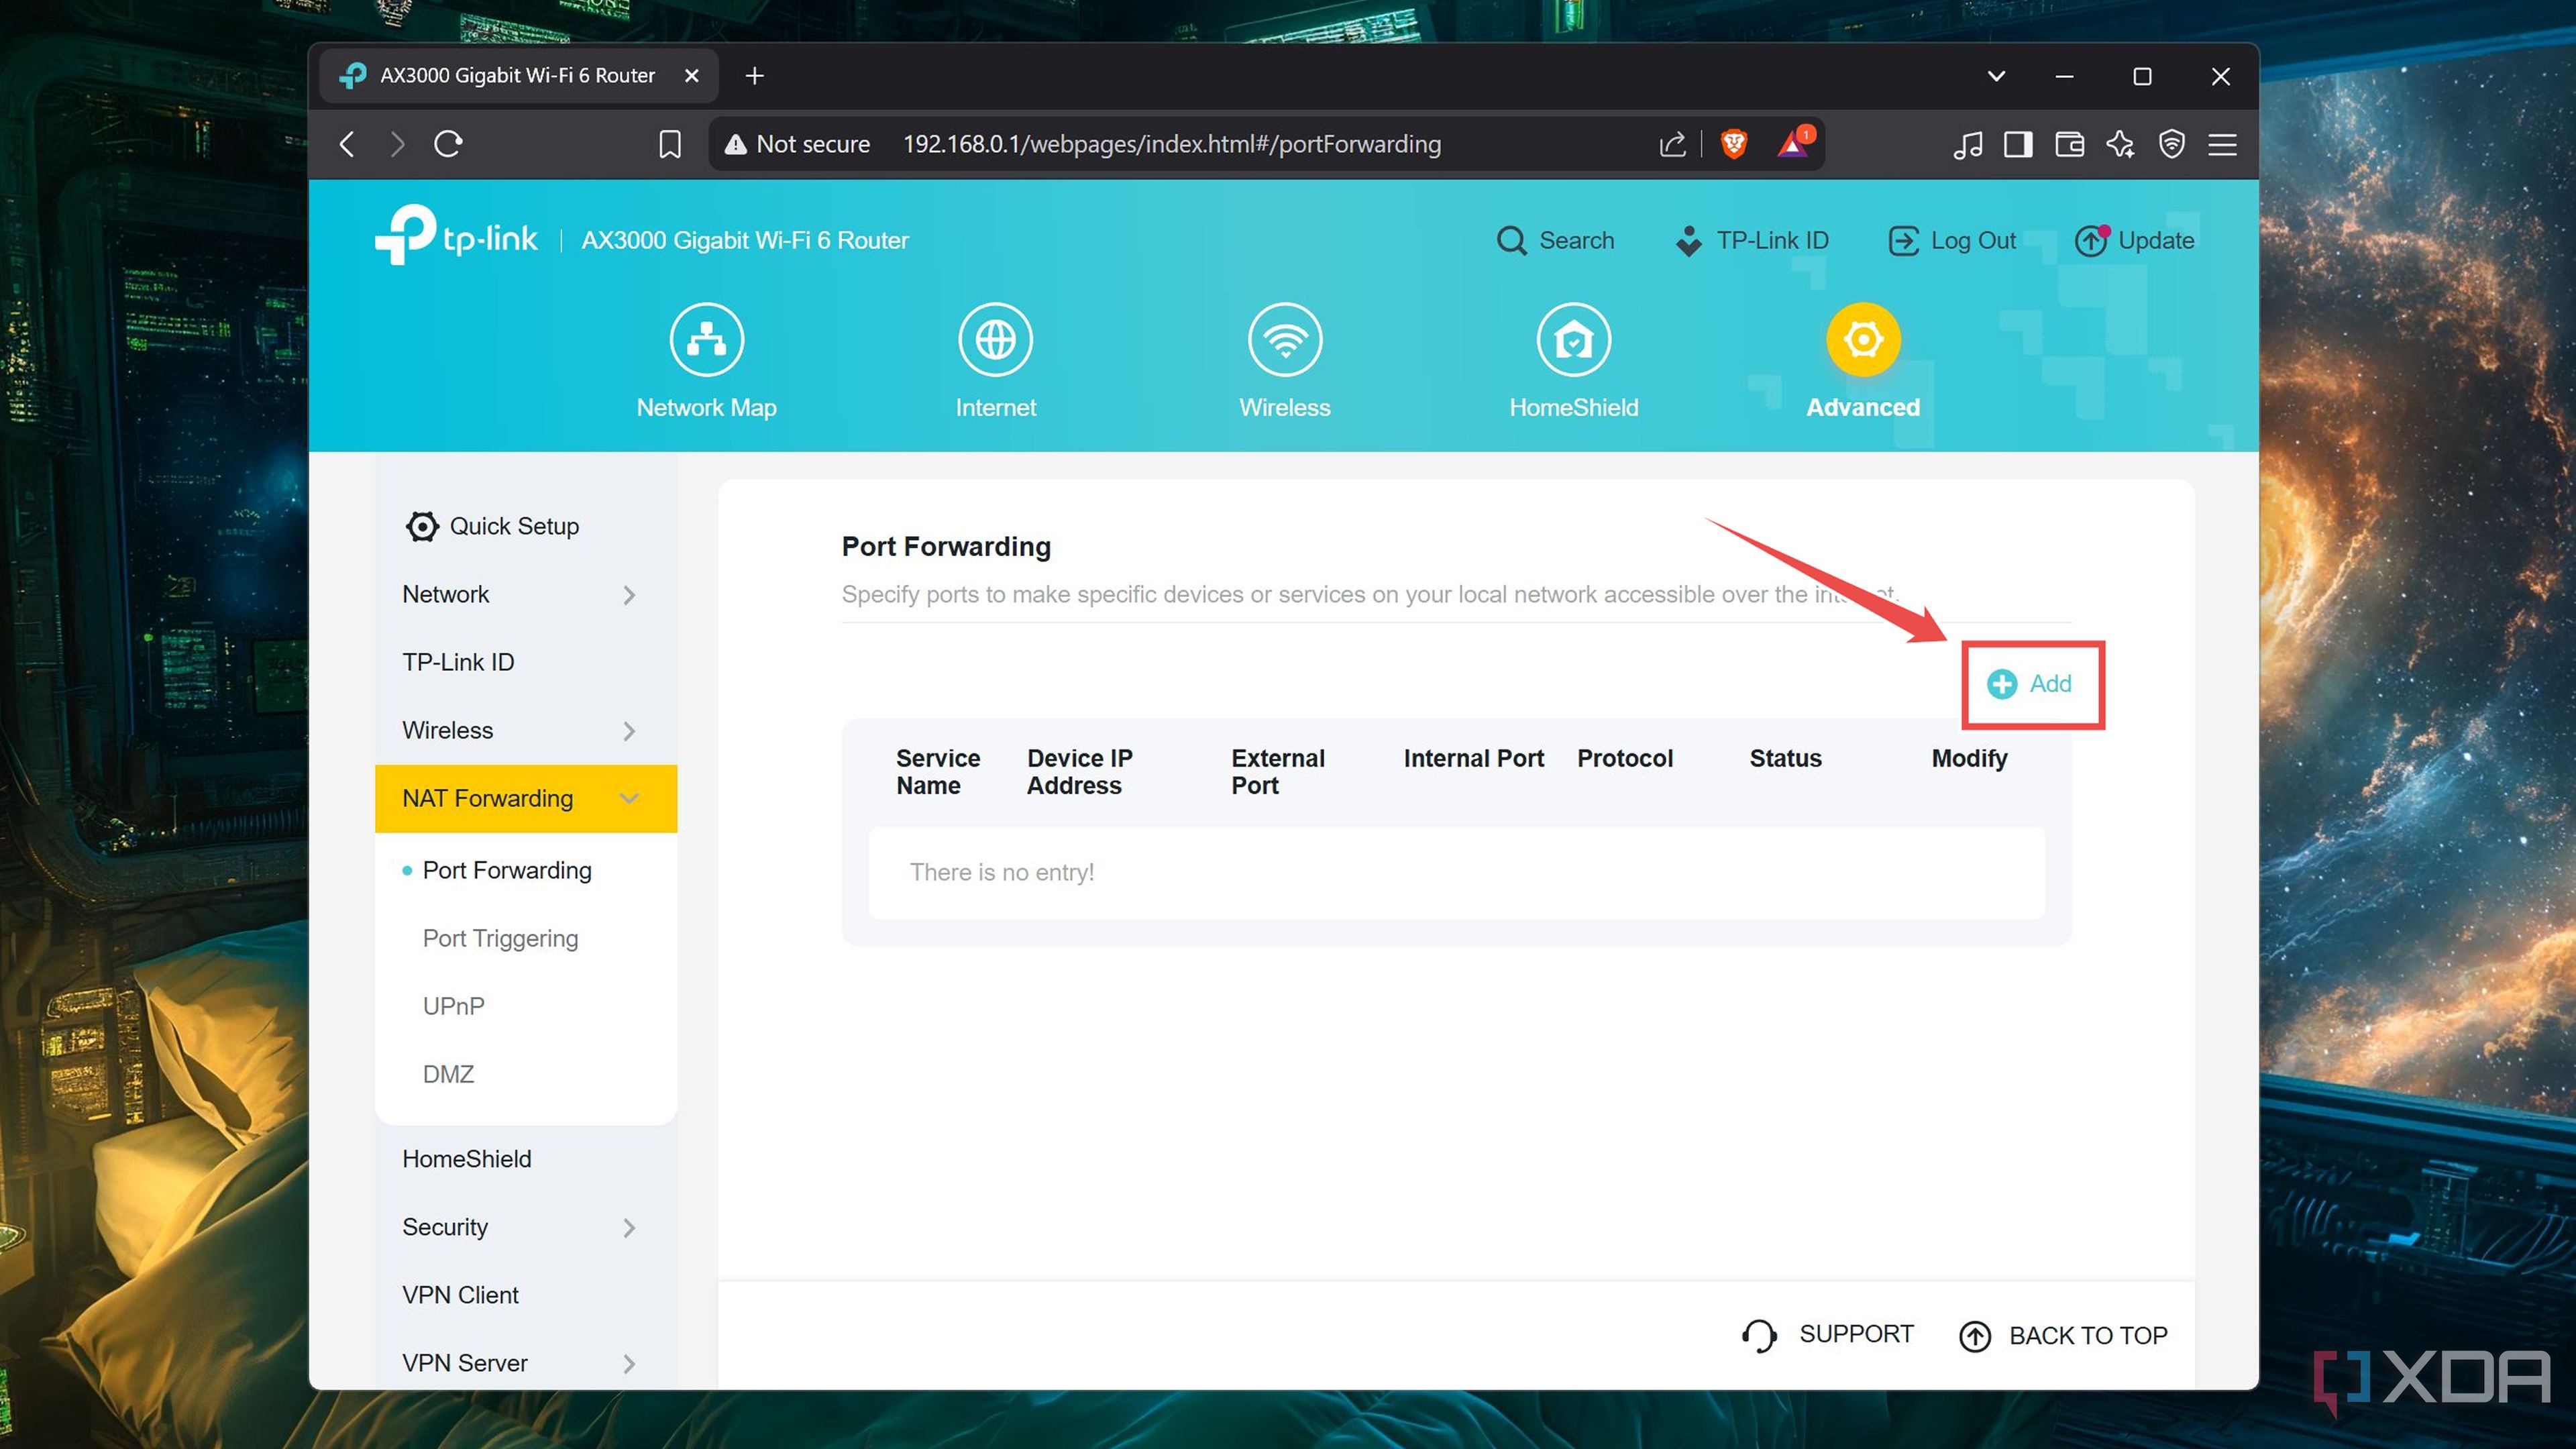
Head to the Advanced tab and select Port Forwarding under the NAT Forwarding header.

-
Click on the Add button under the Port Forwarding tab.
-
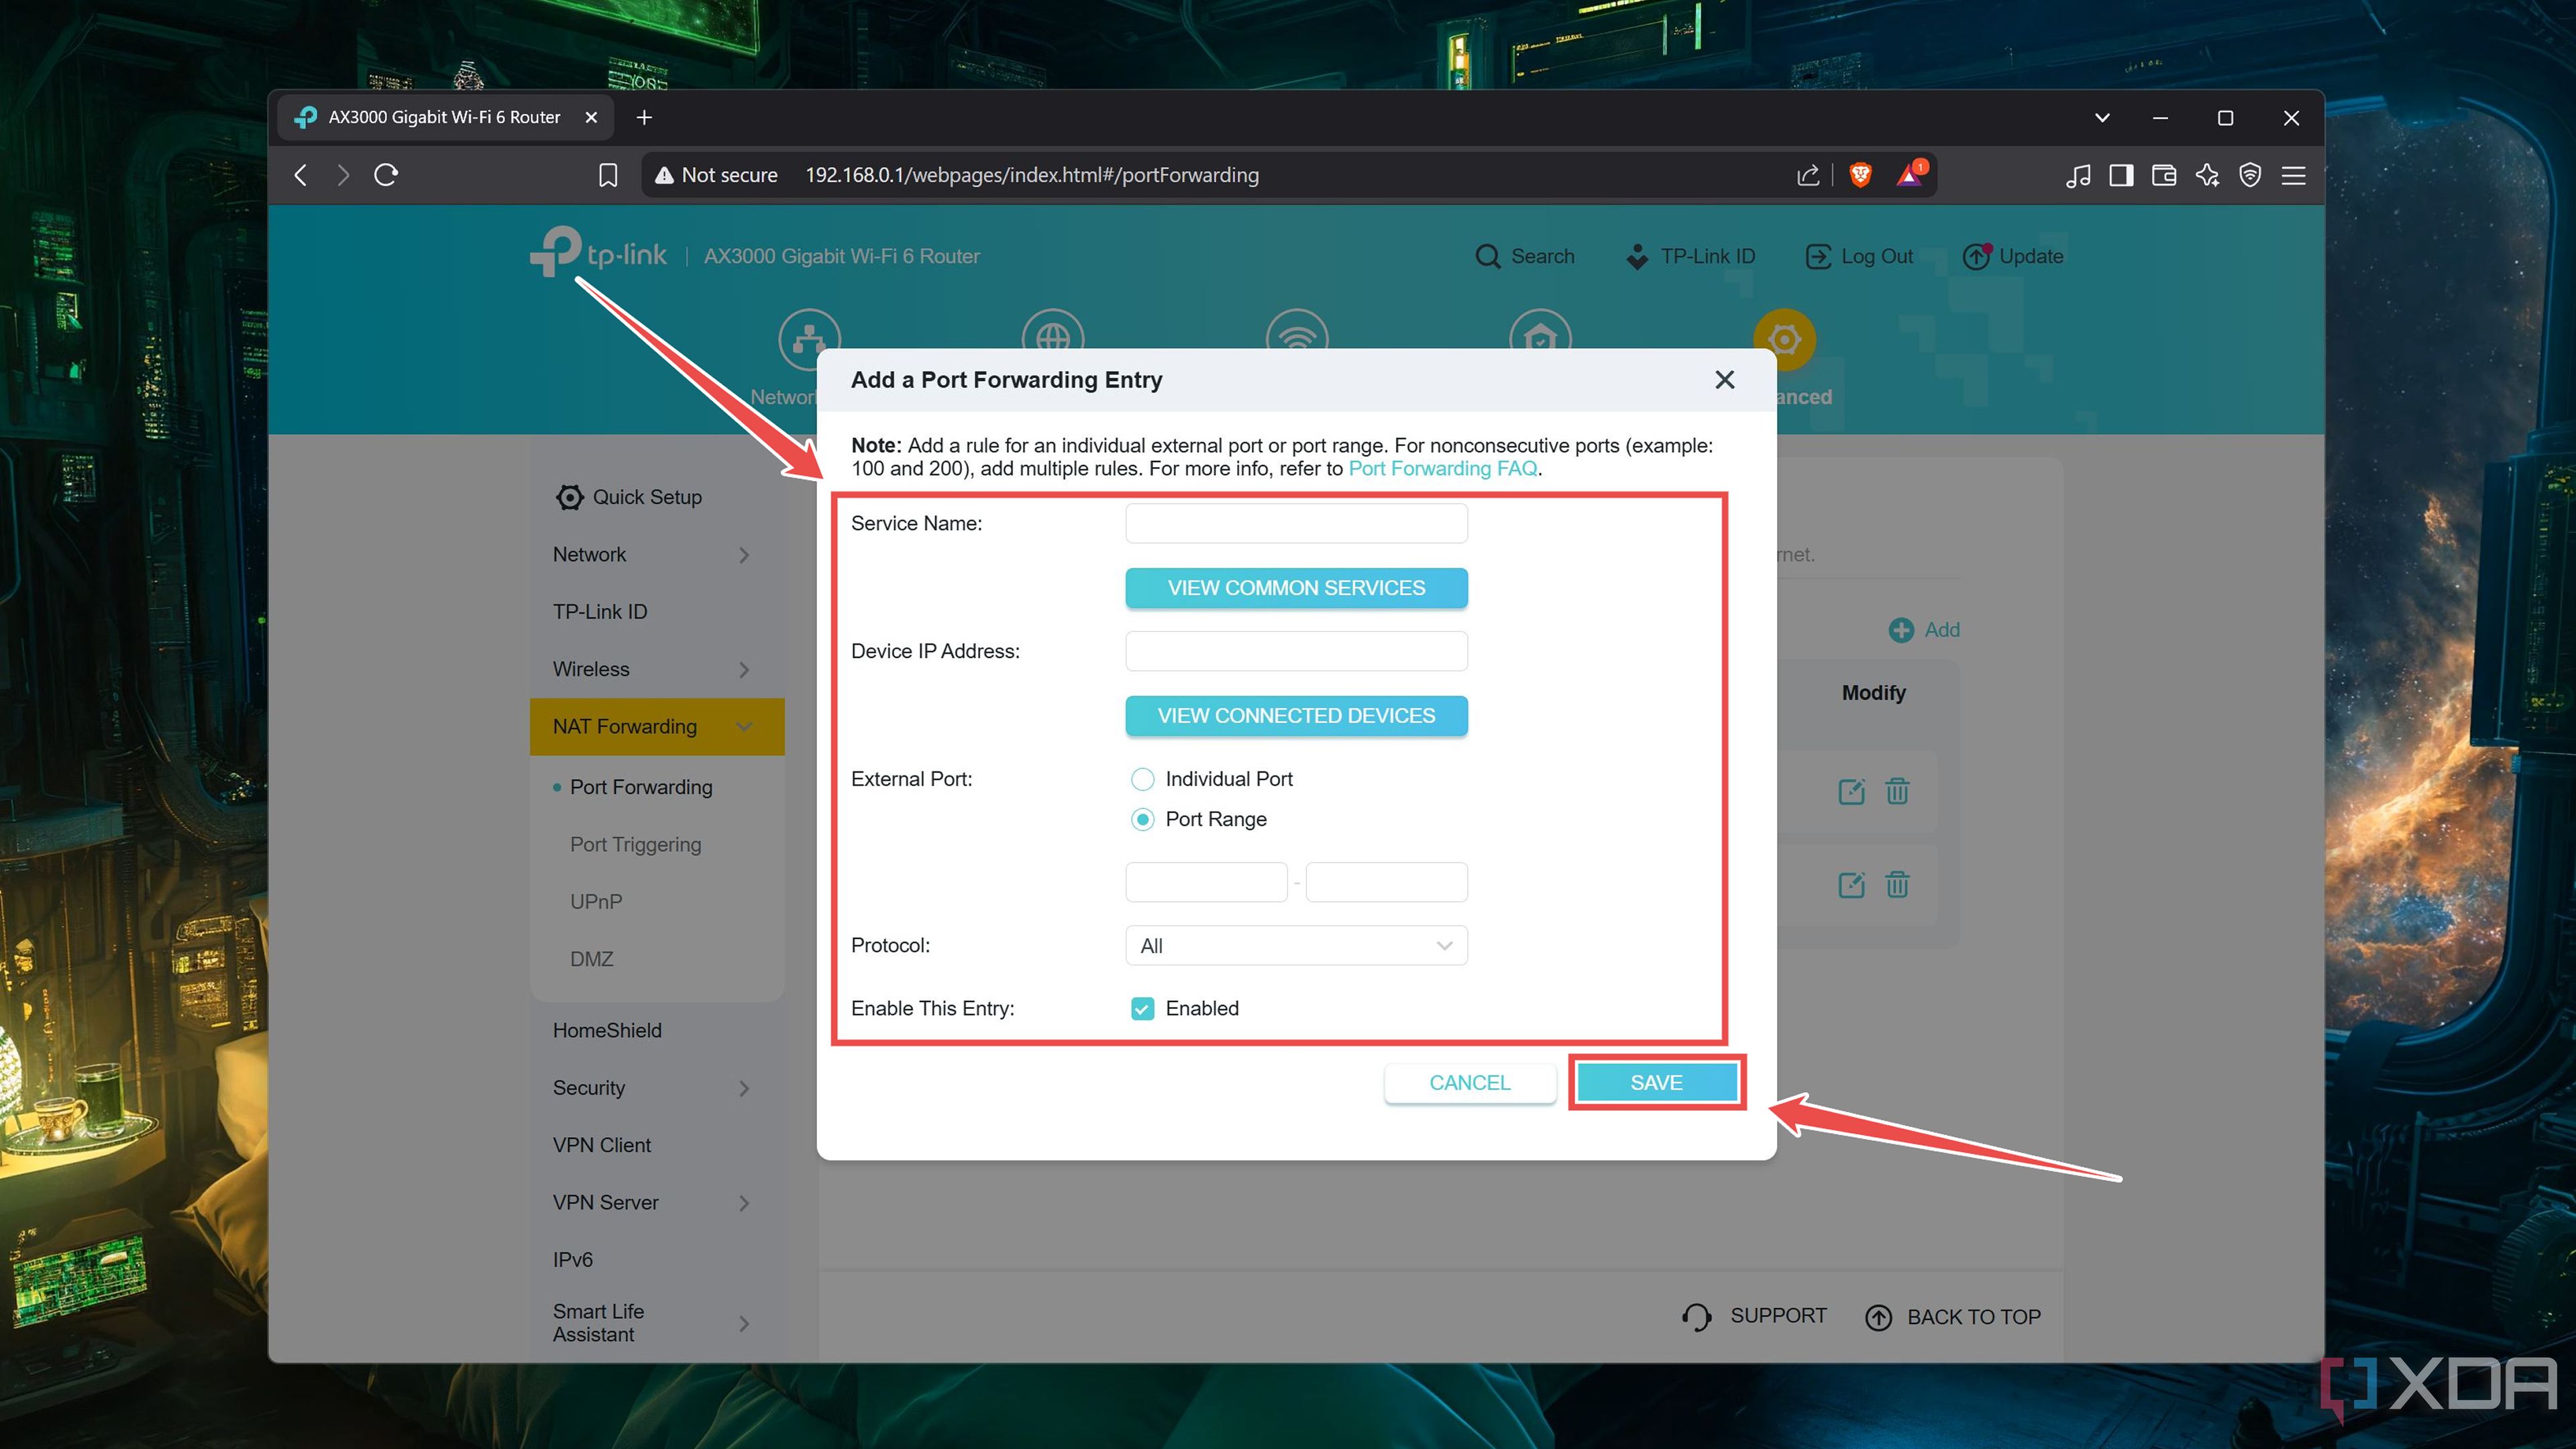
Enter a Service Name, type the IP address of your Raspberry Pi as the Device IP Address, choose the Ports you wish to expose, and hit Save.


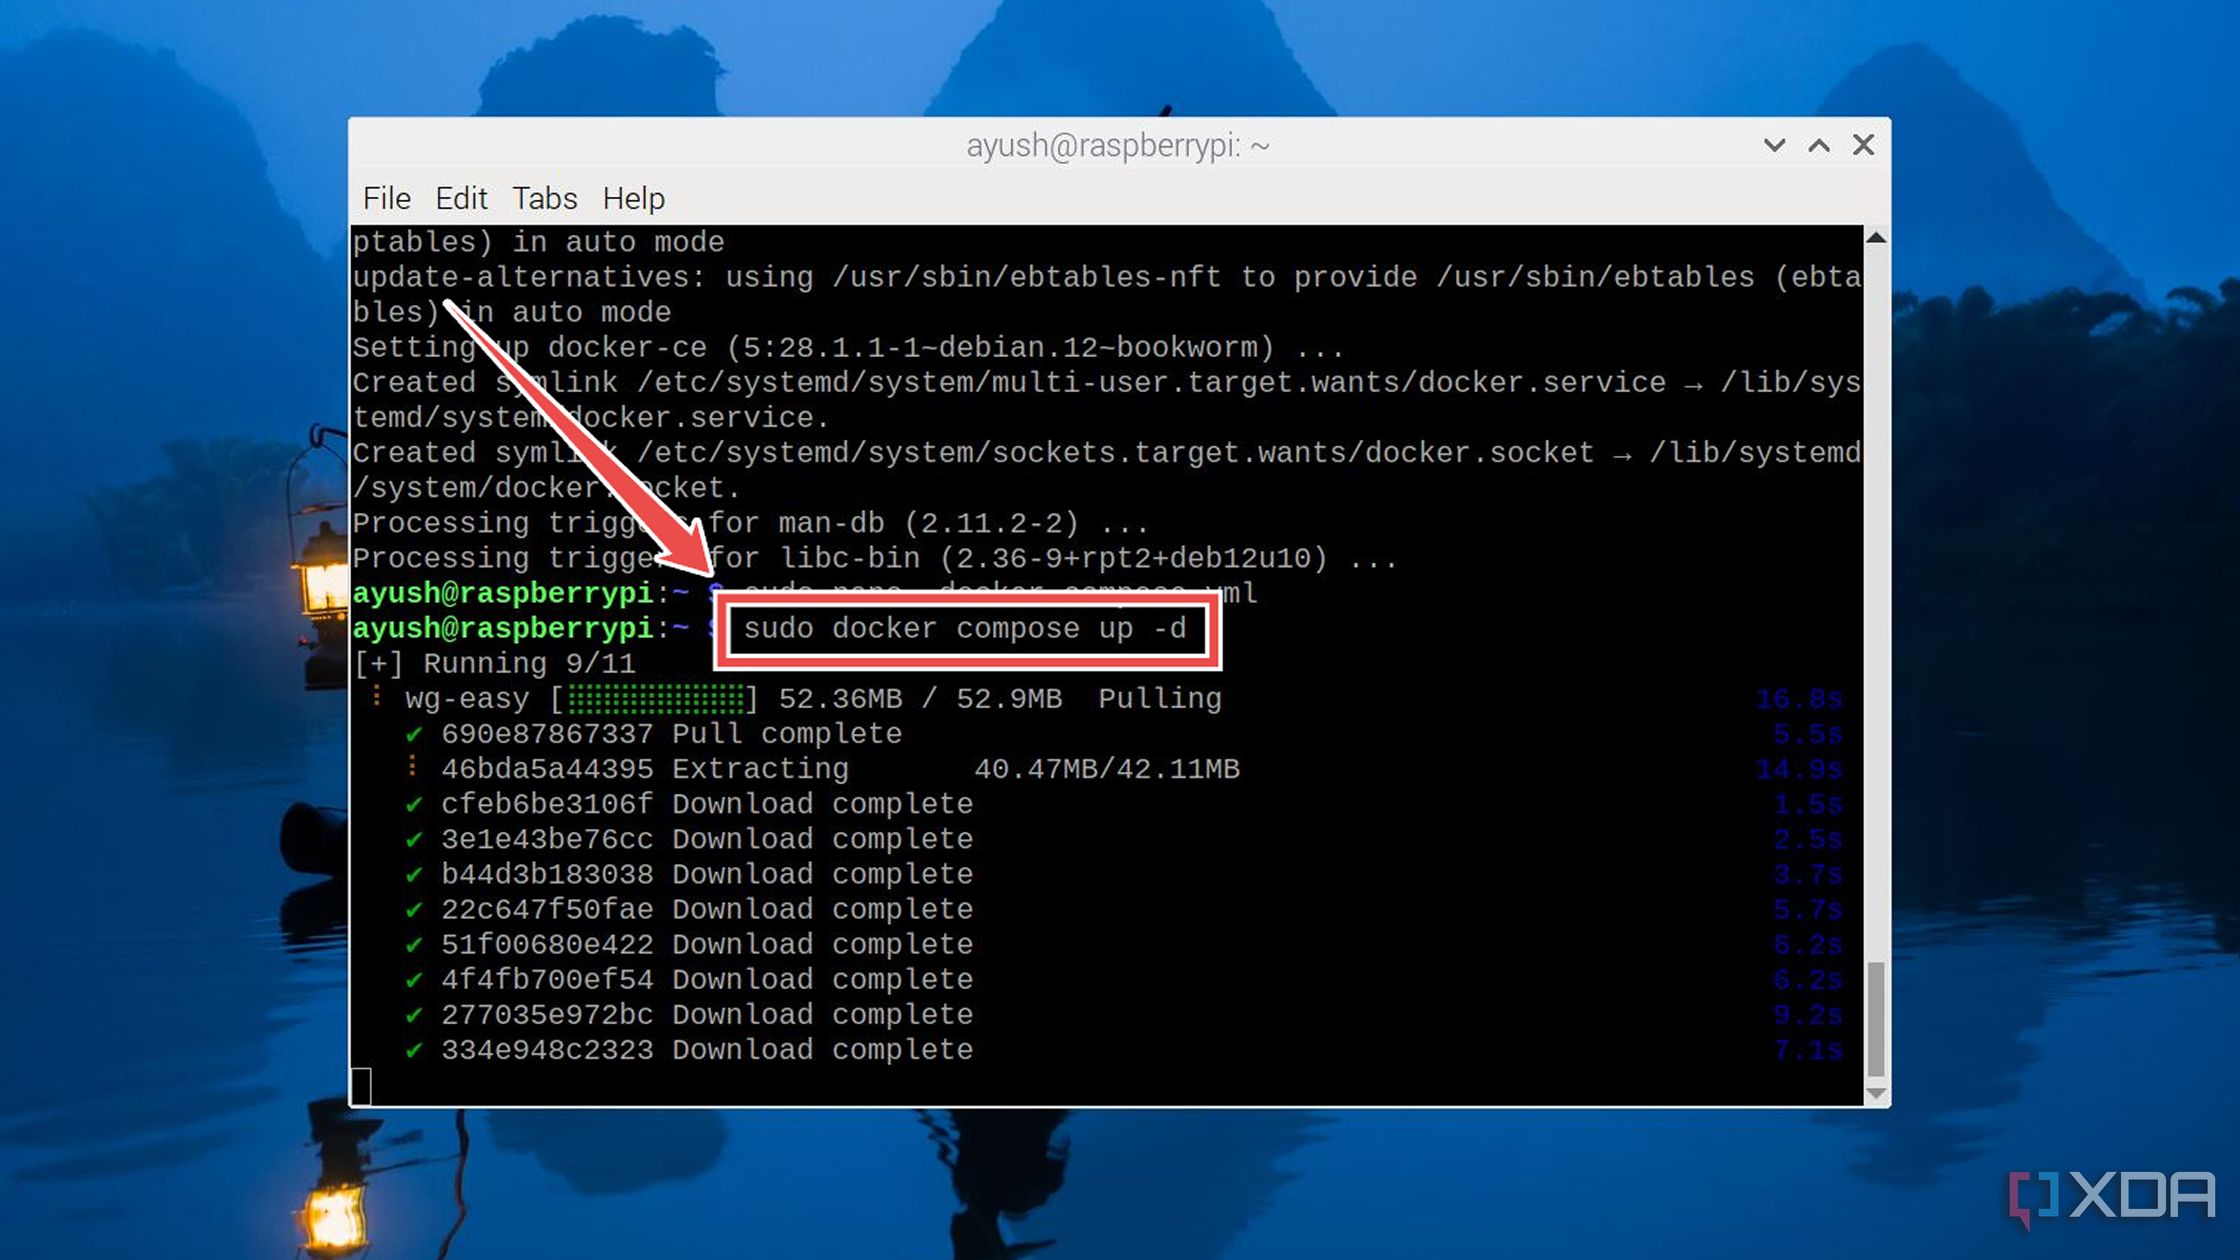
Deploying wg-easy as a container
Once you’ve set up port forwarding, it’s time to whip up a container for the wg-easy image. To do so,
-
(Optional) If you’re on a GUI distro, launch the terminal app included with it.

-
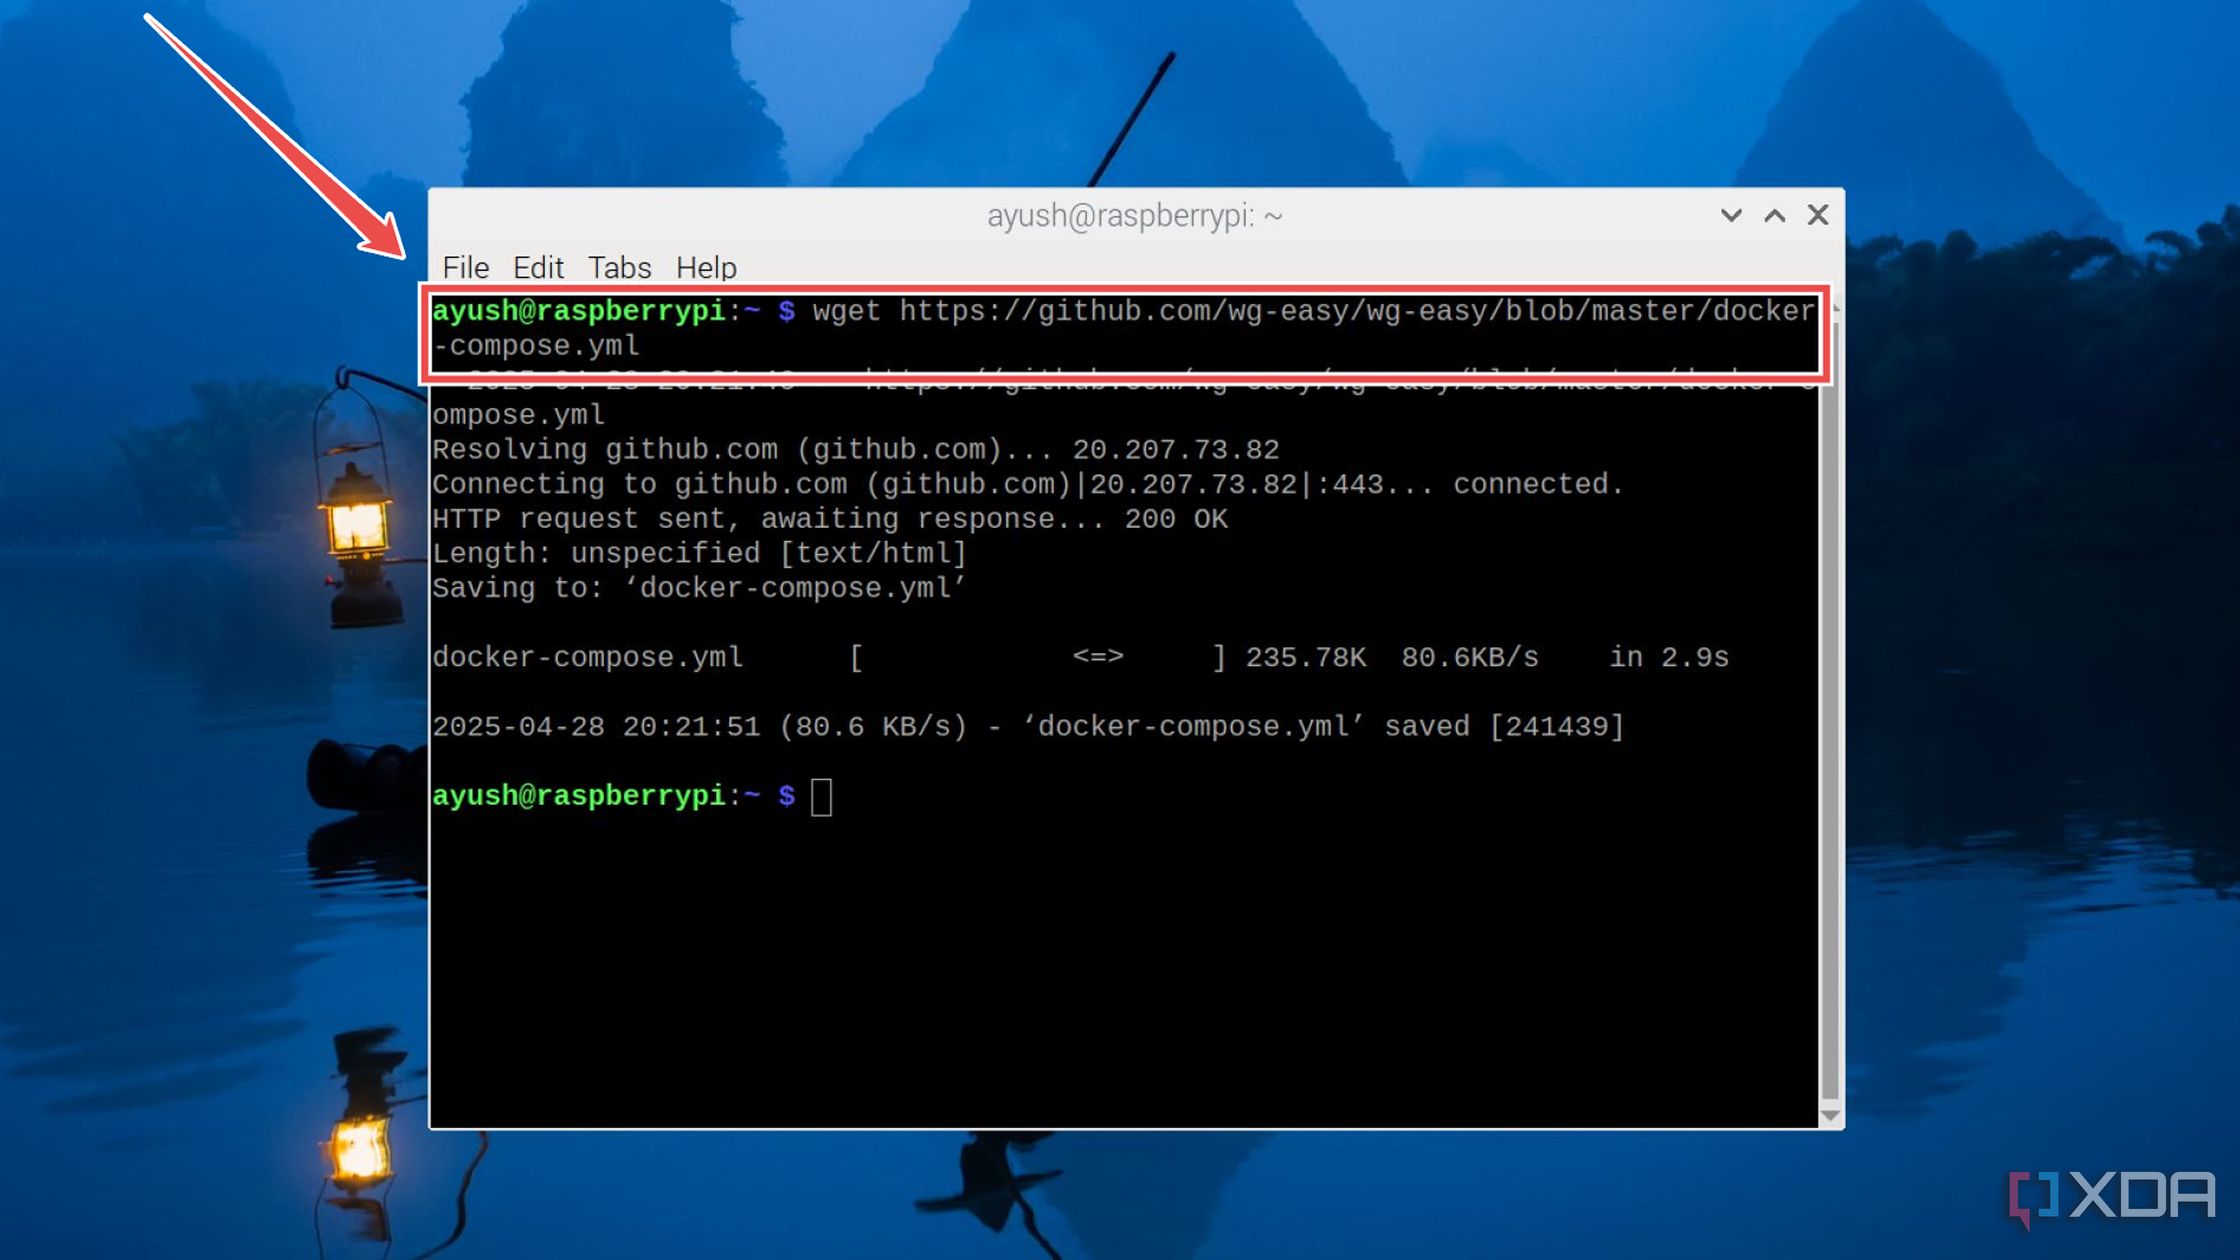
Execute the wget command to grab the docker-compose.yml file associated with wg-easy. wget https://raw.githubusercontent.com/wg-easy/wg-easy/refs/heads/master/docker-compose.yml
-
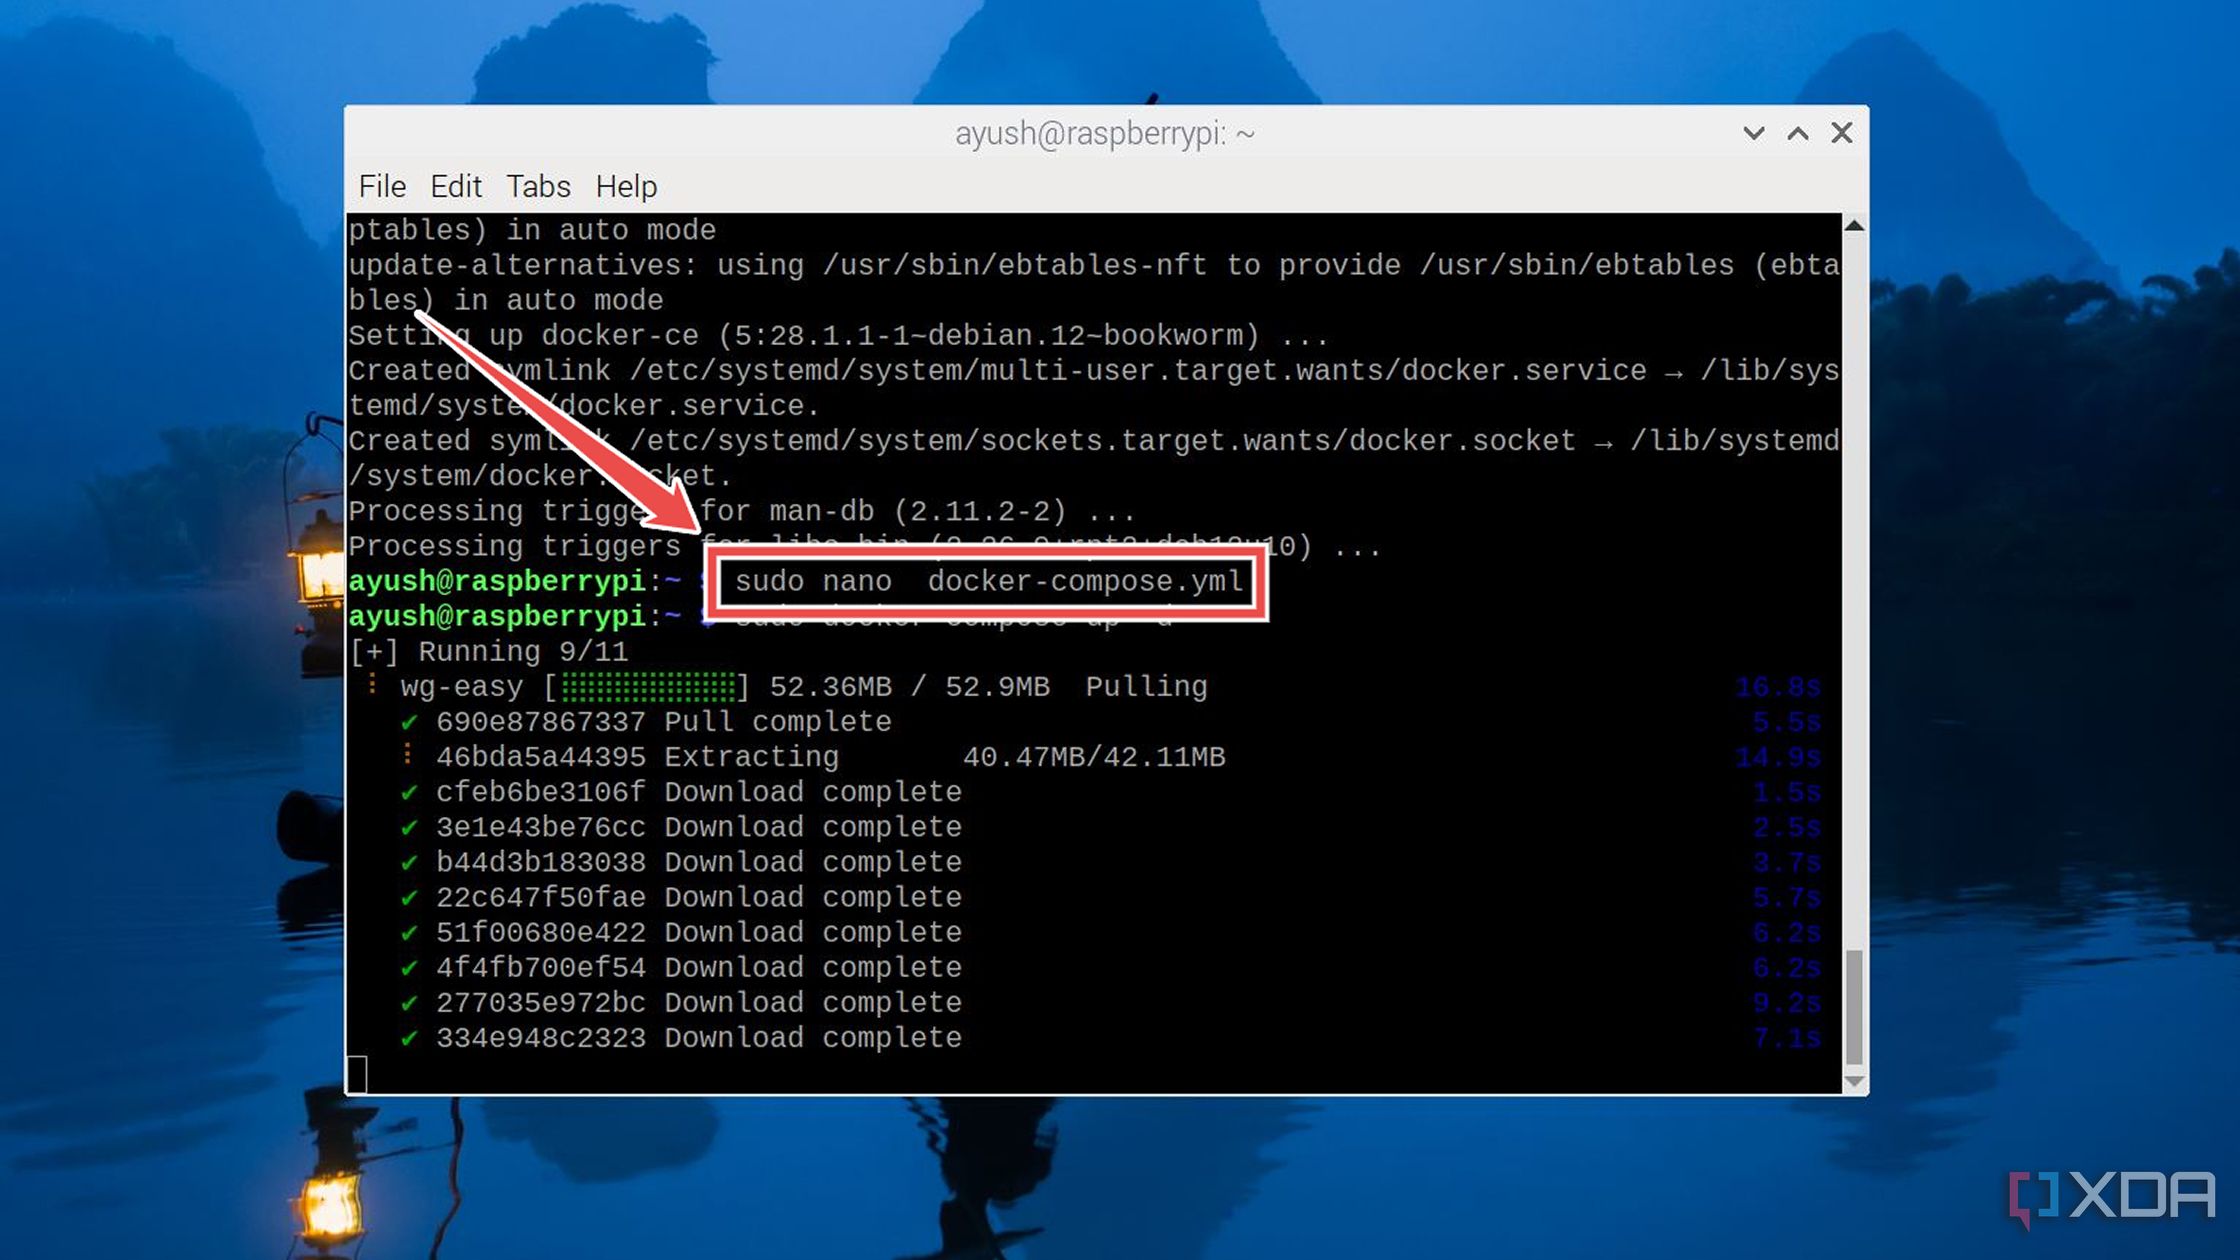
Use the nano editor to open the docker-compose.yml file: sudo nano docker-compose.yml
-
Set the Language to en and enter the Raspberry Pi’s public IP address as the WG_Host option.

I also recommend deleting the # adjacent to the Password and entering a hardened password to secure your wg-easy instance.
- Press Ctrl+X, followed by Y, and the Enter key to save and exit the configuration file.
-
Run the docker compose up command to deploy the wg-easy container. sudo docker compose up -d


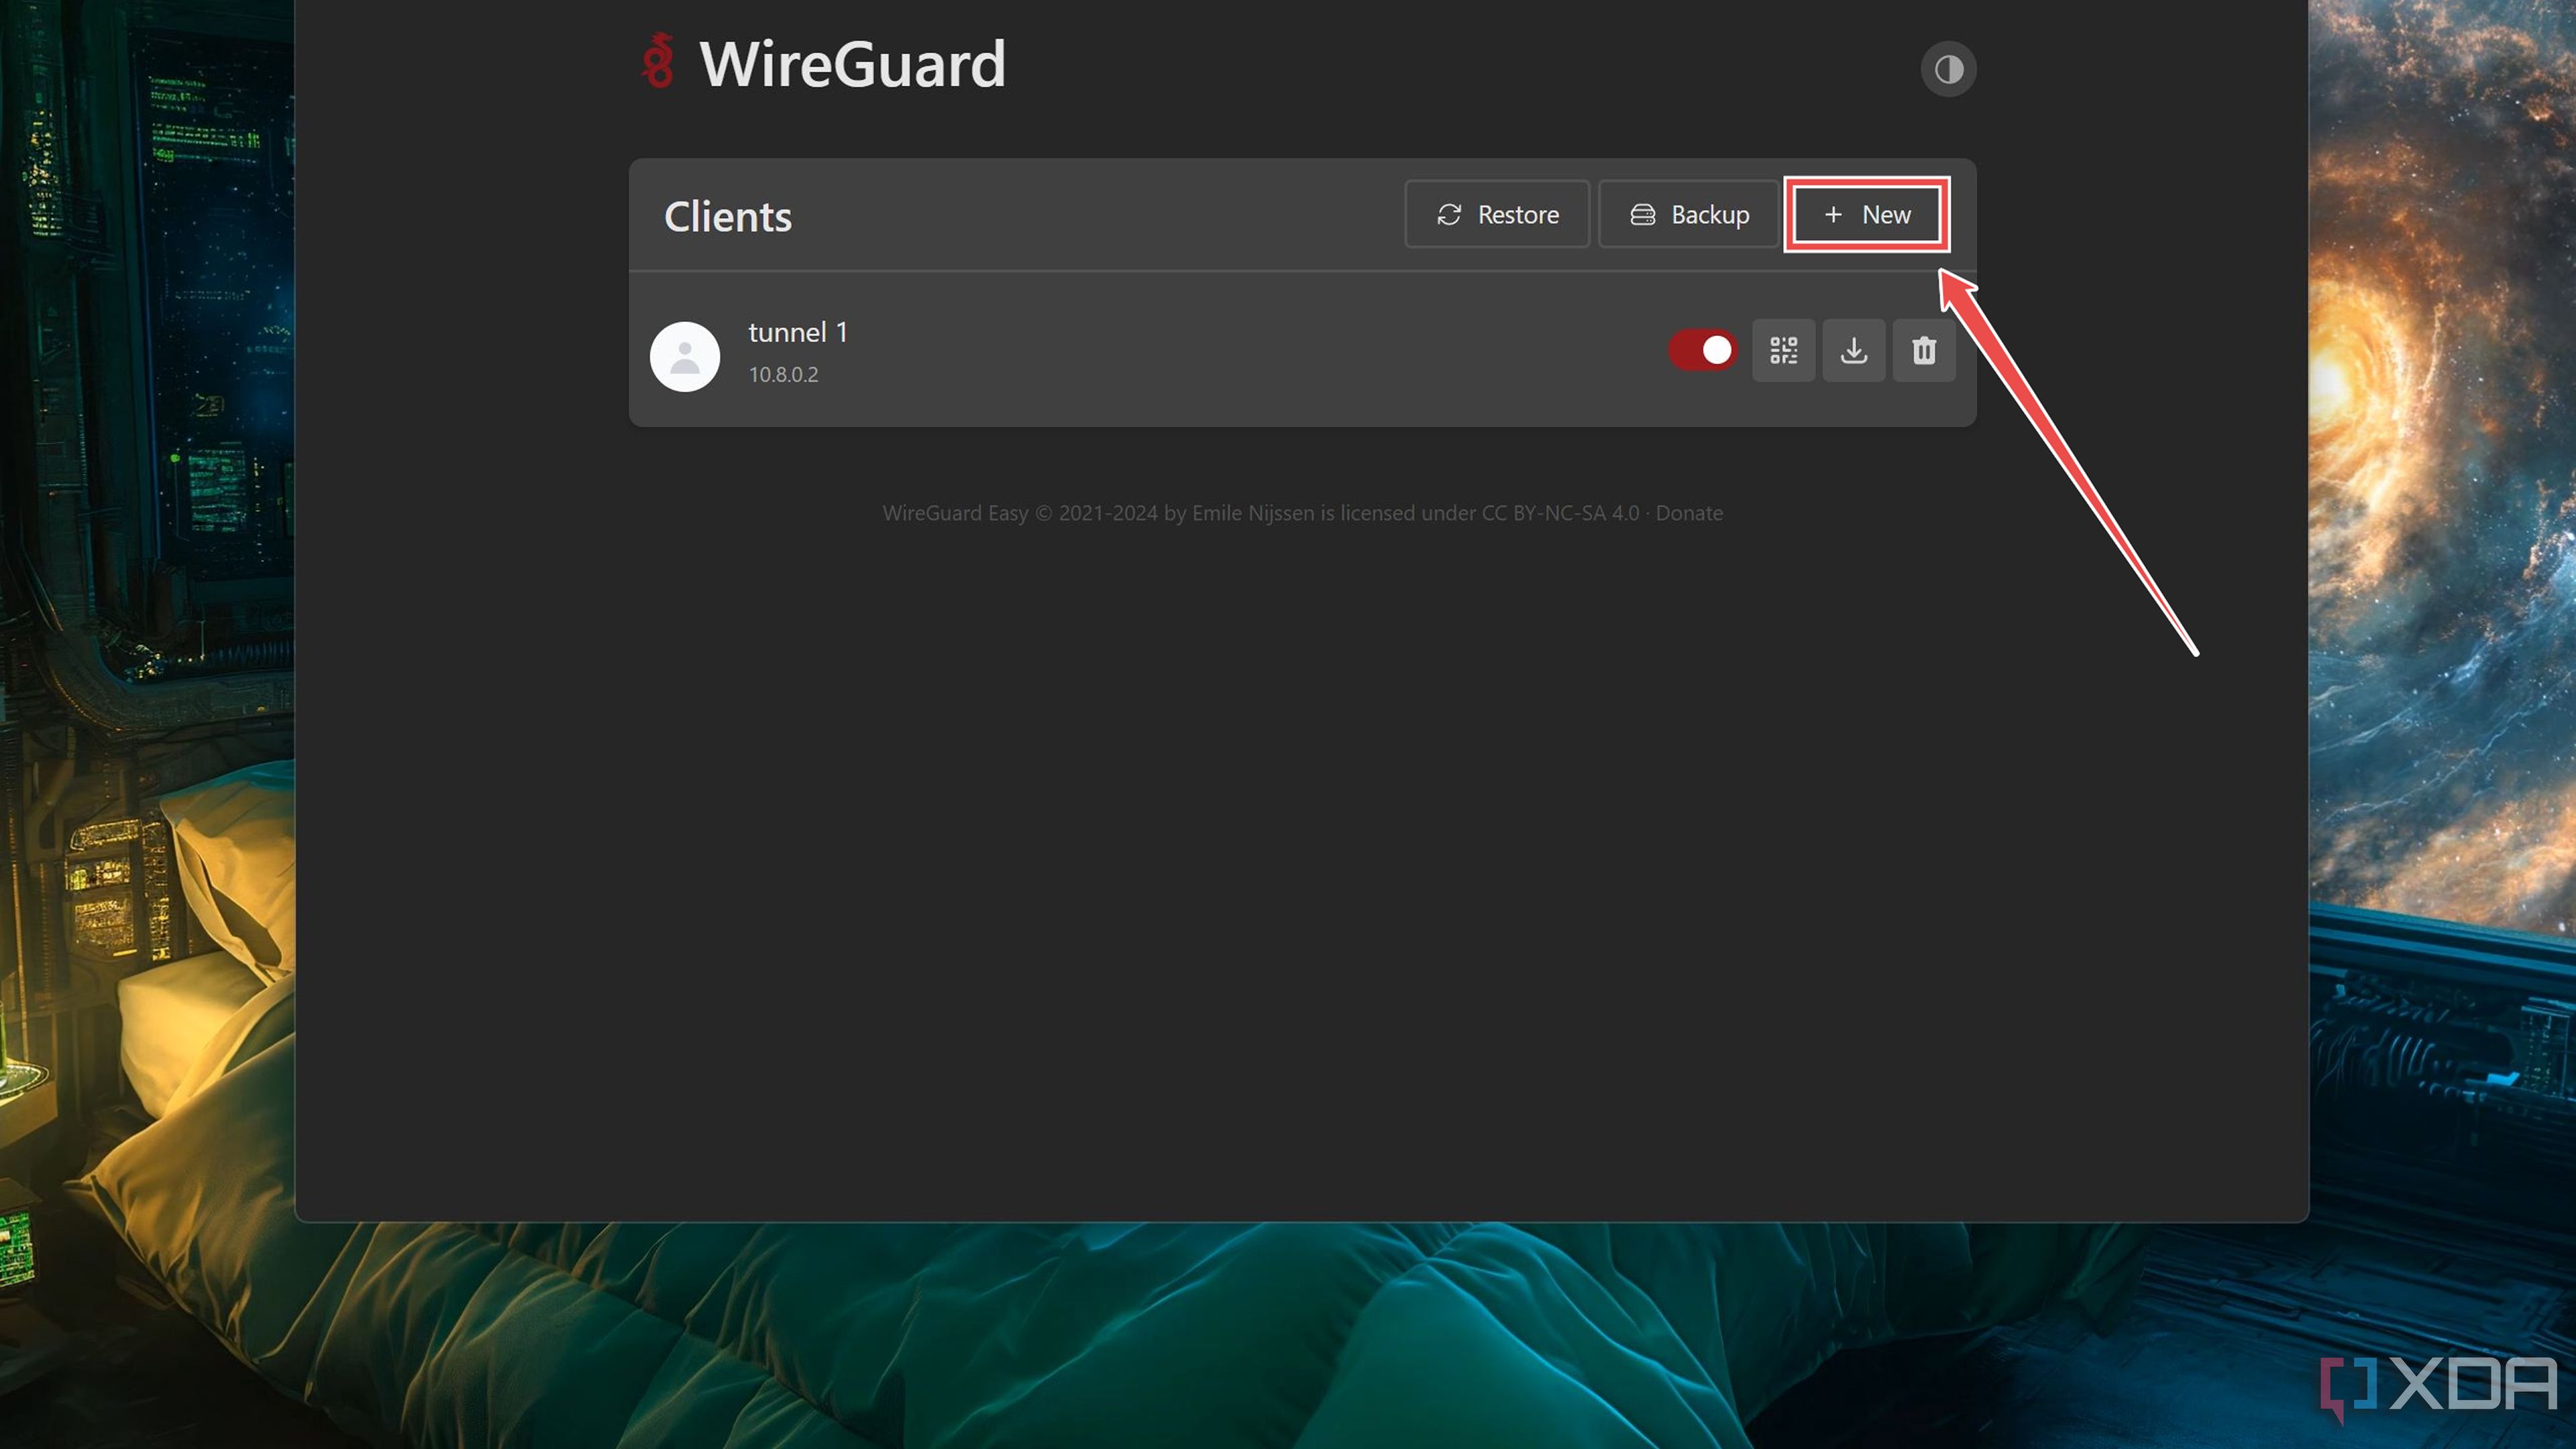
Setting up a client inside WireGuard
Now that you’ve deployed the WireGuard container, you’ll want to add a client and connect a device to the VPN server.
- Type the IP address of your Raspberry Pi followed by a colon (:) and the port number 51821 before entering the Password you’d set earlier.
-
Click on the Add button inside the WireGuard web UI.
-
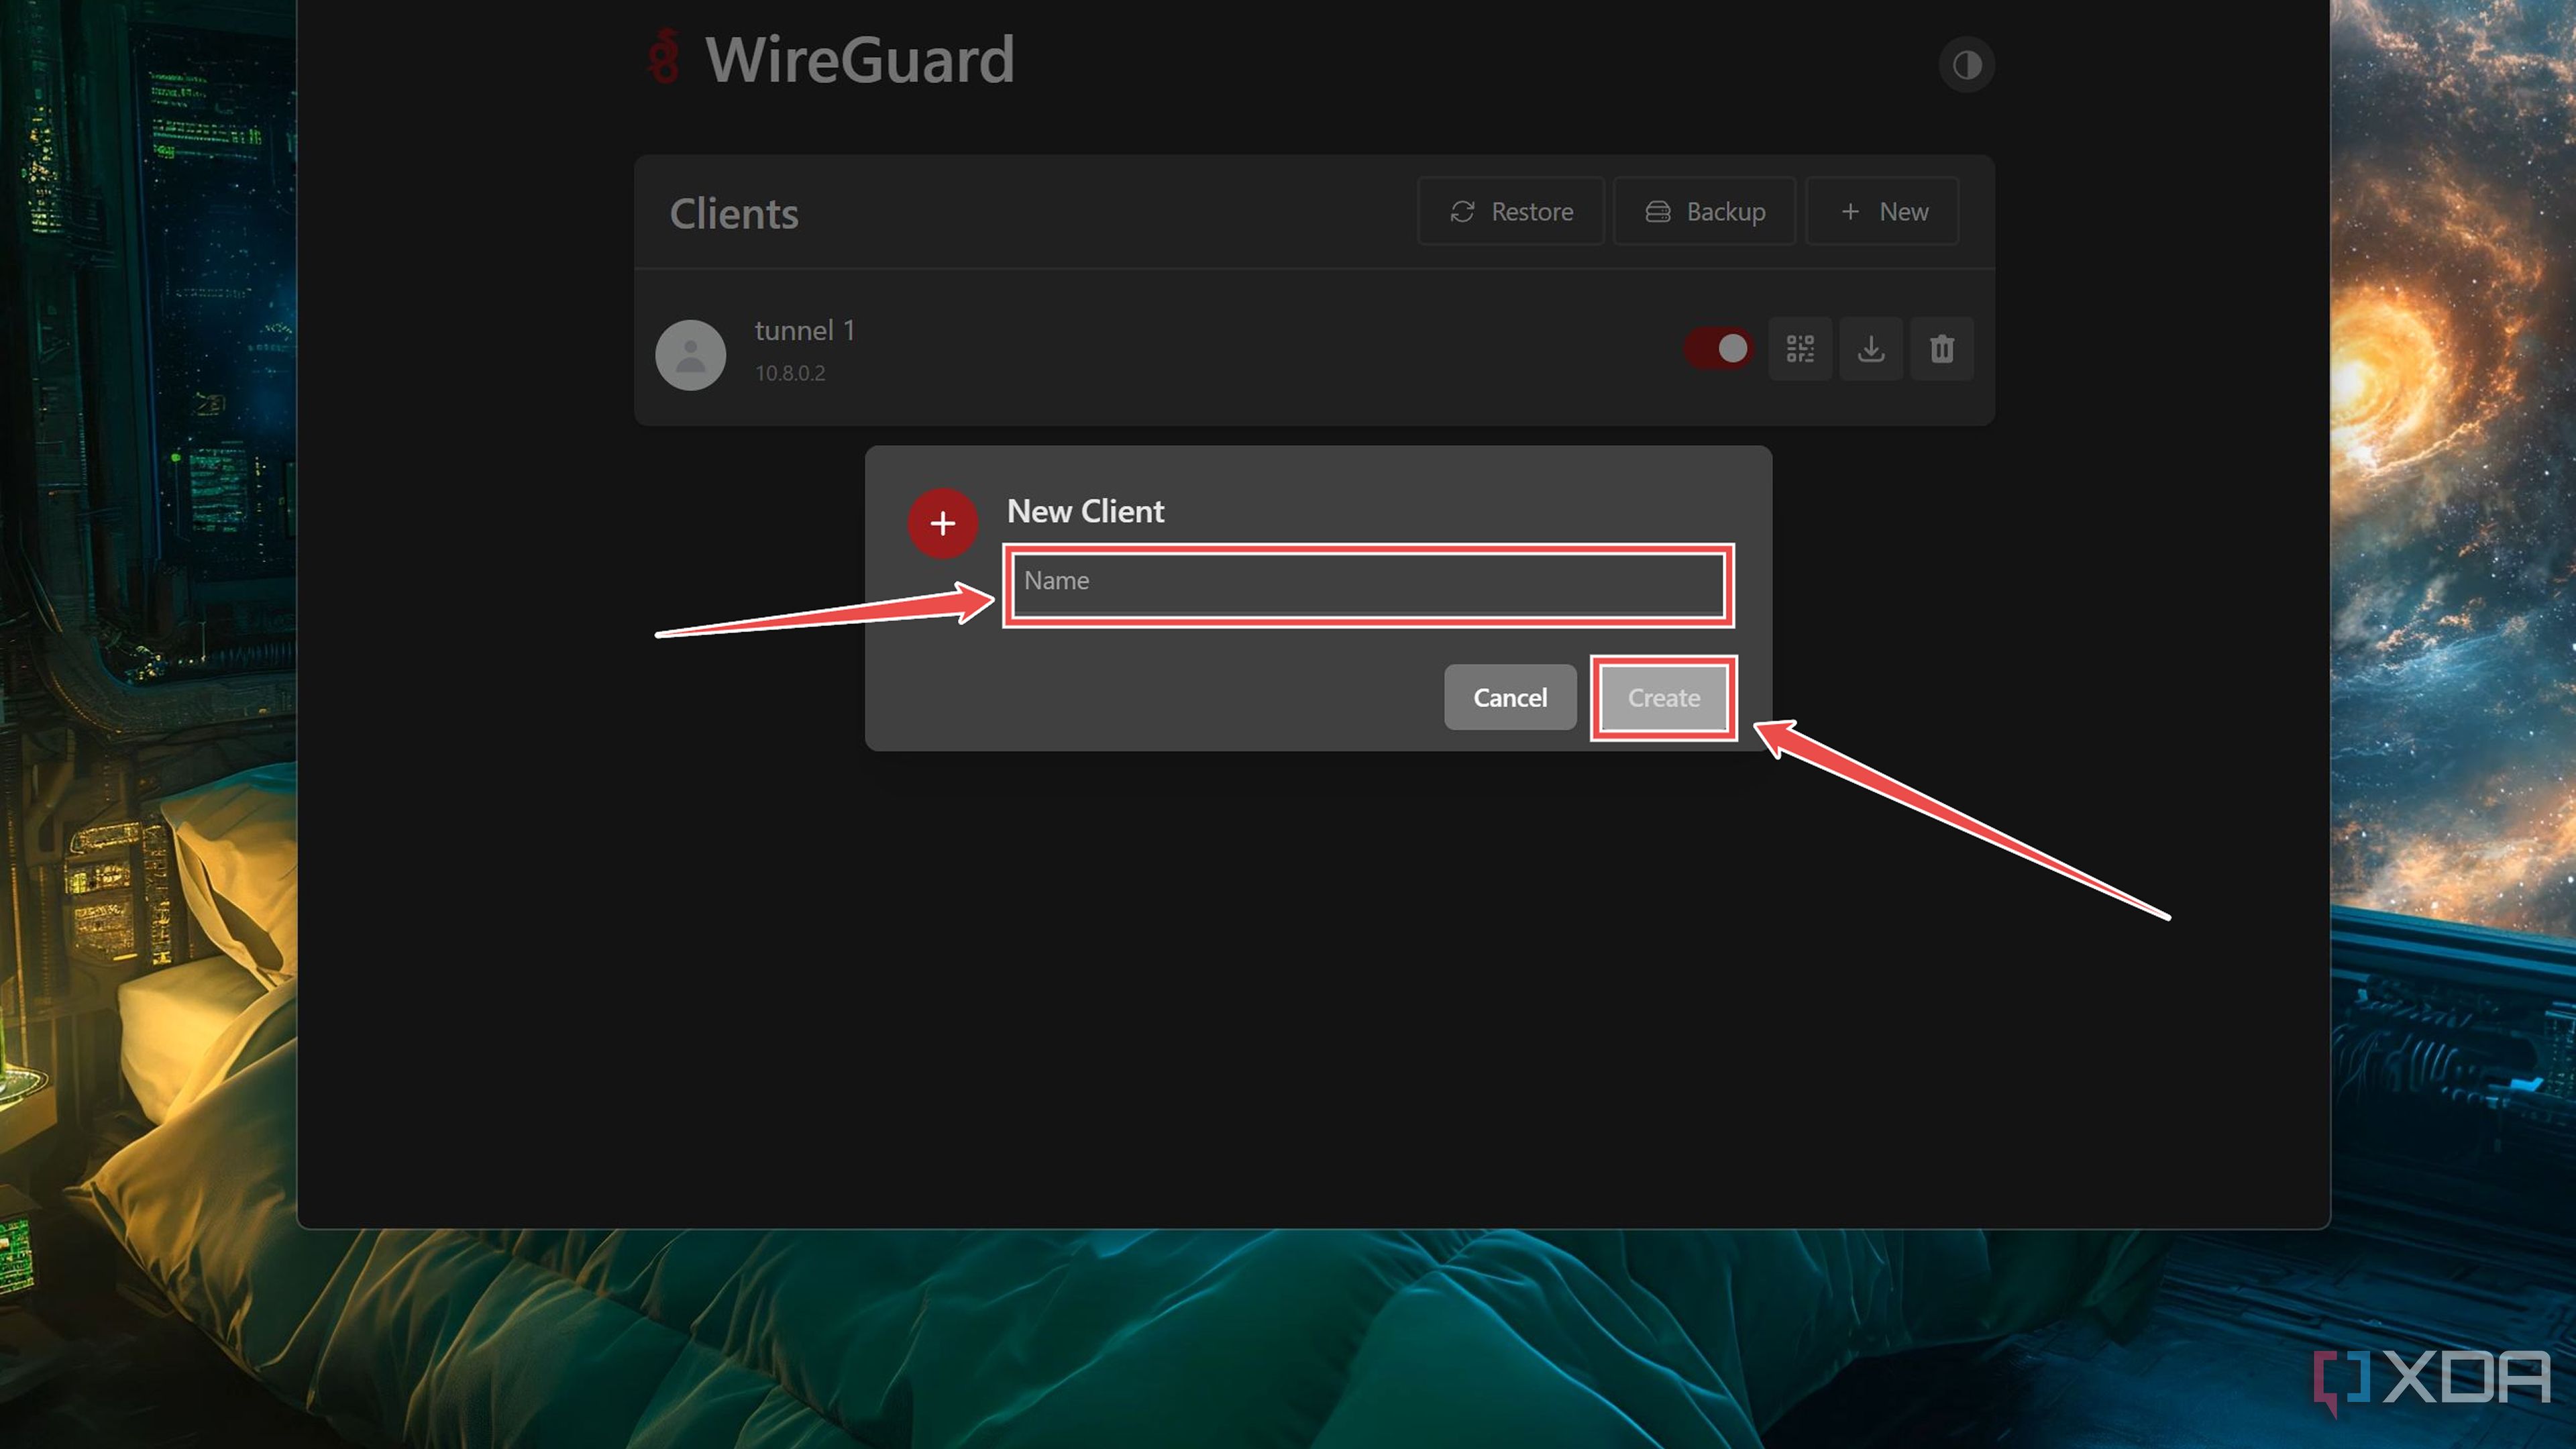
Enter a Name for the Client and tap the Create button inside the pop-up window.
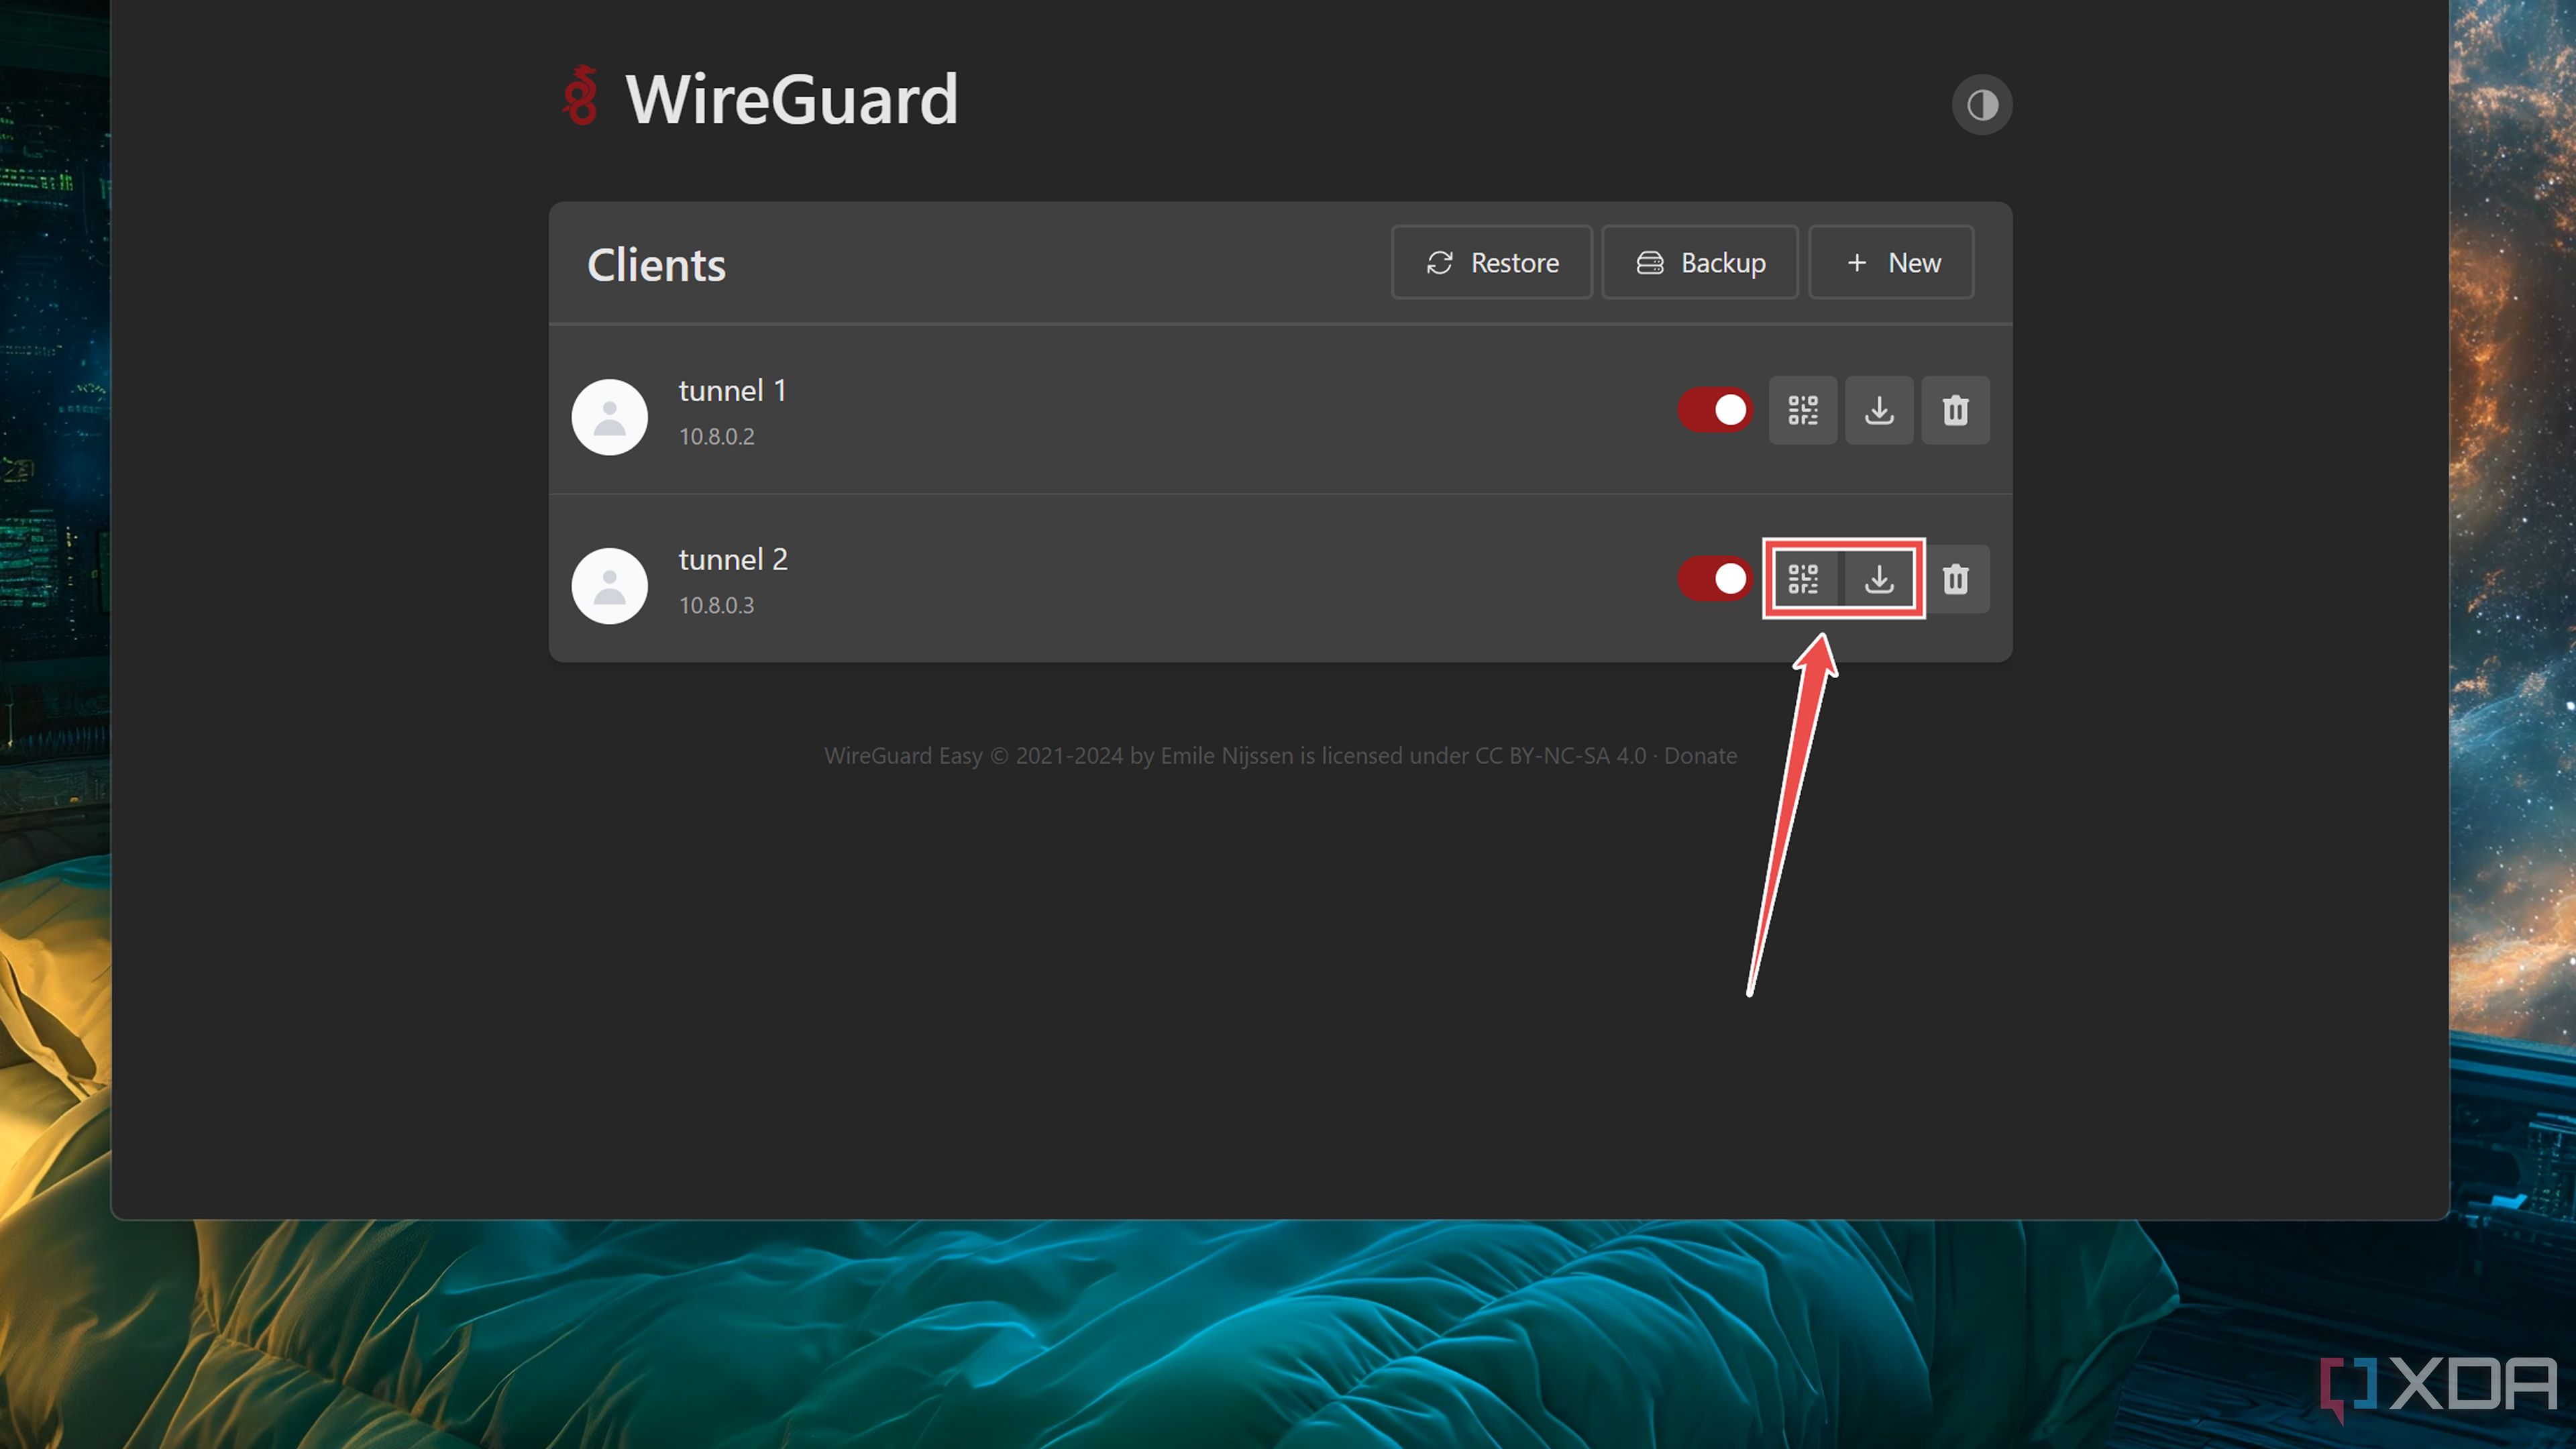
- Grab the device that you plan to use to access the home lab and install the WireGuard app on it.
-
Depending on the operating system inside the client device, you can use a QR code or a Configuration file to connect to the WireGuard VPN.


Securely access your home lab with a self-hosted VPN
If you’ve followed all the steps carefully, you should be able to connect to your local network using the WireGuard VPN. While it’s undoubtedly a great and secure method for accessing your home server from external networks, you’ll have to ensure your ISP doesn’t support CG-NAT.
Otherwise, you’ll have a hard time setting up port forwarding on your home router. In case your home network is afflicted with the scourge of CG-NAT, I recommend checking out Tailscale. Although it relies on Tailscale’s servers to establish the connection, it’s fairly easy to set up and just as secure, especially once you enable the Tailscale lock option.

Related
10 quality-of-life services I self-host on my home lab
Make your life easier by deploying these useful apps on your home server


