

Summary
- Skip the Pi: Run OctoPrint on Windows for easy setup and better performance on higher-end hardware.
- Quick Install: Use the automated installer for a hassle-free process on Windows 10 or newer.
- Avoid Configuration Issues: Troubleshoot common problems like Python recognition and activation scripts in Windows.
OctoPrint is a powerful tool for remotely managing and monitoring your 3D printer. While it’s most often associated with running on a Raspberry Pi, it’s also entirely possible — and sometimes more convenient — to run it on a Windows PC. Whether you’re avoiding the cost or complexity of a Pi or prefer sticking with what you already have, this guide will walk you through the process.
There are a couple of ways to accomplish this, including an automated installer as well as a method outlined by the OctoPrint community itself. This manual method tailors the instructions specifically for Windows users, so there’s no need to hunt down outdated instructions or dig through forums.

Related
5 Octoprint alternatives you should be using
OctoPrint is not the only platform for remotely controlling a 3D printer. These alternatives are great and they even offer more functionalities.
Why run OctoPrint on Windows?
A more straightforward setup for some users
There are several good reasons to skip the Pi and set up OctoPrint on your Windows machine. It’s ideal for testing or development, especially if you’re working on OctoPrint plugins or UI tweaks. Also, since a Windows installation performs better on higher-end hardware, you can manage multiple printers or heavier plugins without slowdown.
It’s also just convenient. You don’t need to buy extra hardware if you already have a dedicated PC near your printer. And if you’re in an environment where Pi availability is limited or your Pi is required elsewhere, Windows makes a solid alternative.
What you’ll need before starting
Tools and software to prepare first
Before diving into the install process, ensure you’ve covered the basics. Here’s what you’ll need:
- A Windows 10 or 11 PC (64-bit preferred)
- Administrator access to install software
- A working 3D printer with a USB connection
- Python 3.8 to 3.11 installed (if you use the automated installer, this will happen automatically)
- Git for Windows (also installed automatically with the installer)
- Basic command-line familiarity (Command Prompt or PowerShell)
If Python isn’t already installed, make sure to add it to your system PATH during installation. This will be critical if you choose the manual installation method instead of the automated installer.
The quick and easy automatic OctoPrint installation
If you want to install OctoPrint and all of its dependencies quickly and automatically, the community maintains an installer to handle all of this for you. This installer requires 64-bit Windows 10 or newer. It won’t work if you have a 32-bit operating system, so keep that in mind. To follow this method, here’s what you need to do.
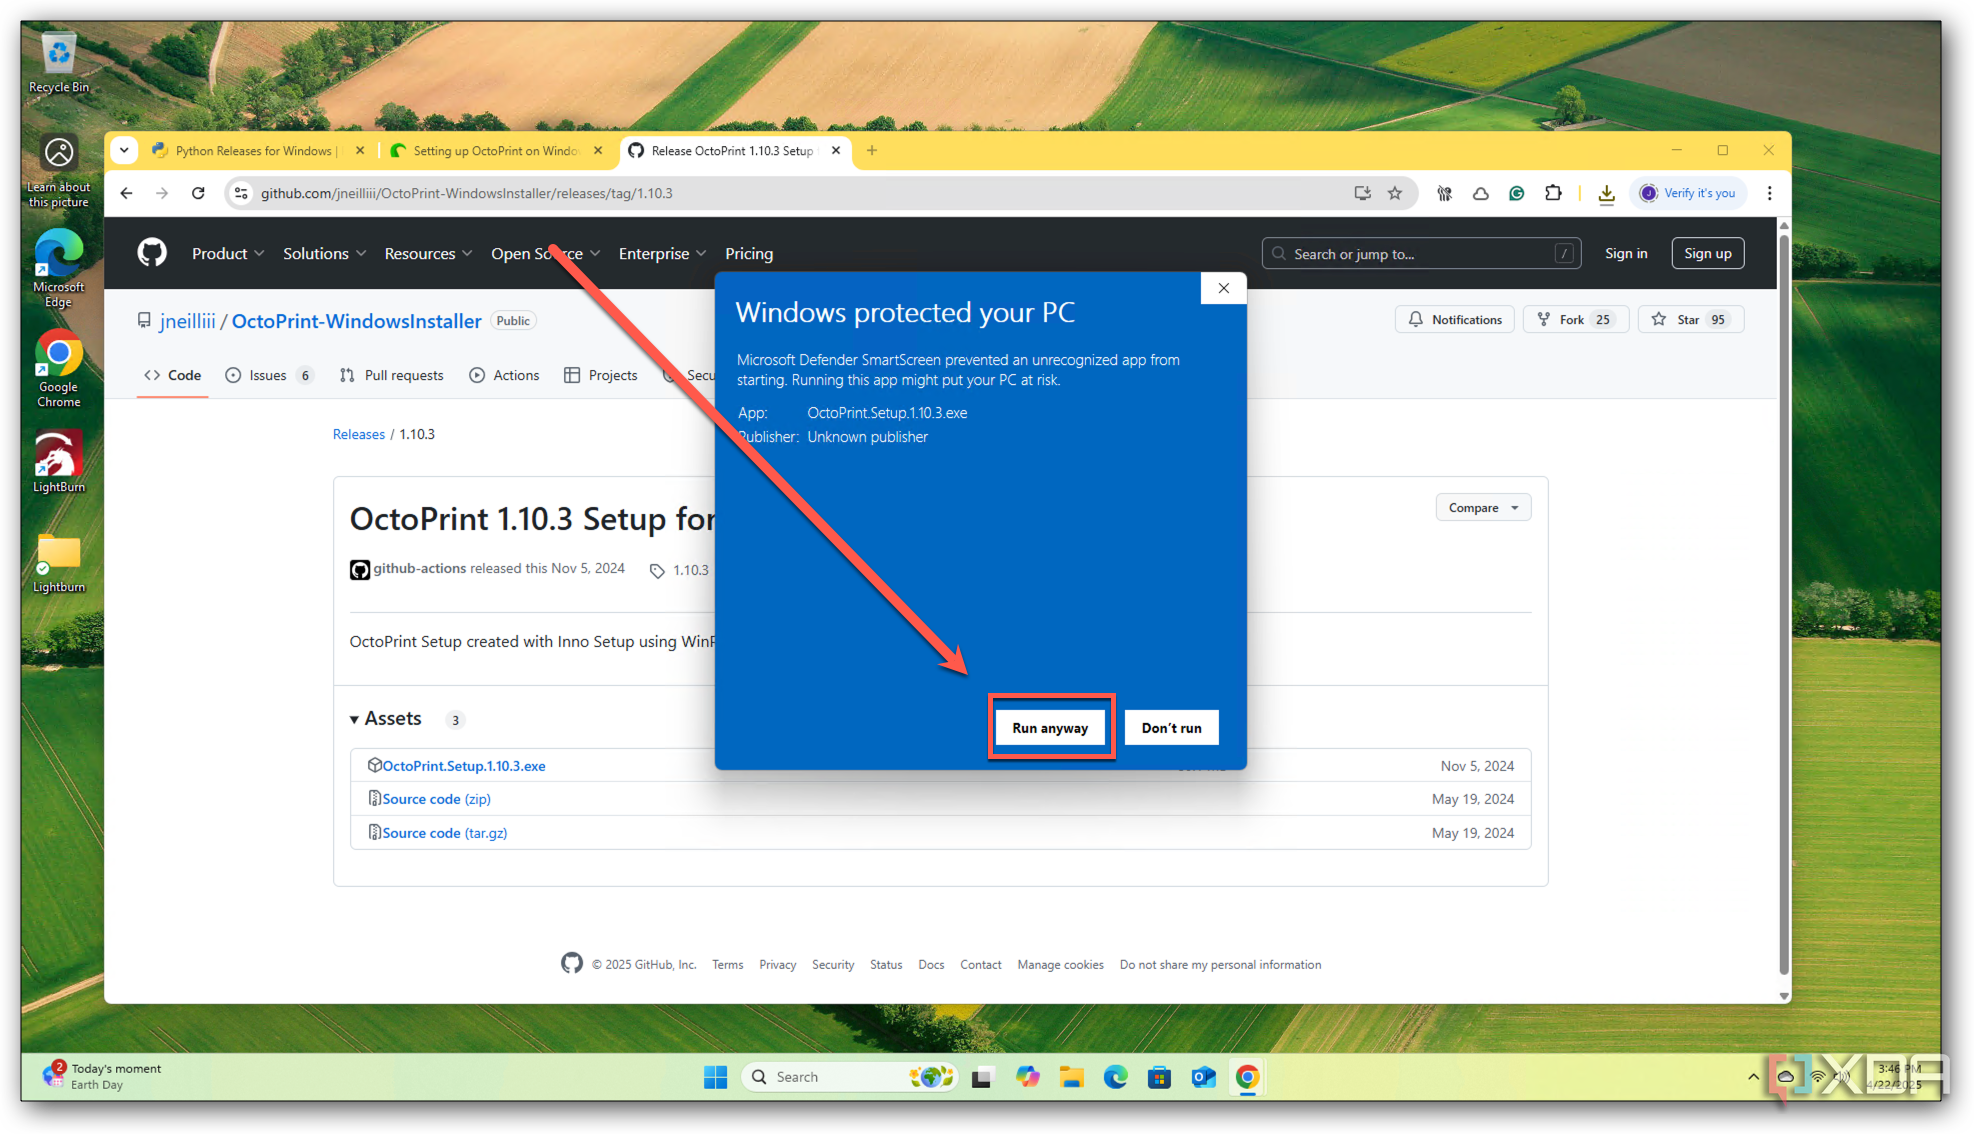
- Download the latest stable release from the OctoPrint-WindowsInstaller GitHub repository.
-
Once downloaded, run the installer. If you get an error that Microsoft Defender has blocked the app from running, click on Run anyway.
-
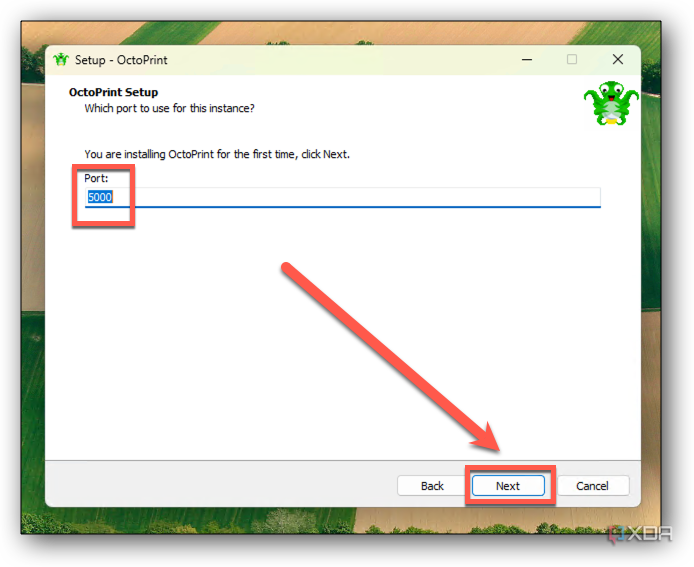
By default, the installer will configure OctoPrint to use port 5000. If you wish to change that, you can do so during the installation by entering the port number when prompted and clicking Next.
-
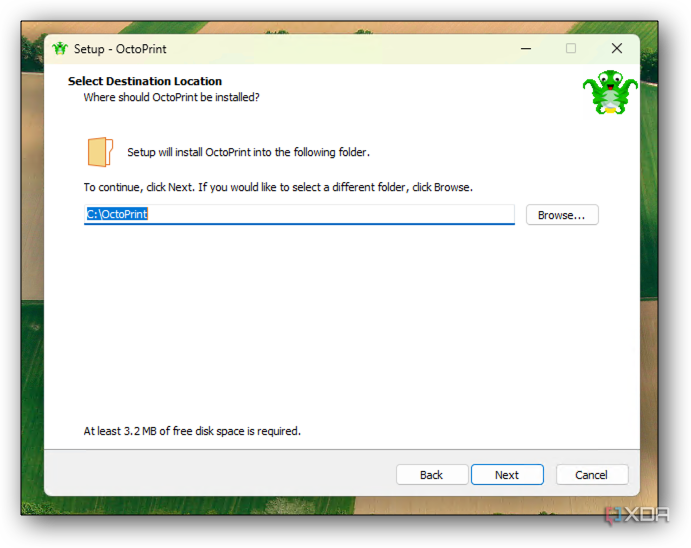
You can also change where OctoPrint is installed, but most folks should stick to the default settings.
- Choose any additional tasks you want the installer to complete, like including go2rtc or YawCam for webcam support.
-
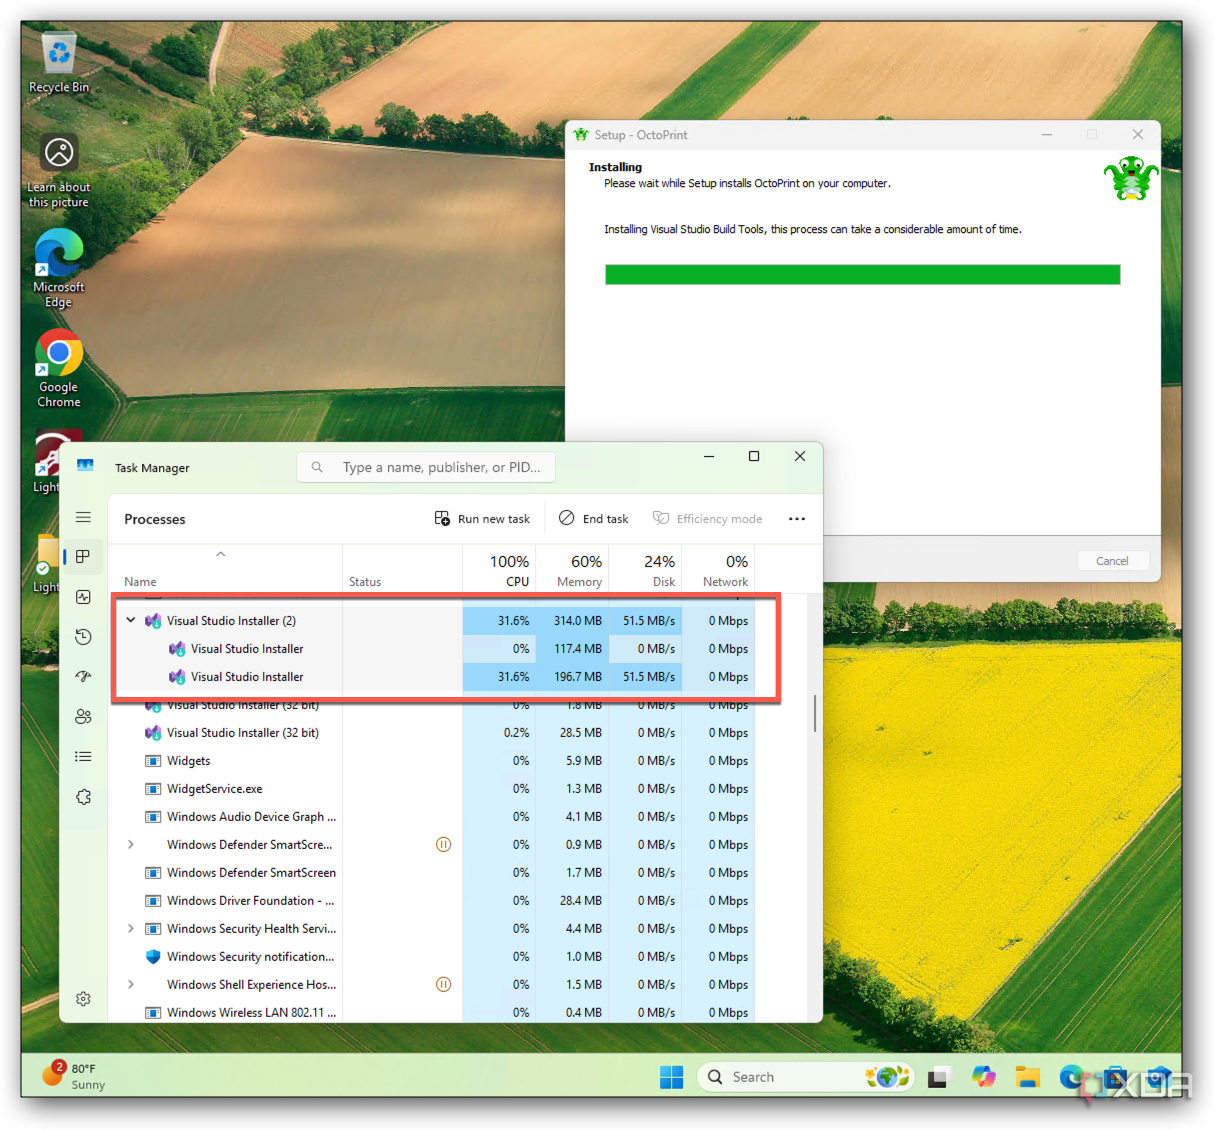
The installer will download the dependencies it needs to run, which could take a few minutes. It may seem to stall while installing Visual Studio Build Tools, but this is normal. You can look in Task Manager to see the Visual Studio Installer running.
-
Once the installer finishes, ensure the box labeled Open OctoPrint to complete initial setup is checked, then click Finish.

-
Your default browser will open to the OctoPrint web interface, where you can complete the process of connecting OctoPrint to your 3D printer or printers.


Installing OctoPrint on Windows, the long way, manually
From virtual environment to first launch
Now that your environment is ready, let’s walk through setting up OctoPrint. You’ll install it in a virtual environment using Python, which keeps things clean and easy to manage.
- Create a working directory for your OctoPrint installation. In either the Command Prompt or a PowerShell window, run mkdir OctoPrint and then cd OctoPrint to create and move into a new folder.
- Set up a Python virtual environment by running python -m venv venv to create the virtual environment. Then activate it using one of the following options.
- If using PowerShell, run .venvScriptsActivate.ps1
- If you’re using the normal Command Prompt, the command is .venvScriptsactivate.bat
- Upgrade pip using python -m pip install –upgrade pip to ensure pip is current.
- Next, install OctoPrint using pip install octoprint.
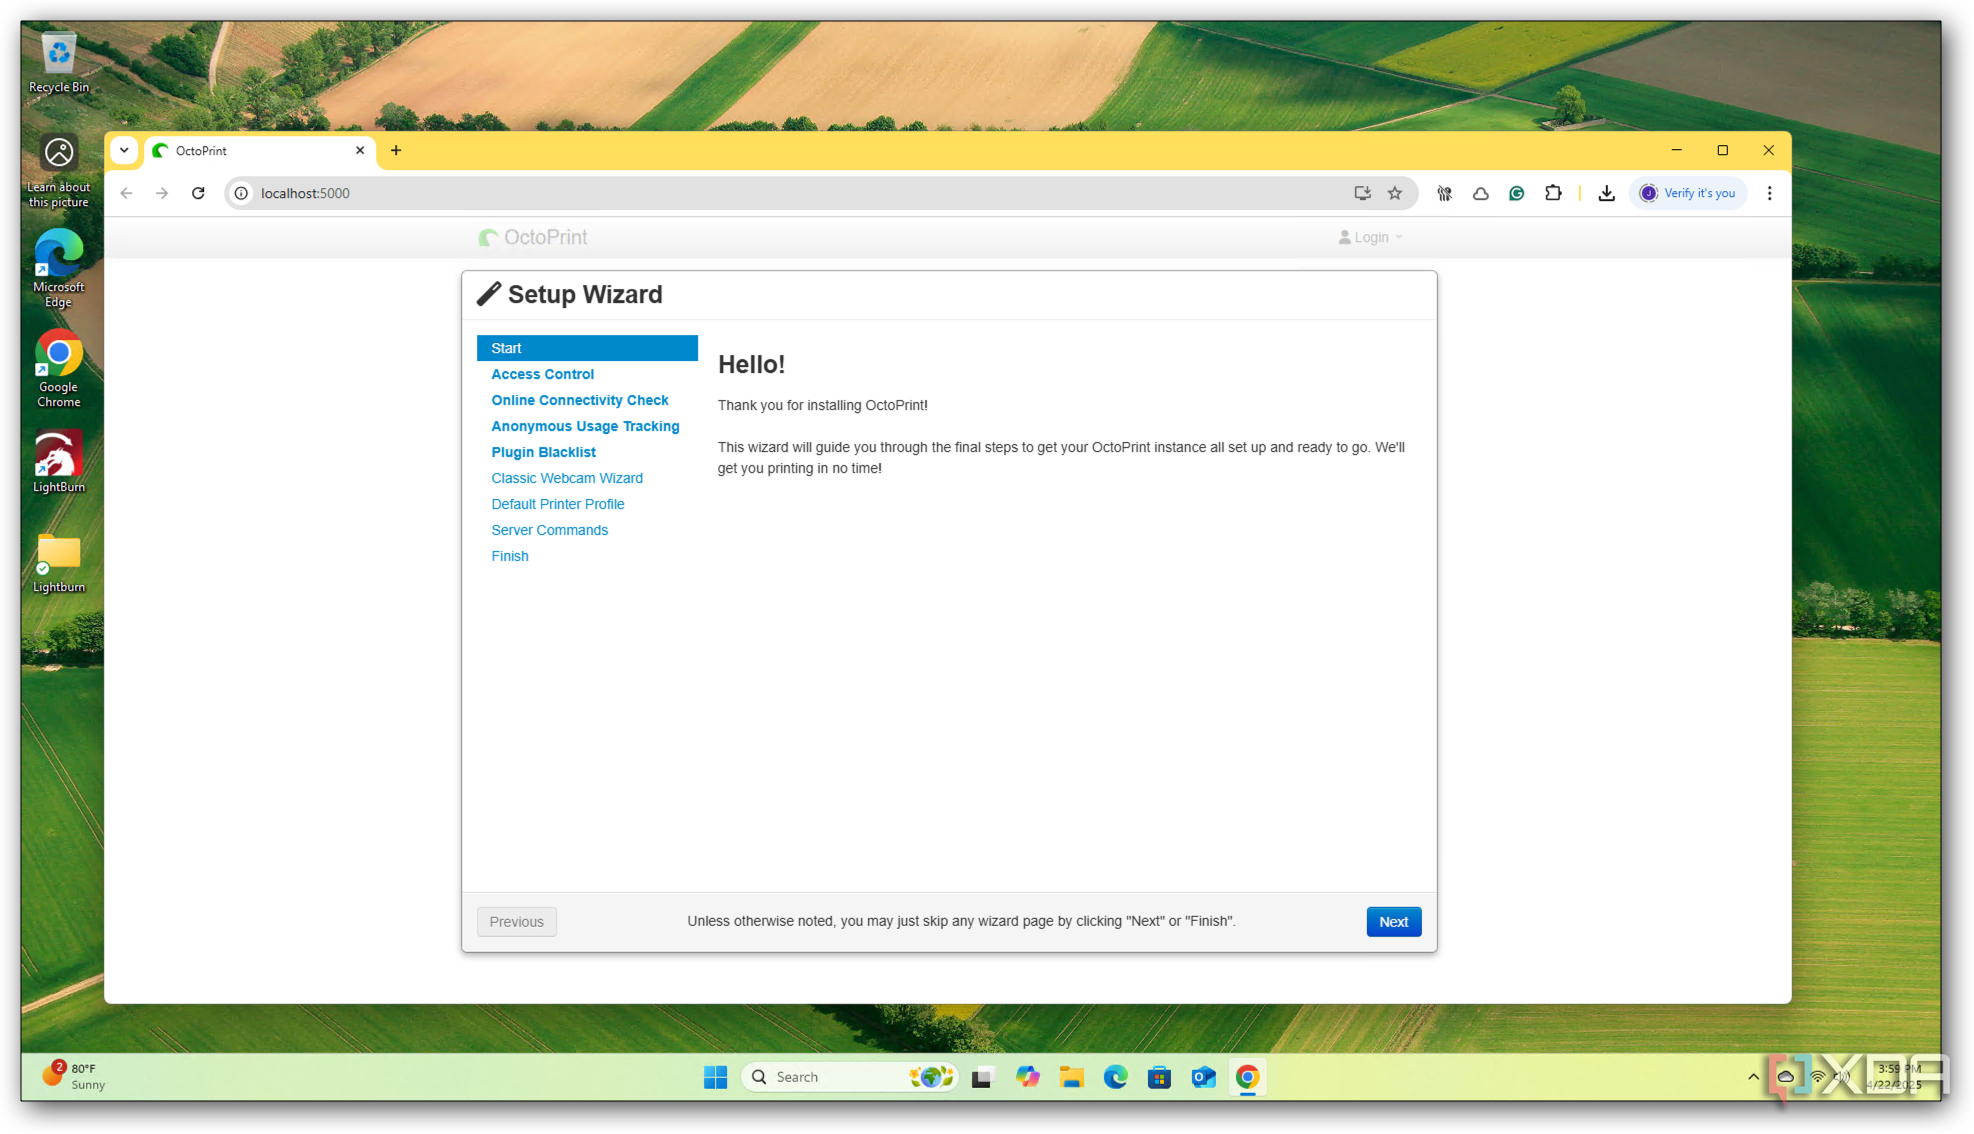
- To run OctoPrint for the first time, start the server with octoprint serve. If everything works, your browser should open to http://localhost:5000 where you’ll complete the first-time setup wizard.
- If you want OctoPrint to launch when Windows starts, you can create a scheduled task or batch file shortcut. This step isn’t required, but it’s handy for regular use.
- Plug in your printer via USB. In the OctoPrint interface, select the appropriate port from the dropdown menu to connect and start controlling your printer.
Common issues and how to fix them
Avoiding or working around some ‘gotchas’ unique to Windows users
Since OctoPrint was initially designed for Linux-based platforms, there are a few things to watch out for. These might seem ready to stop you in your tracks, but don’t worry—they’re easily remedied. Here are the biggest hurdles I faced when I was setting up OctoPrint on my mini PC with Windows 11 Pro.
If you’re using OctoPrint as a production environment under Windows, be sure to disable automatic reboots for Windows updates. Your prints could be interrupted unexpectedly if Windows reboots while your 3D printer is in the middle of a print job.
PowerShell won’t run the activation script
If you’re using PowerShell to activate your Python virtual environment, you might see an error message about script execution being disabled. This happens because Windows has a security policy that blocks unsigned scripts by default, including the ones generated by Python’s virtual environment setup. It’s not a sign that something is wrong — just a default setting.
You can temporarily lift the restriction for your current session to work around this. Run the following command in PowerShell before you try to activate the environment again:
Set-ExecutionPolicy -Scope Process -ExecutionPolicy Bypass
This change only affects the current PowerShell window, so your overall system security policy remains intact.
Python isn’t recognized in the terminal
If the terminal says ‘python’ is not recognized as an internal or external command, the issue is almost always that Python wasn’t added to your system’s PATH variable. This makes it so the terminal doesn’t know where to find the Python executable.
The easiest fix is reinstalling Python and ensuring the “Add Python to PATH” option is checked during installation. If you’d rather not reinstall, you can manually edit the PATH environment variable and add the folder where Python is installed — typically something like C:UsersYourNameAppDataLocalProgramsPythonPython311.
OctoPrint launches, but nothing loads
After running octoprint serve, if your browser doesn’t automatically open or shows a connection error, the issue may be caused by your firewall or antivirus software. These tools sometimes block local ports, including the one OctoPrint uses — port 5000.
You’ll want to check your firewall rules and ensure that Python and OctoPrint are allowed through. If necessary, open a browser manually and go to http://localhost:5000. If you’re using third-party antivirus software, you may need to create an exception or allow list rule for the OctoPrint process.
Wrapping up your OctoPrint setup
A reliable alternative to Raspberry Pi
Running OctoPrint on Windows can be a solid alternative when you don’t want to use a Raspberry Pi. You get access to the same features and plugin ecosystem; with the right prep, it’s not hard to set up. Whether you’re testing new features, working on plugin development, or just want a desktop-based print controller, this installation method is worth keeping in your toolkit.

Related
4 amazing self-hosted services I use for my 3D printer
Make 3D printing more convenient by hosting these neat apps on your home server


