


With plenty of documentation, thousands of container images, and a solid ecosystem, Docker is the most popular container runtime in the home lab community. That said, it’s far from the only platform you can power your container fleet with. For folks who prefer better security and Kubernetes-like pods, you can’t go wrong with the rootless, daemonless Podman.
Like Docker, Podman also has a proper application on Windows. Unlike its rival, Podman Desktop not only supports multiple container runtimes (including Docker Desktop), but also includes a ton of extensions to boost your workstation’s capabilities. But if setting it up sounds like a job and a half, you can follow this guide to deploy Podman Desktop on your Windows 11 PC.

Related
Docker vs. Podman: Which one’s better for your self-hosting needs?
Can Podman dethrone Docker to become the king of containerization platforms?
Enabling virtualization in the BIOS
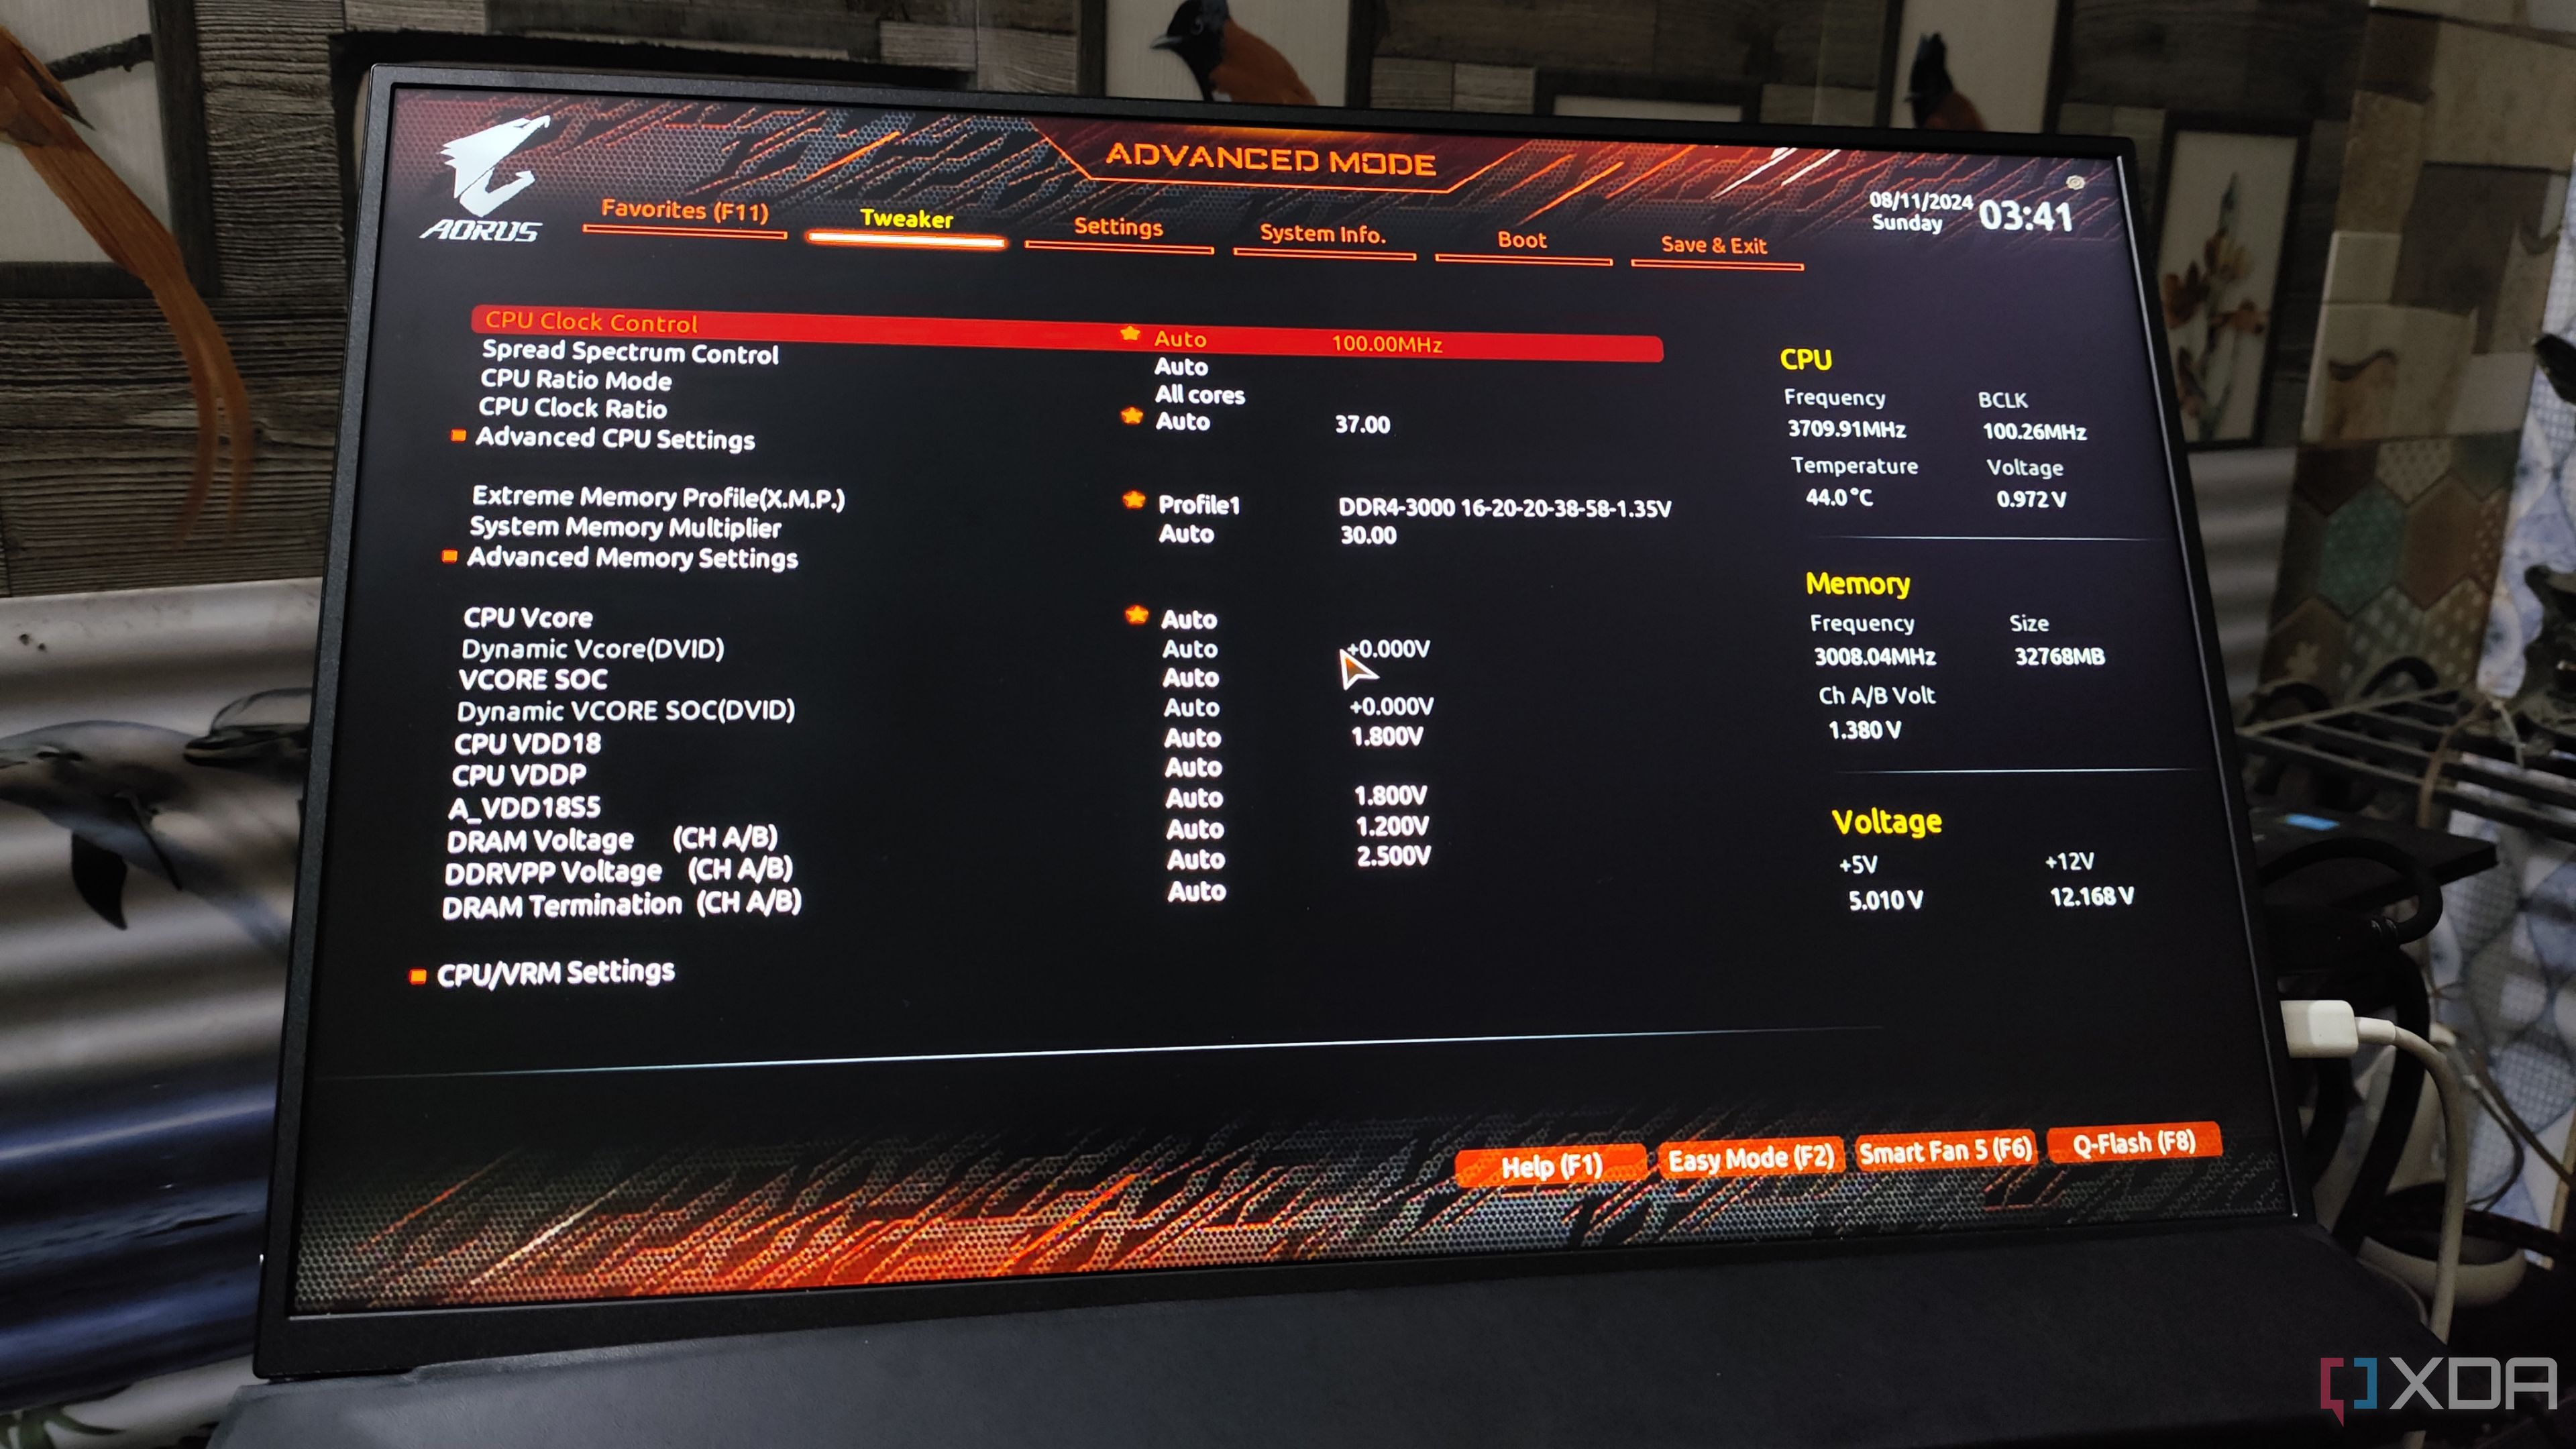
Similar to its Docker equivalent, Podman Desktop lets you choose between Hyper-V or Windows Subsystem for Linux (WSL) to run your containers. As such, you’ll have to enable CPU virtualization in your computer’s BIOS. While the exact settings and menus vary across different motherboards, here’s a general outline of the process:
- Power on your PC and enter the BIOS by mashing the Del/Delete key like there’s no tomorrow.
-
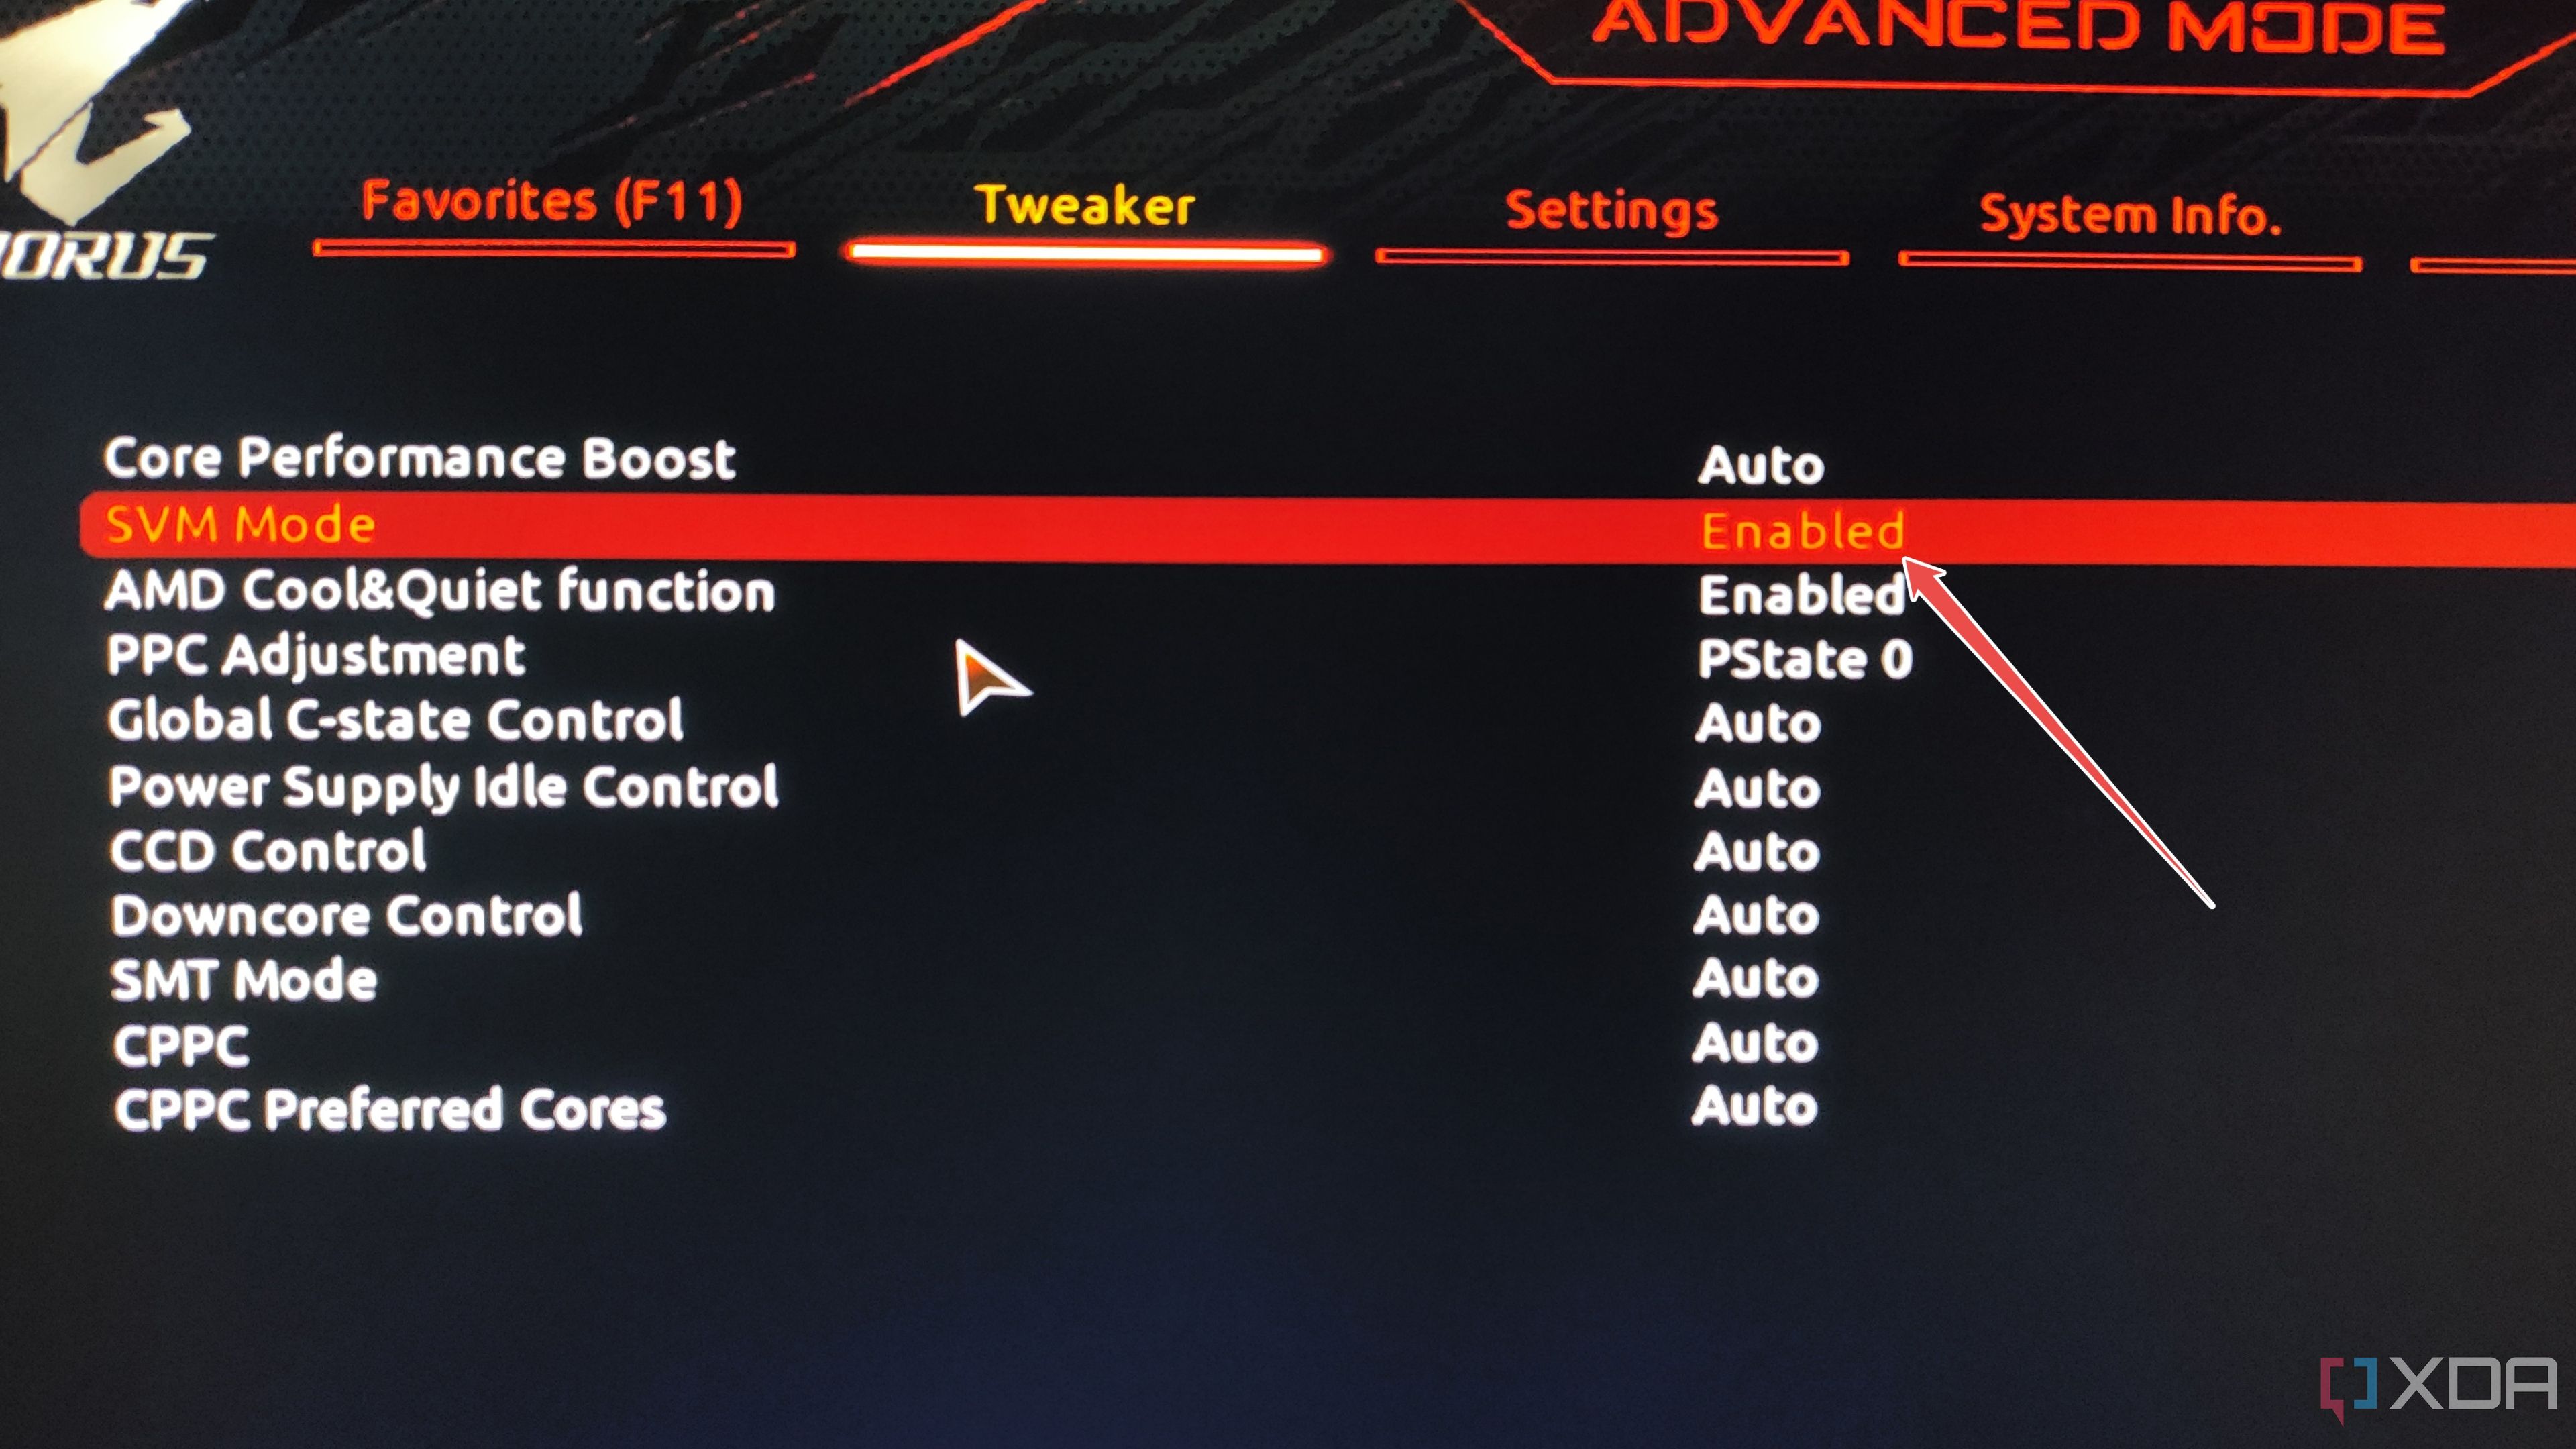
Switch to the Tweaker/CPU Settings tab and open the Advanced CPU Settings/Security submenu.
-
Enable the SVM Mode/Virtualization/Intel VT-x/AMD-V option.
- Save and exit the BIOS.


Installing Podman Desktop
With virtualization enabled, it’s time to get on with the actual Podman Desktop installation. The process would be easier if you have WSL or Hyper-V pre-configured, but you can just follow the optional steps if you don’t have them already.
- Head to the official Podman website and download the Desktop version of the utility.
-
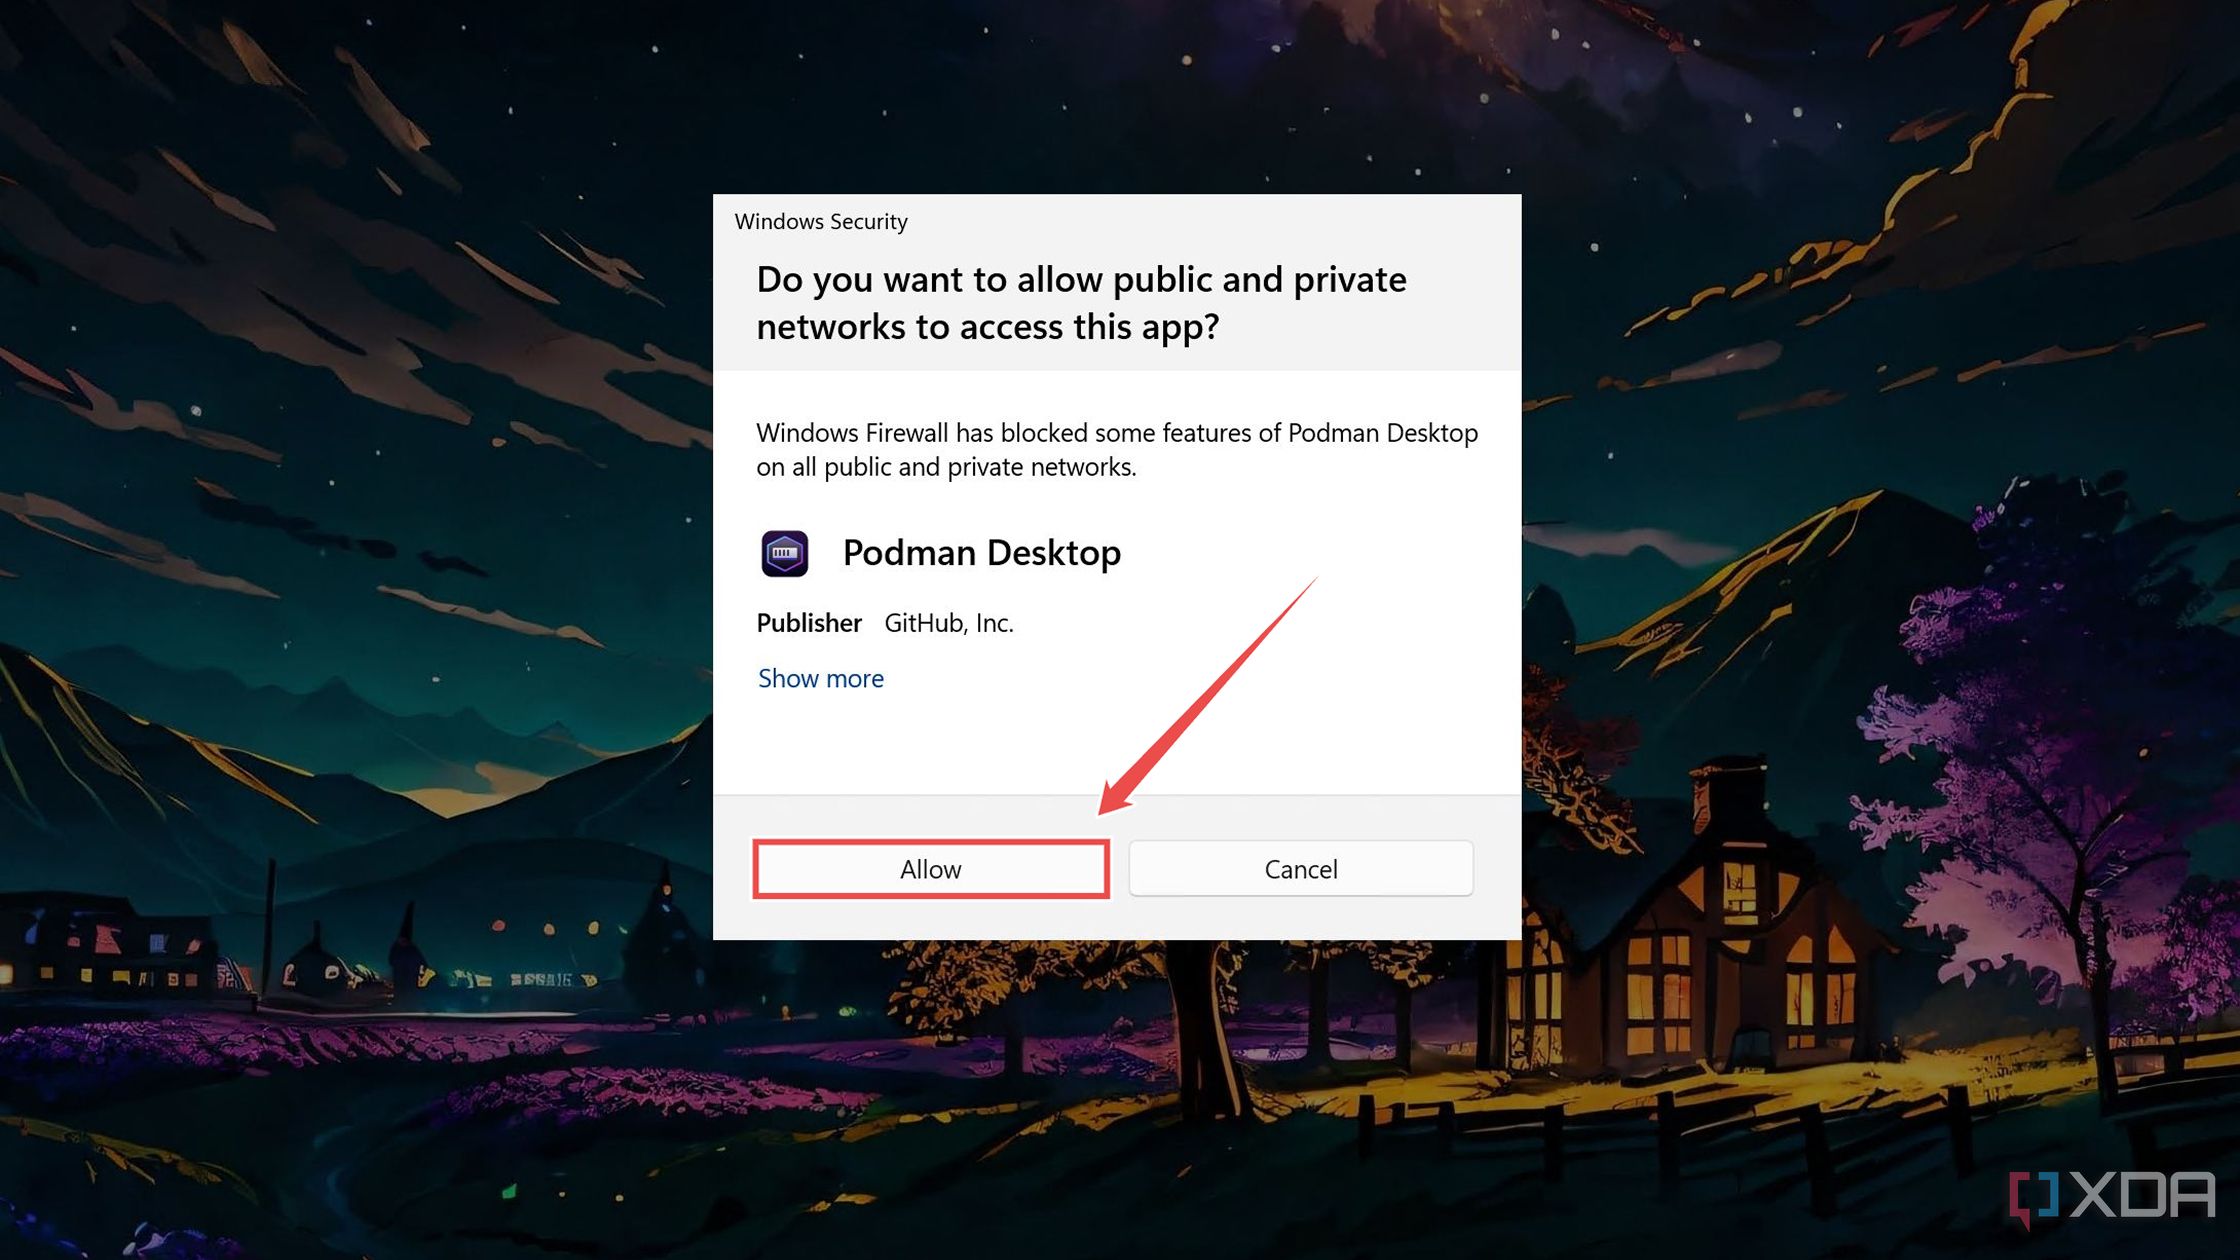
Run the Podman Desktop.exe app as an admin and grant the app access to your network when prompted by the Windows Security pop-up.
-
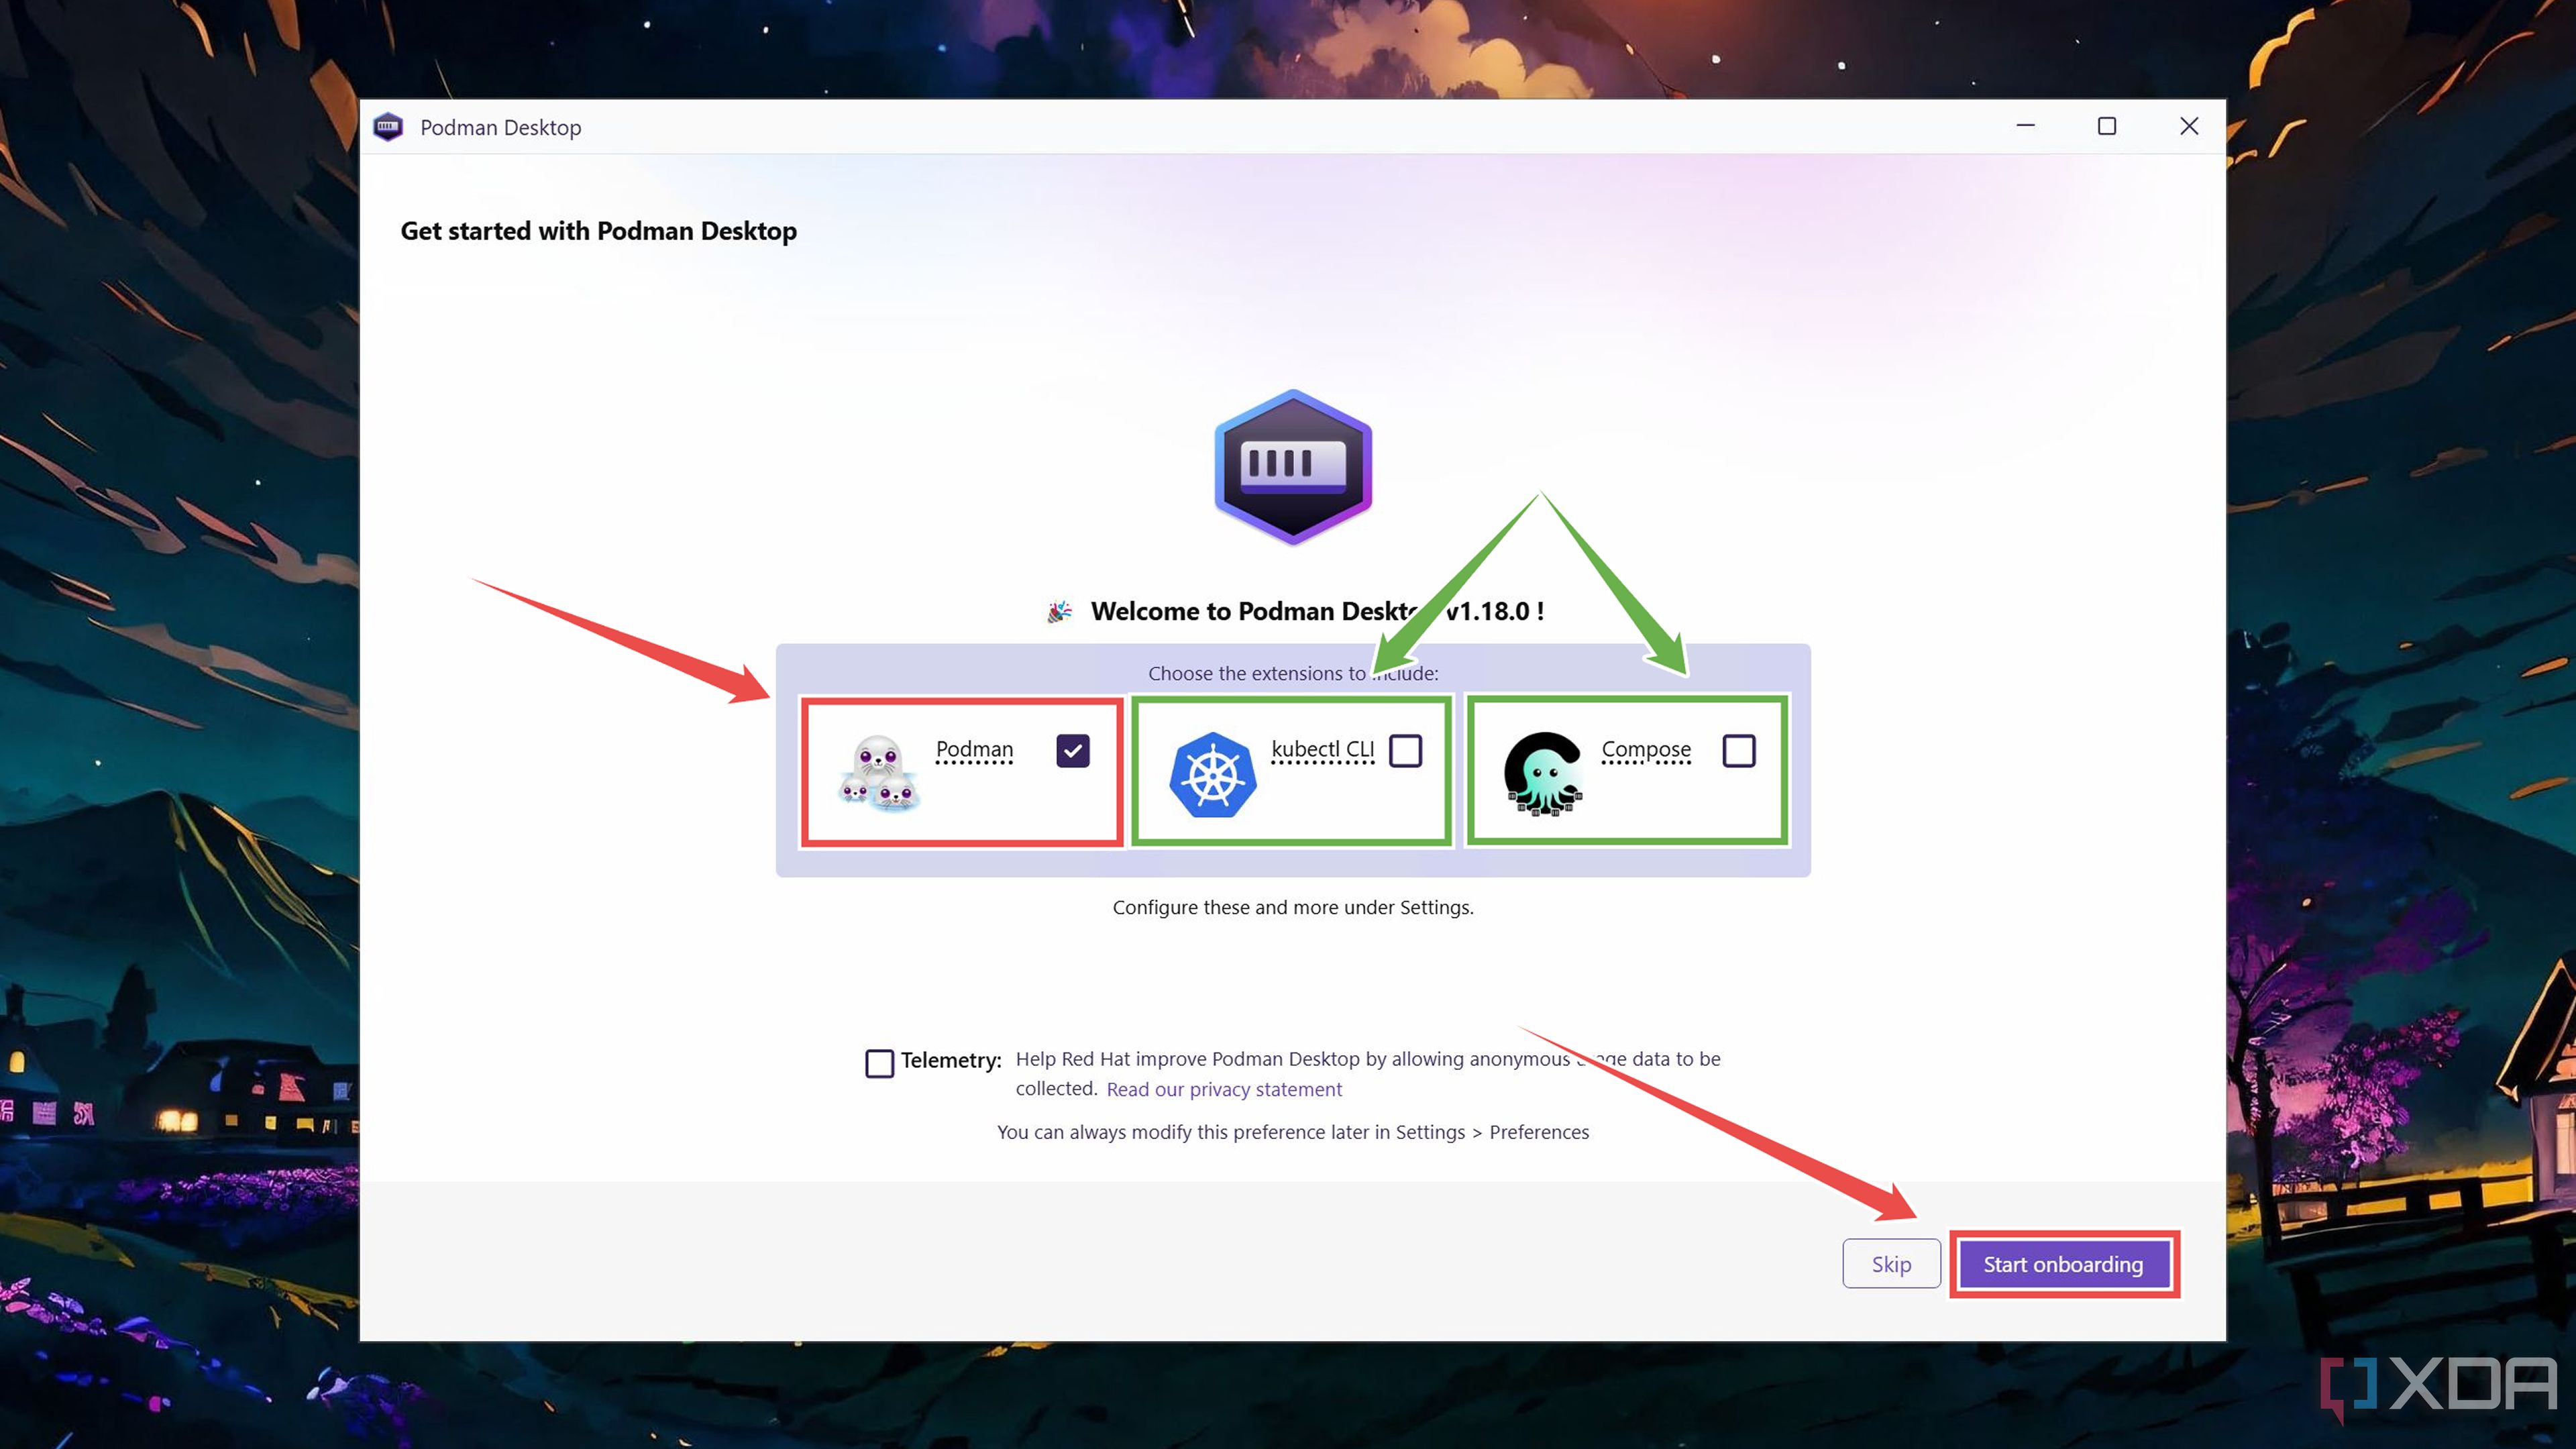
Make sure the Podman extension is selected and tap the Next button twice.
-
(Optional) If you don’t have WSL pre-installed, you can do so by opening the terminal app (it appears once you right-click on the Start button) and executing these commands:
dism.exe /online /enable-feature /featurename:VirtualMachinePlatform /all /norestart
wsl.exe --install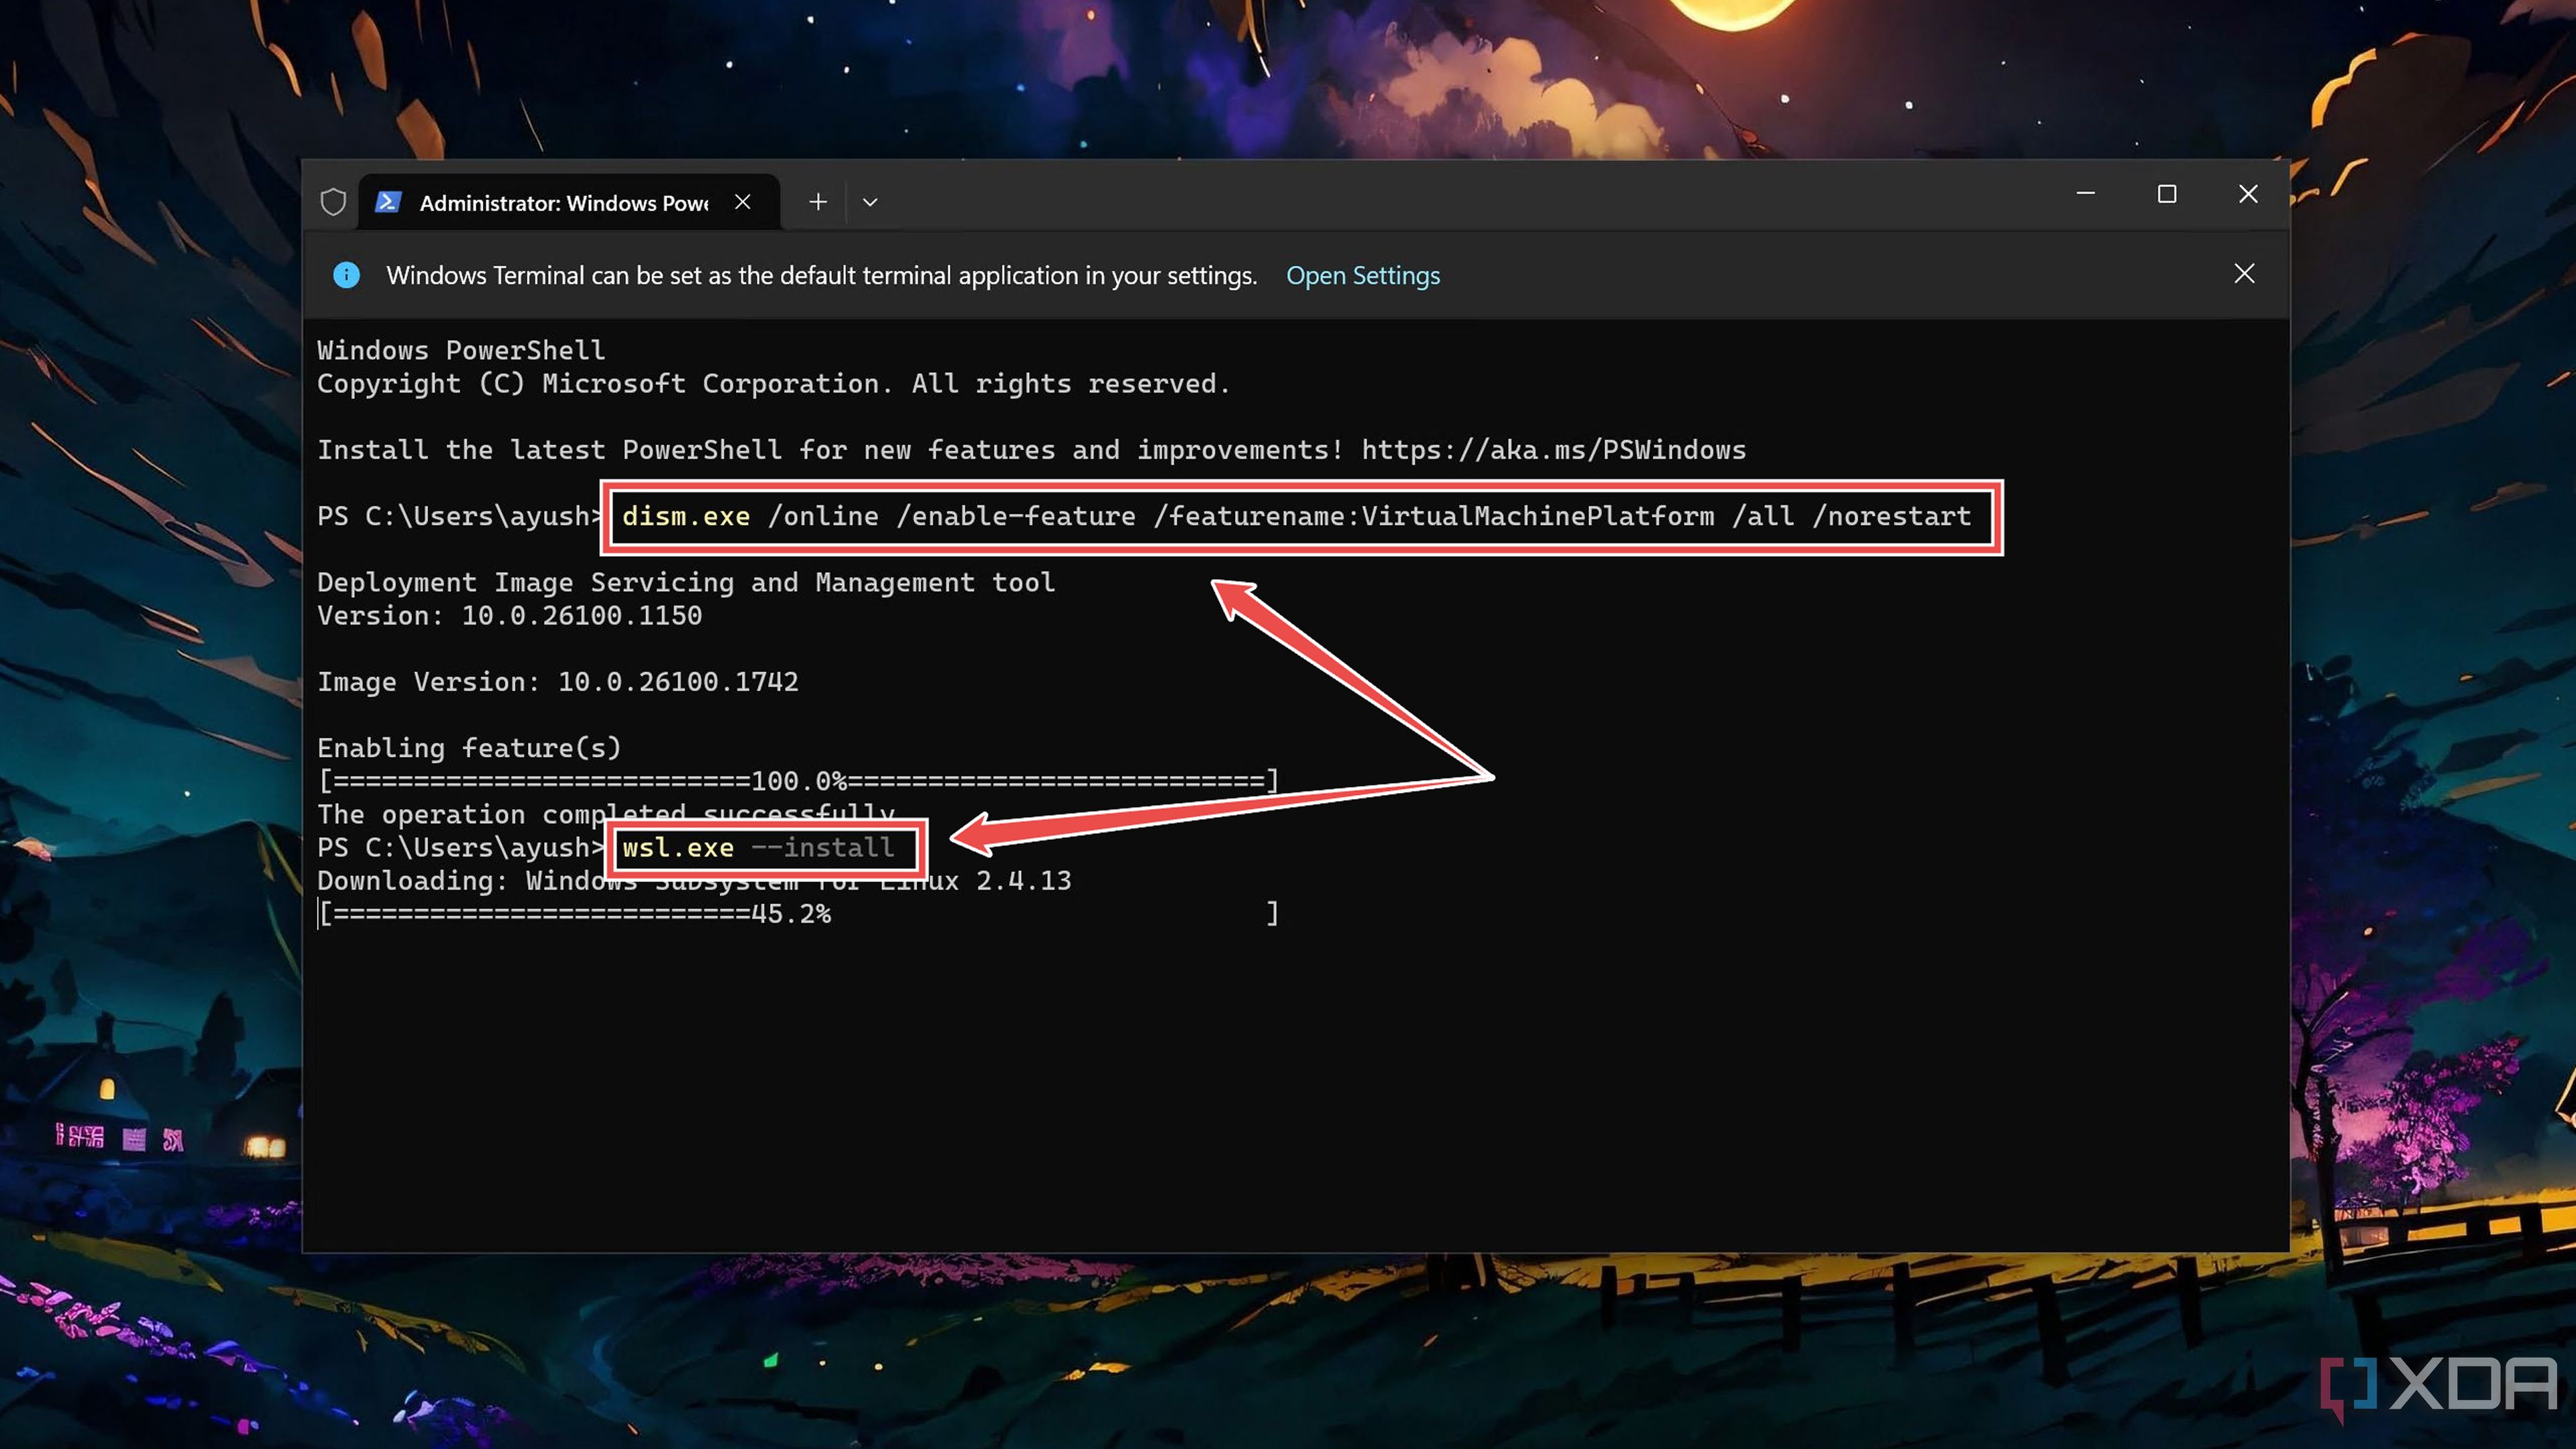
Remember to restart your PC afterward before launching the Podman Desktop application.
-
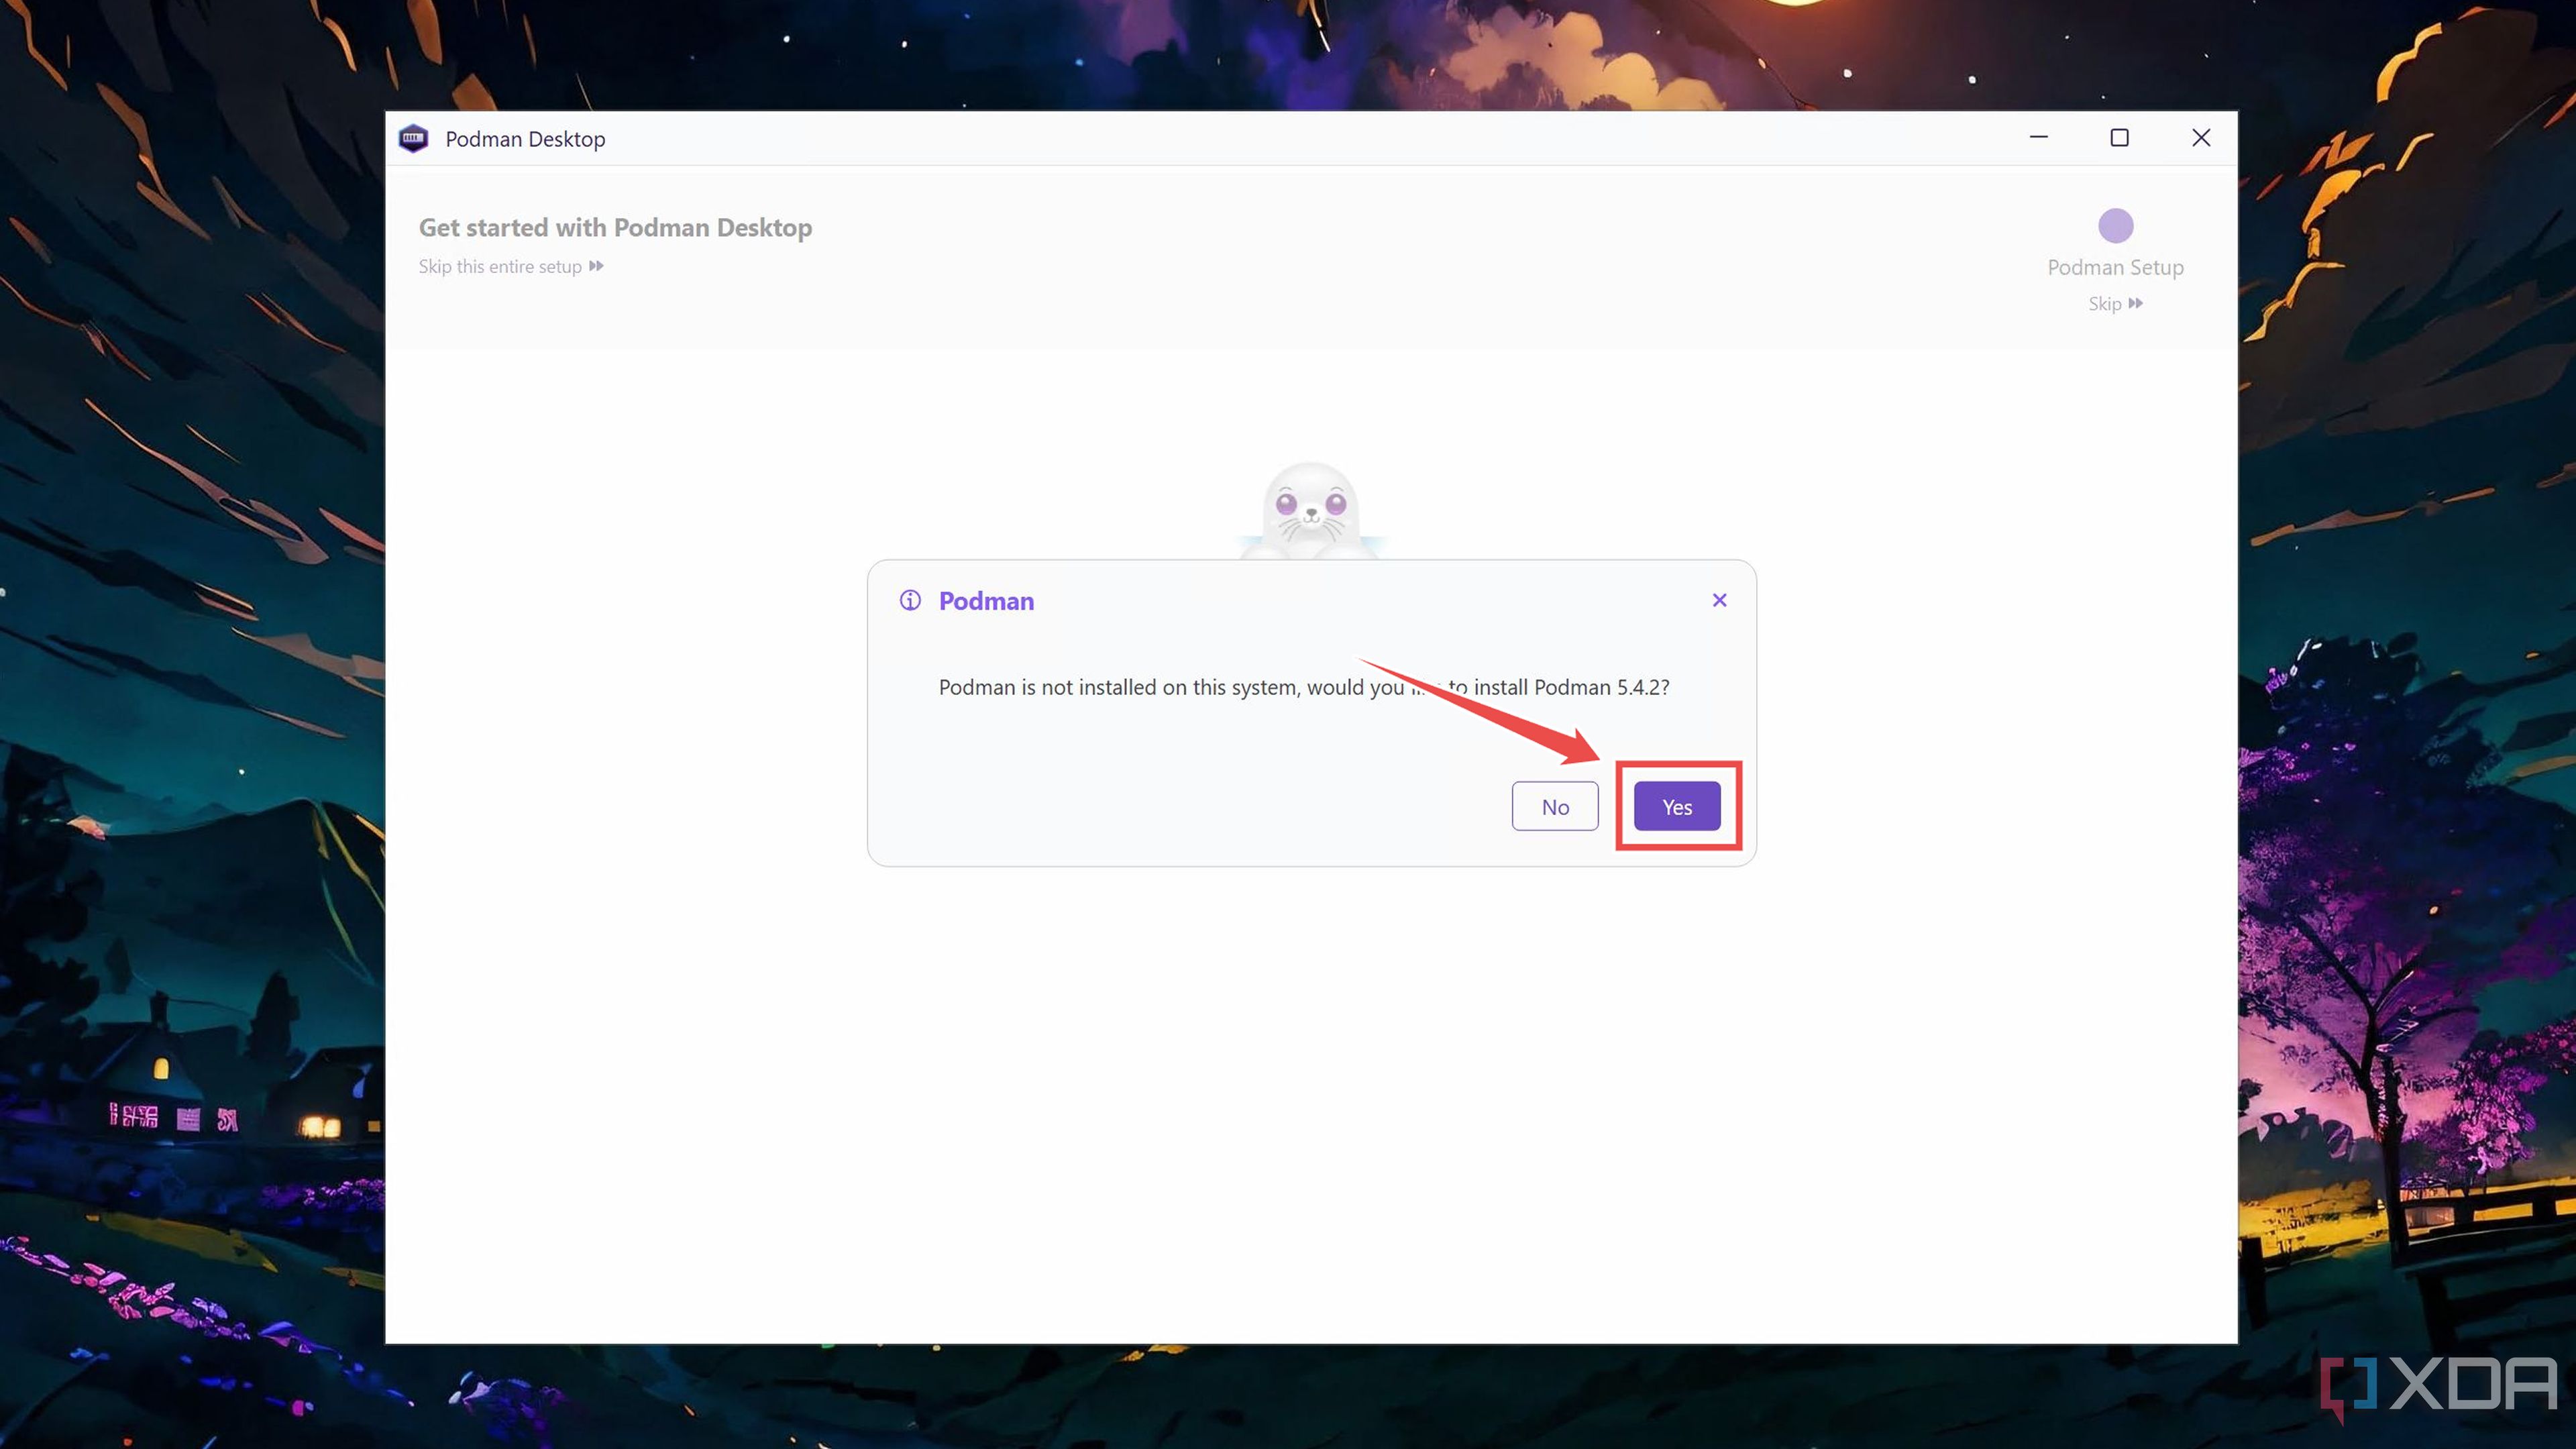
Hit Yes when the prompts you to install Podman.
-
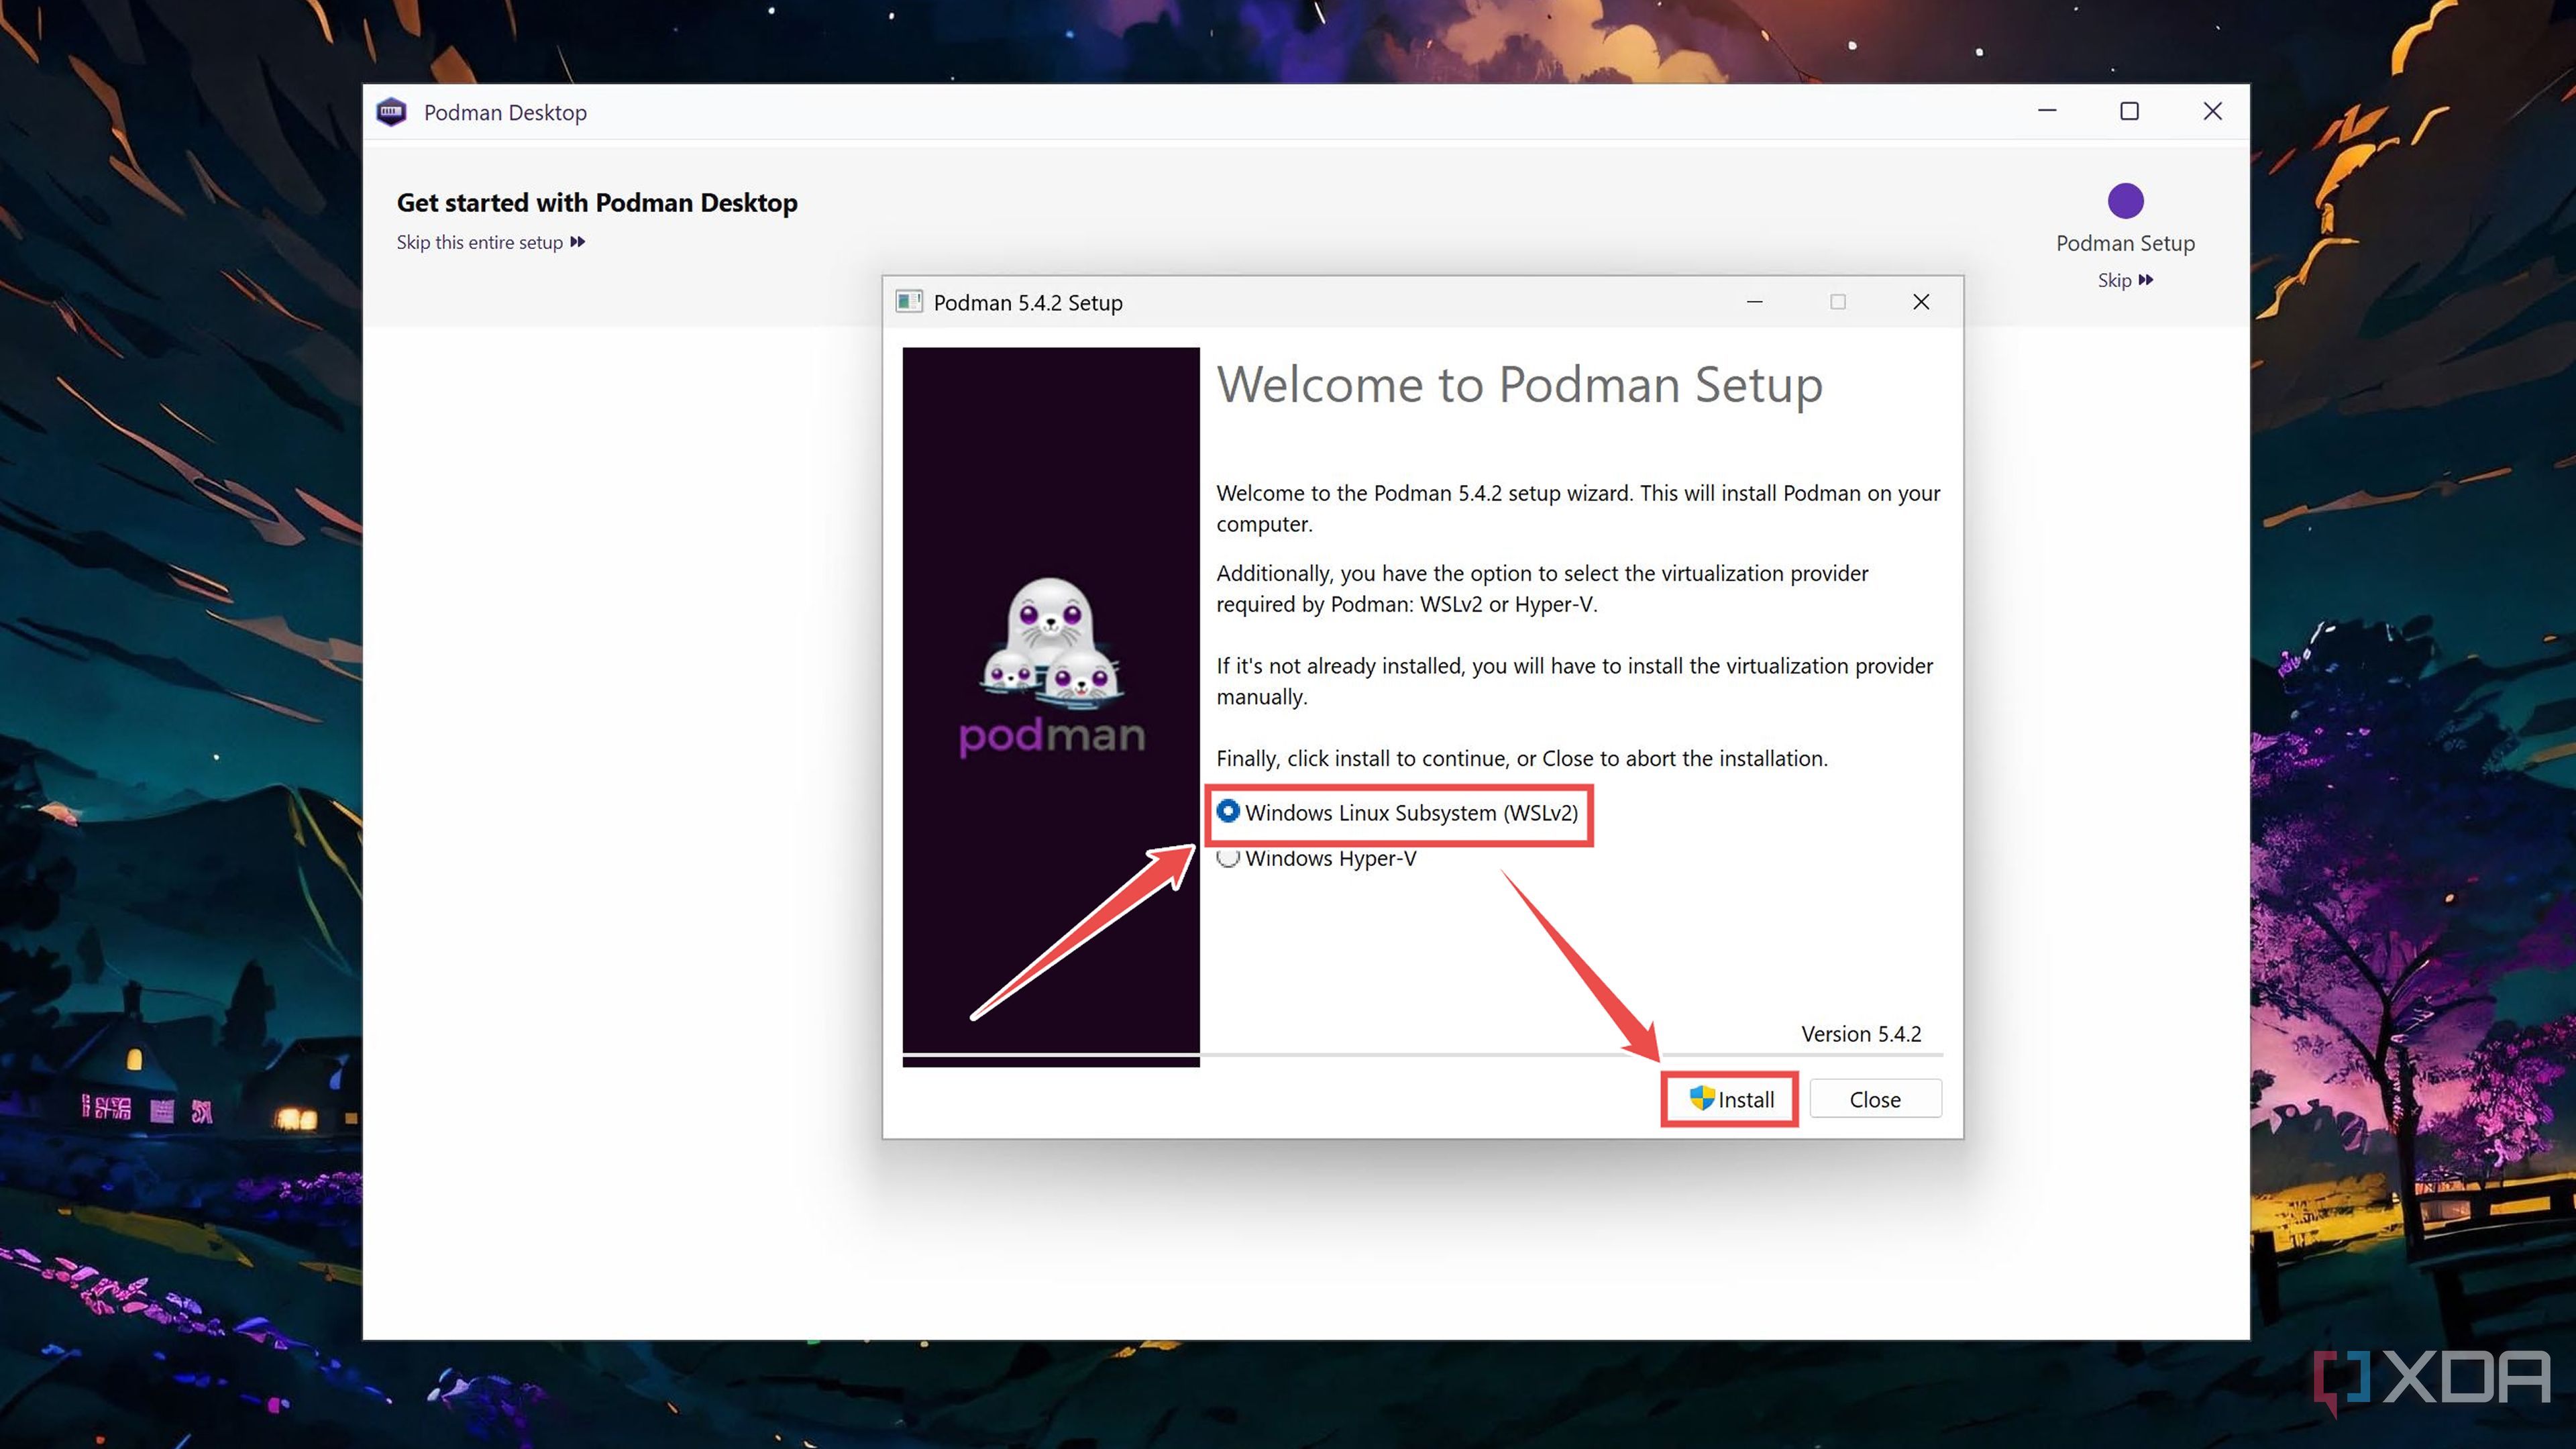
Choose the Windows Linux Subsystem (WSLv2) option inside the pop-up window and press Install.
-
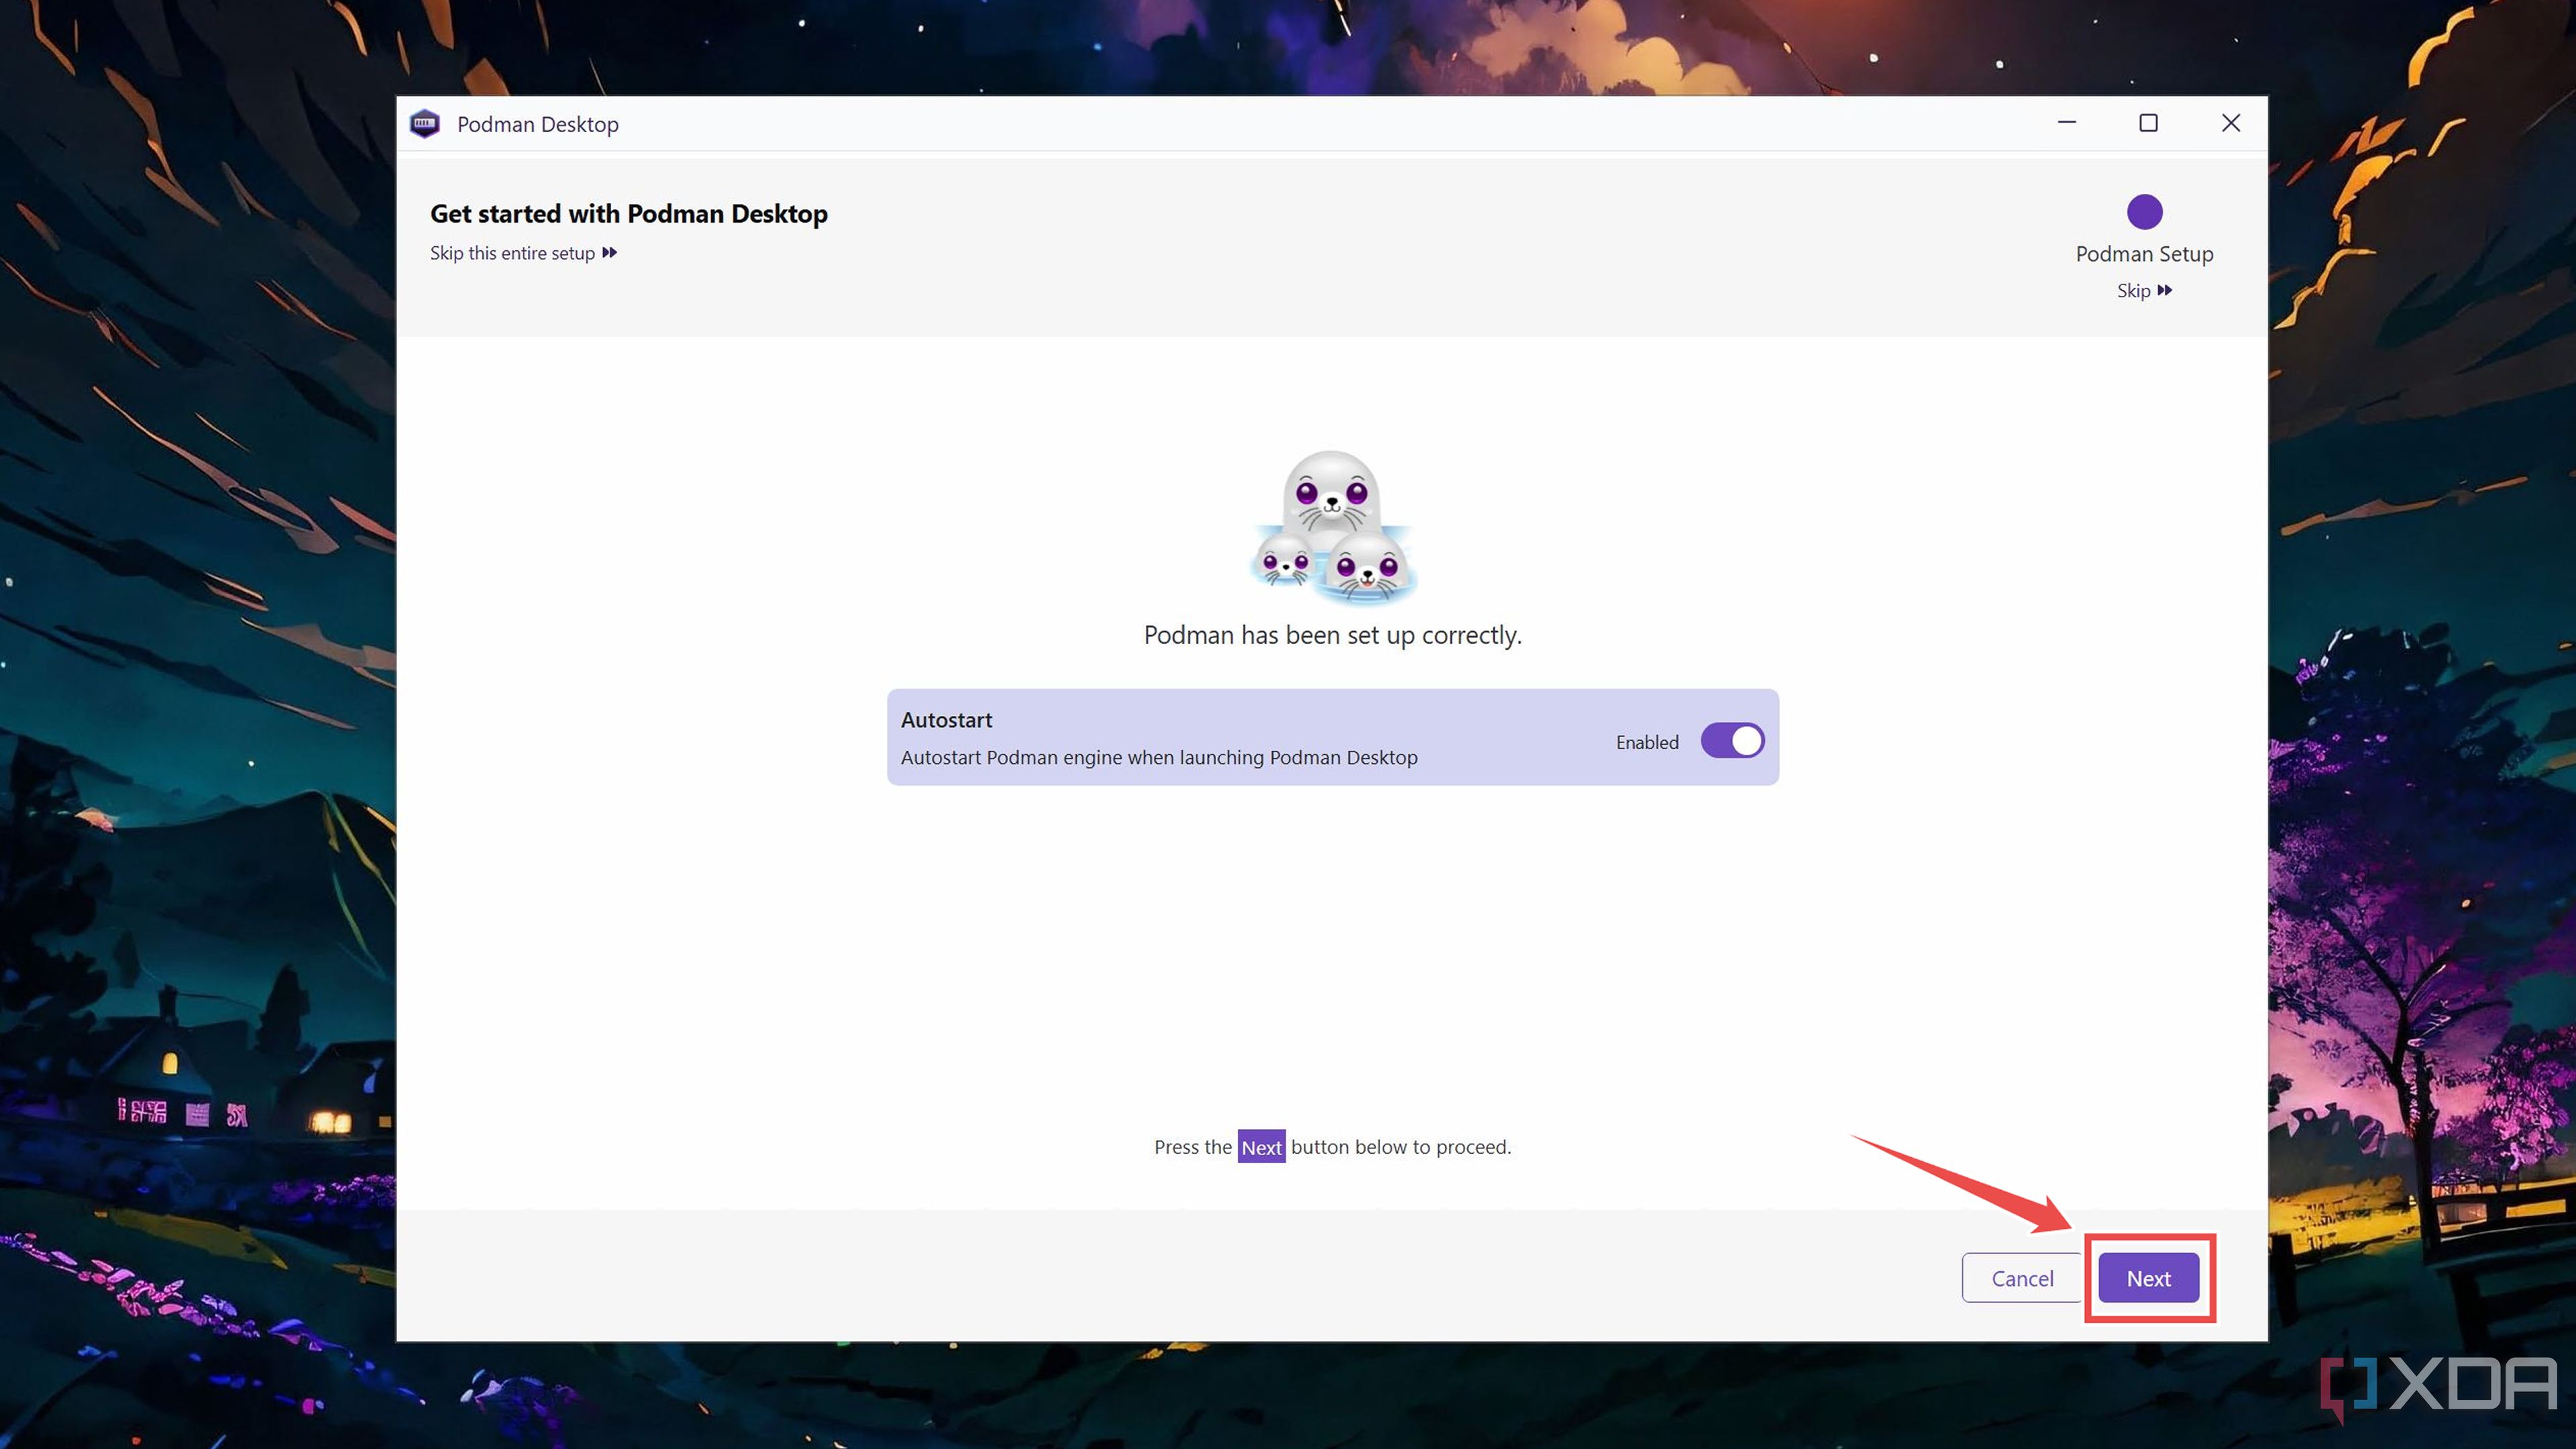
Press Yes when UAC prompts you for approval and tap Close once Podman is installed on your PC.

-
Click Next twice to configure the Podman Desktop installation.
-
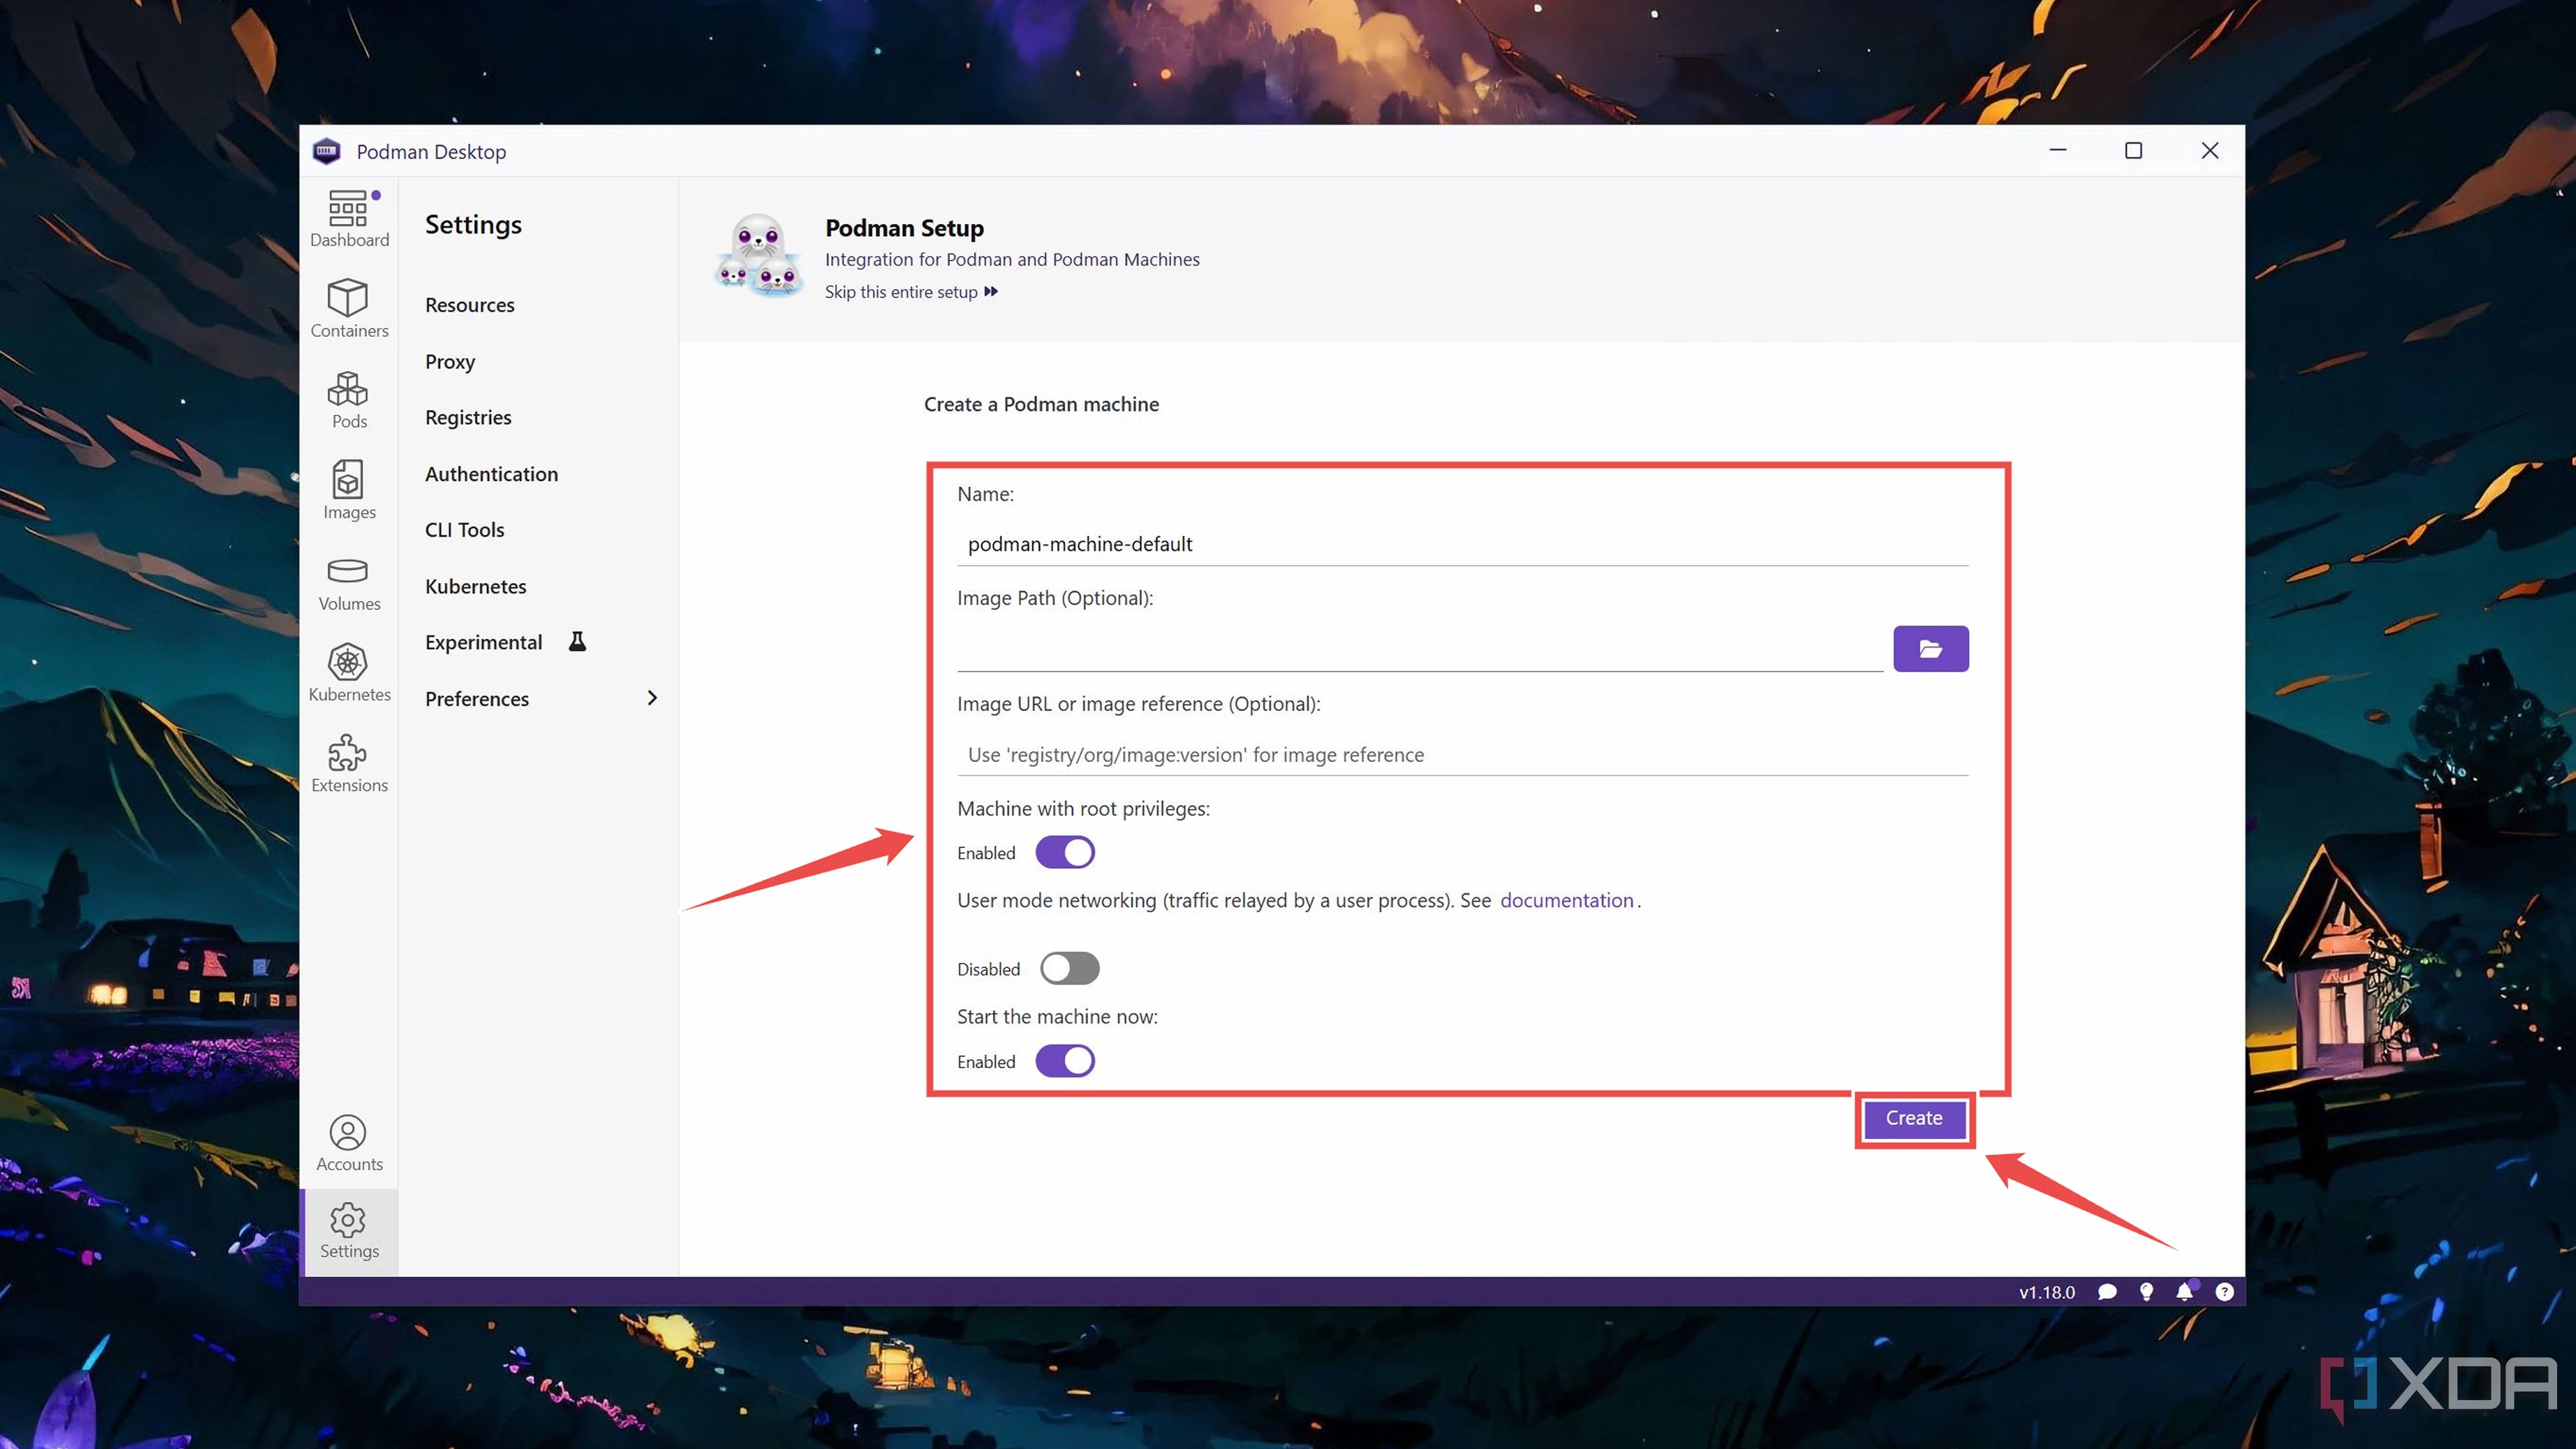
Enter the Name, Image Path, and other settings before tapping the Create button.


Deploying a container in Podman
Now that Podman Desktop is configured, it’s time to arm it with a couple of containers.
-
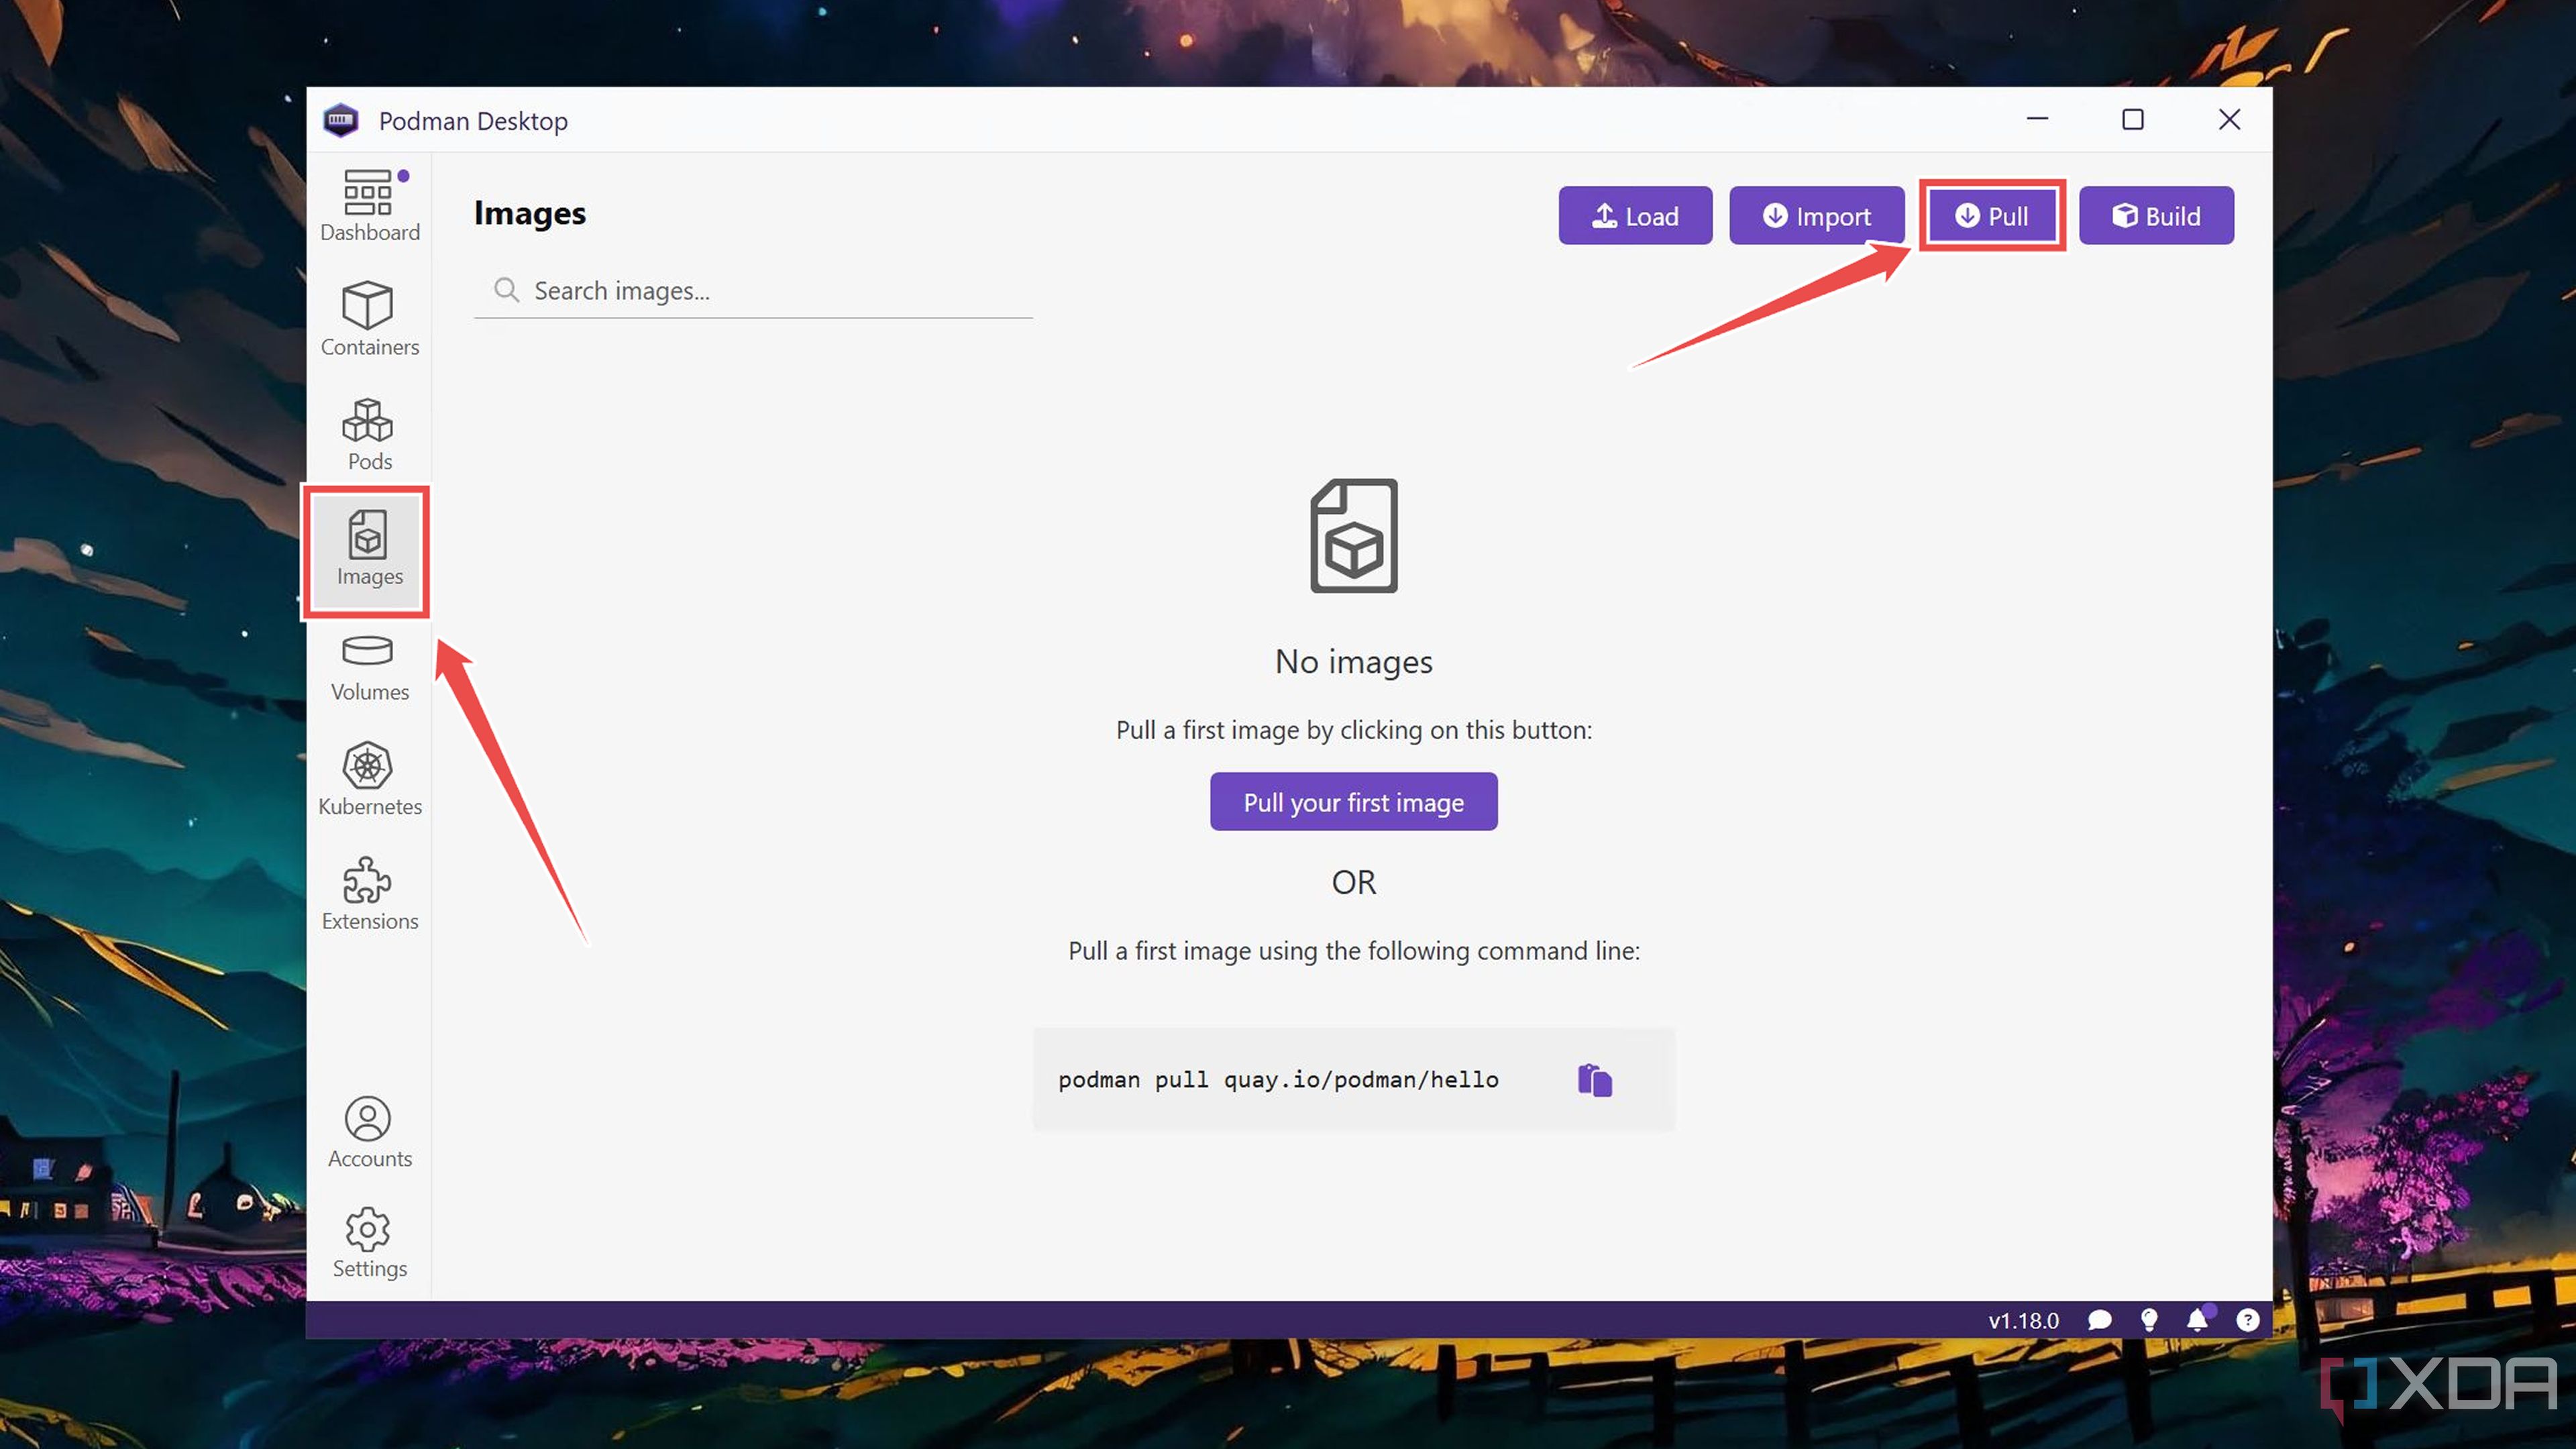
Open the Image tab in the app and tap the Pull button.
-
Type the name of the image into the Search Bar, and hit Pull Image.
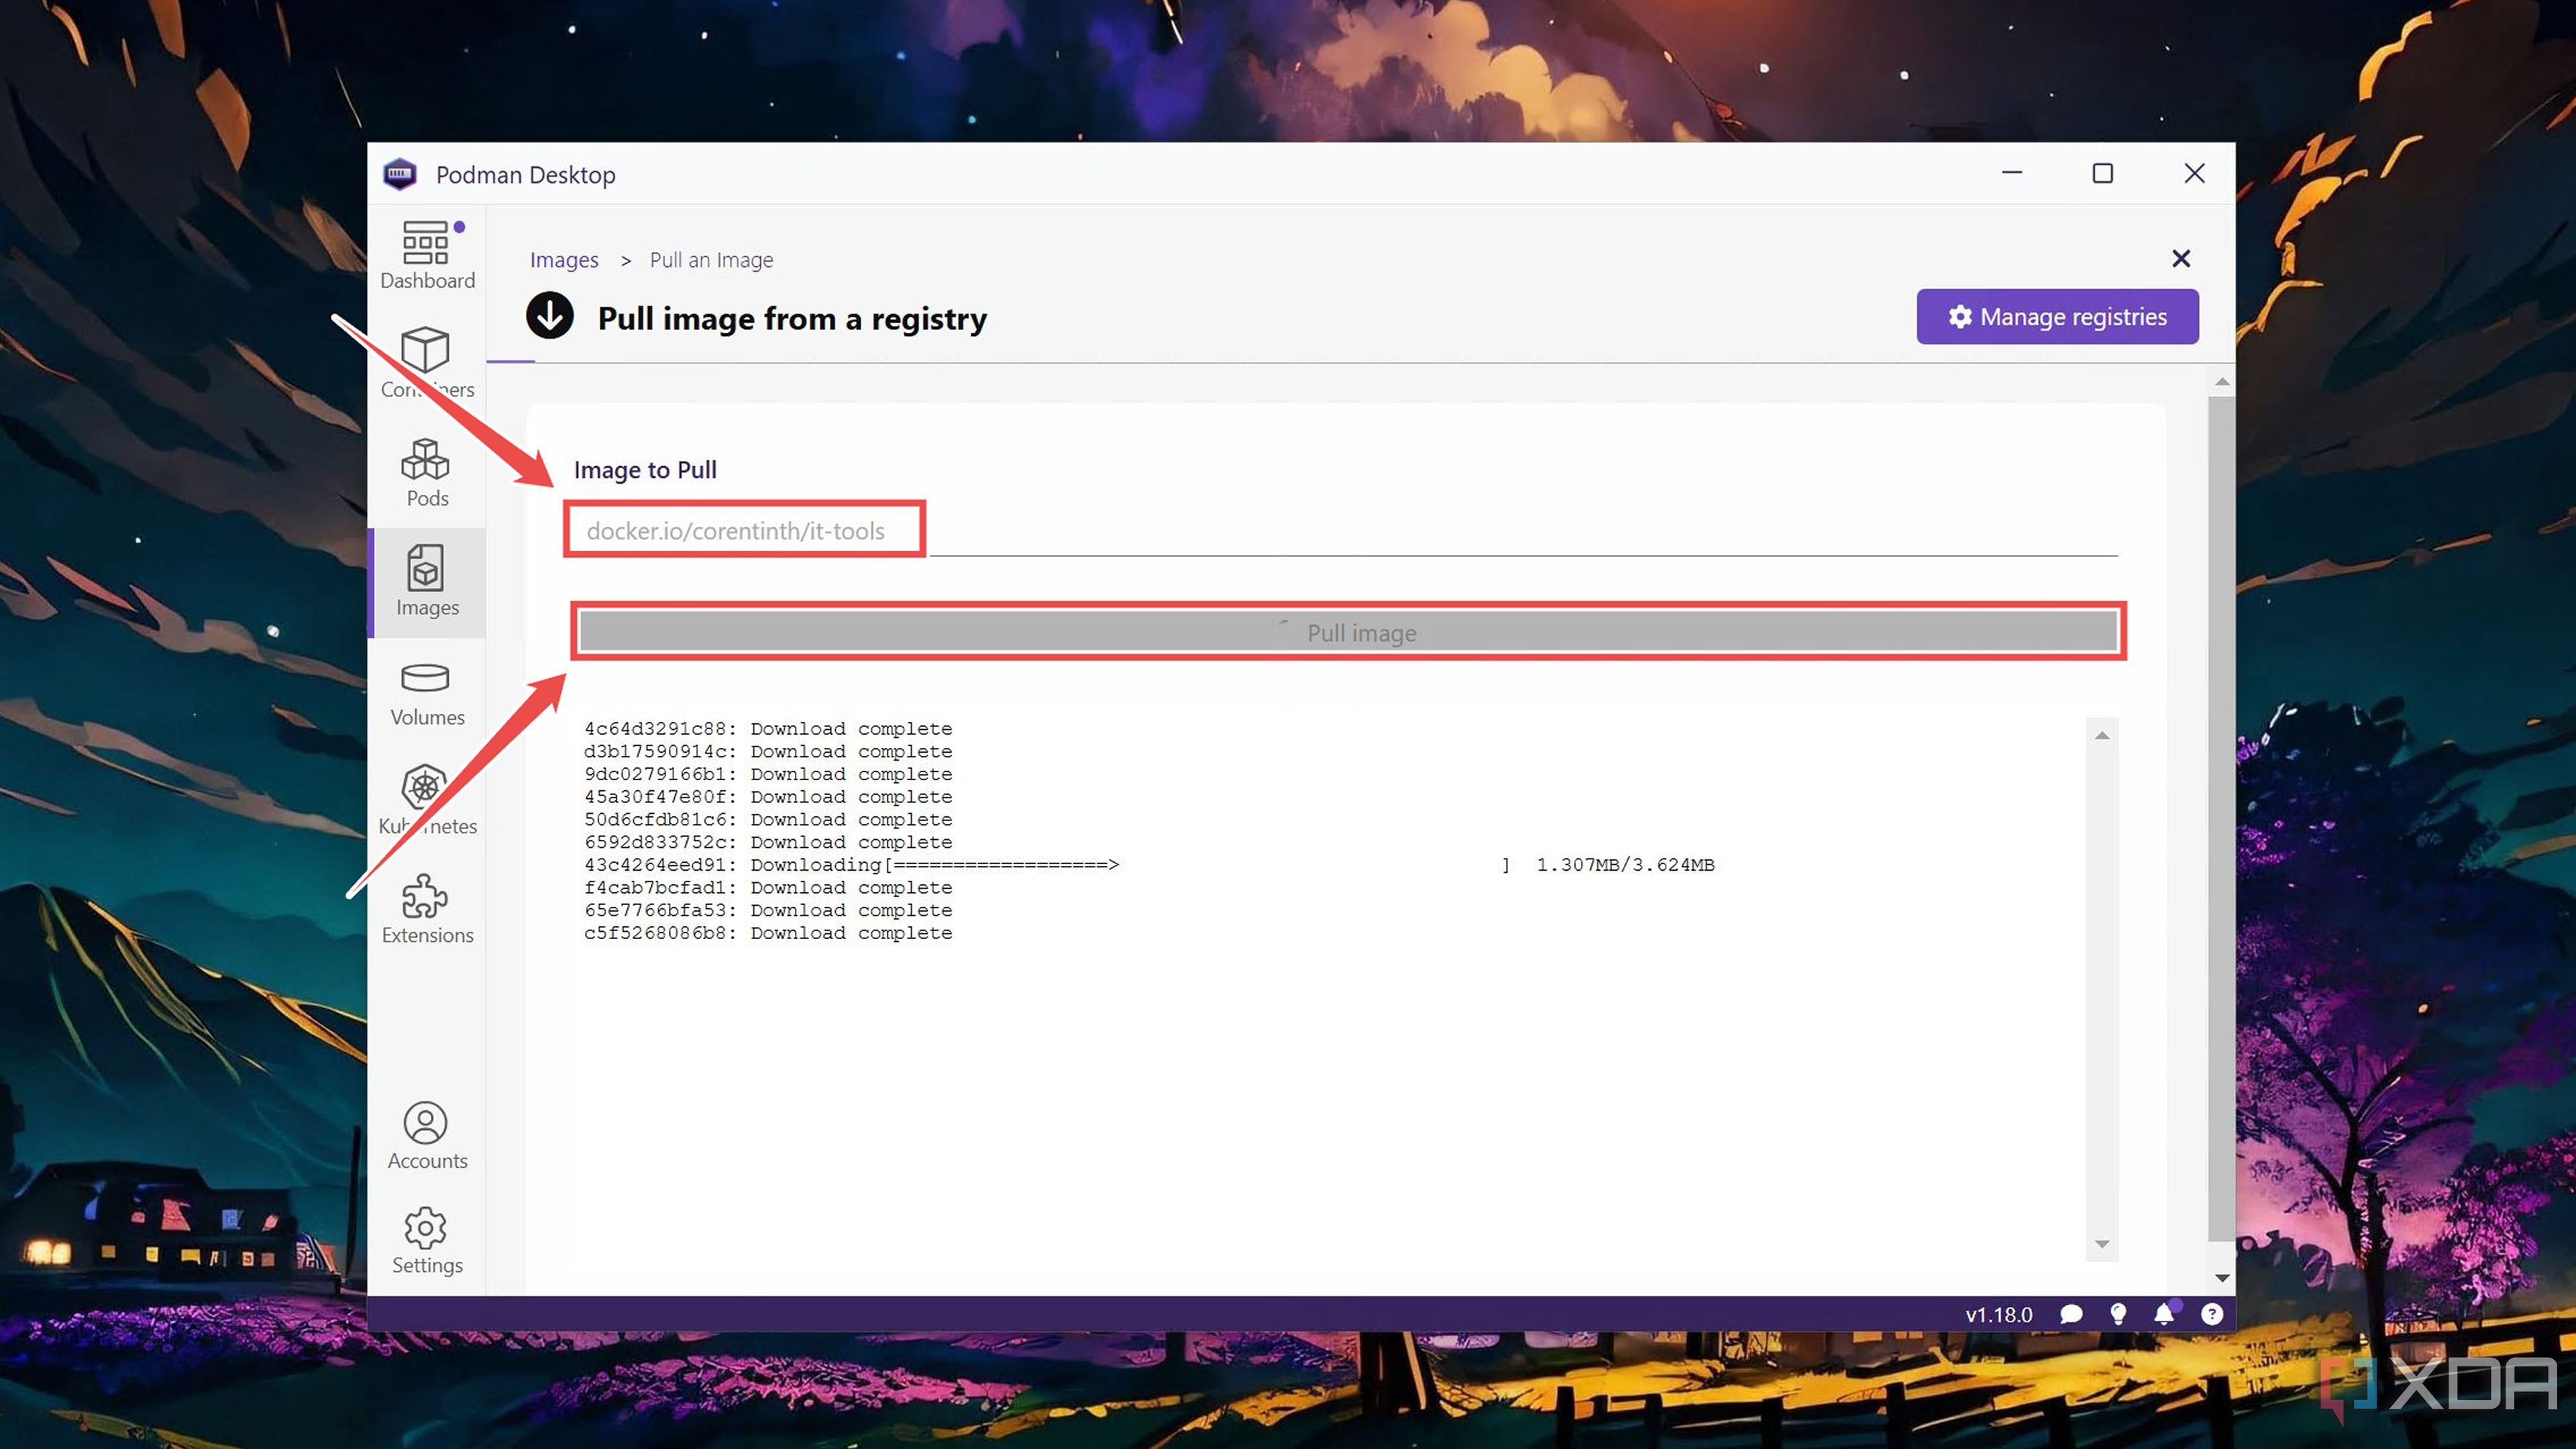
Even without relying on the Docker extension, you can use the images from Docker Hub by following the docker.io/image/name format. I’ve used IT-Tools (docker.io/corentinth/it-tools) in this tutorial.
-
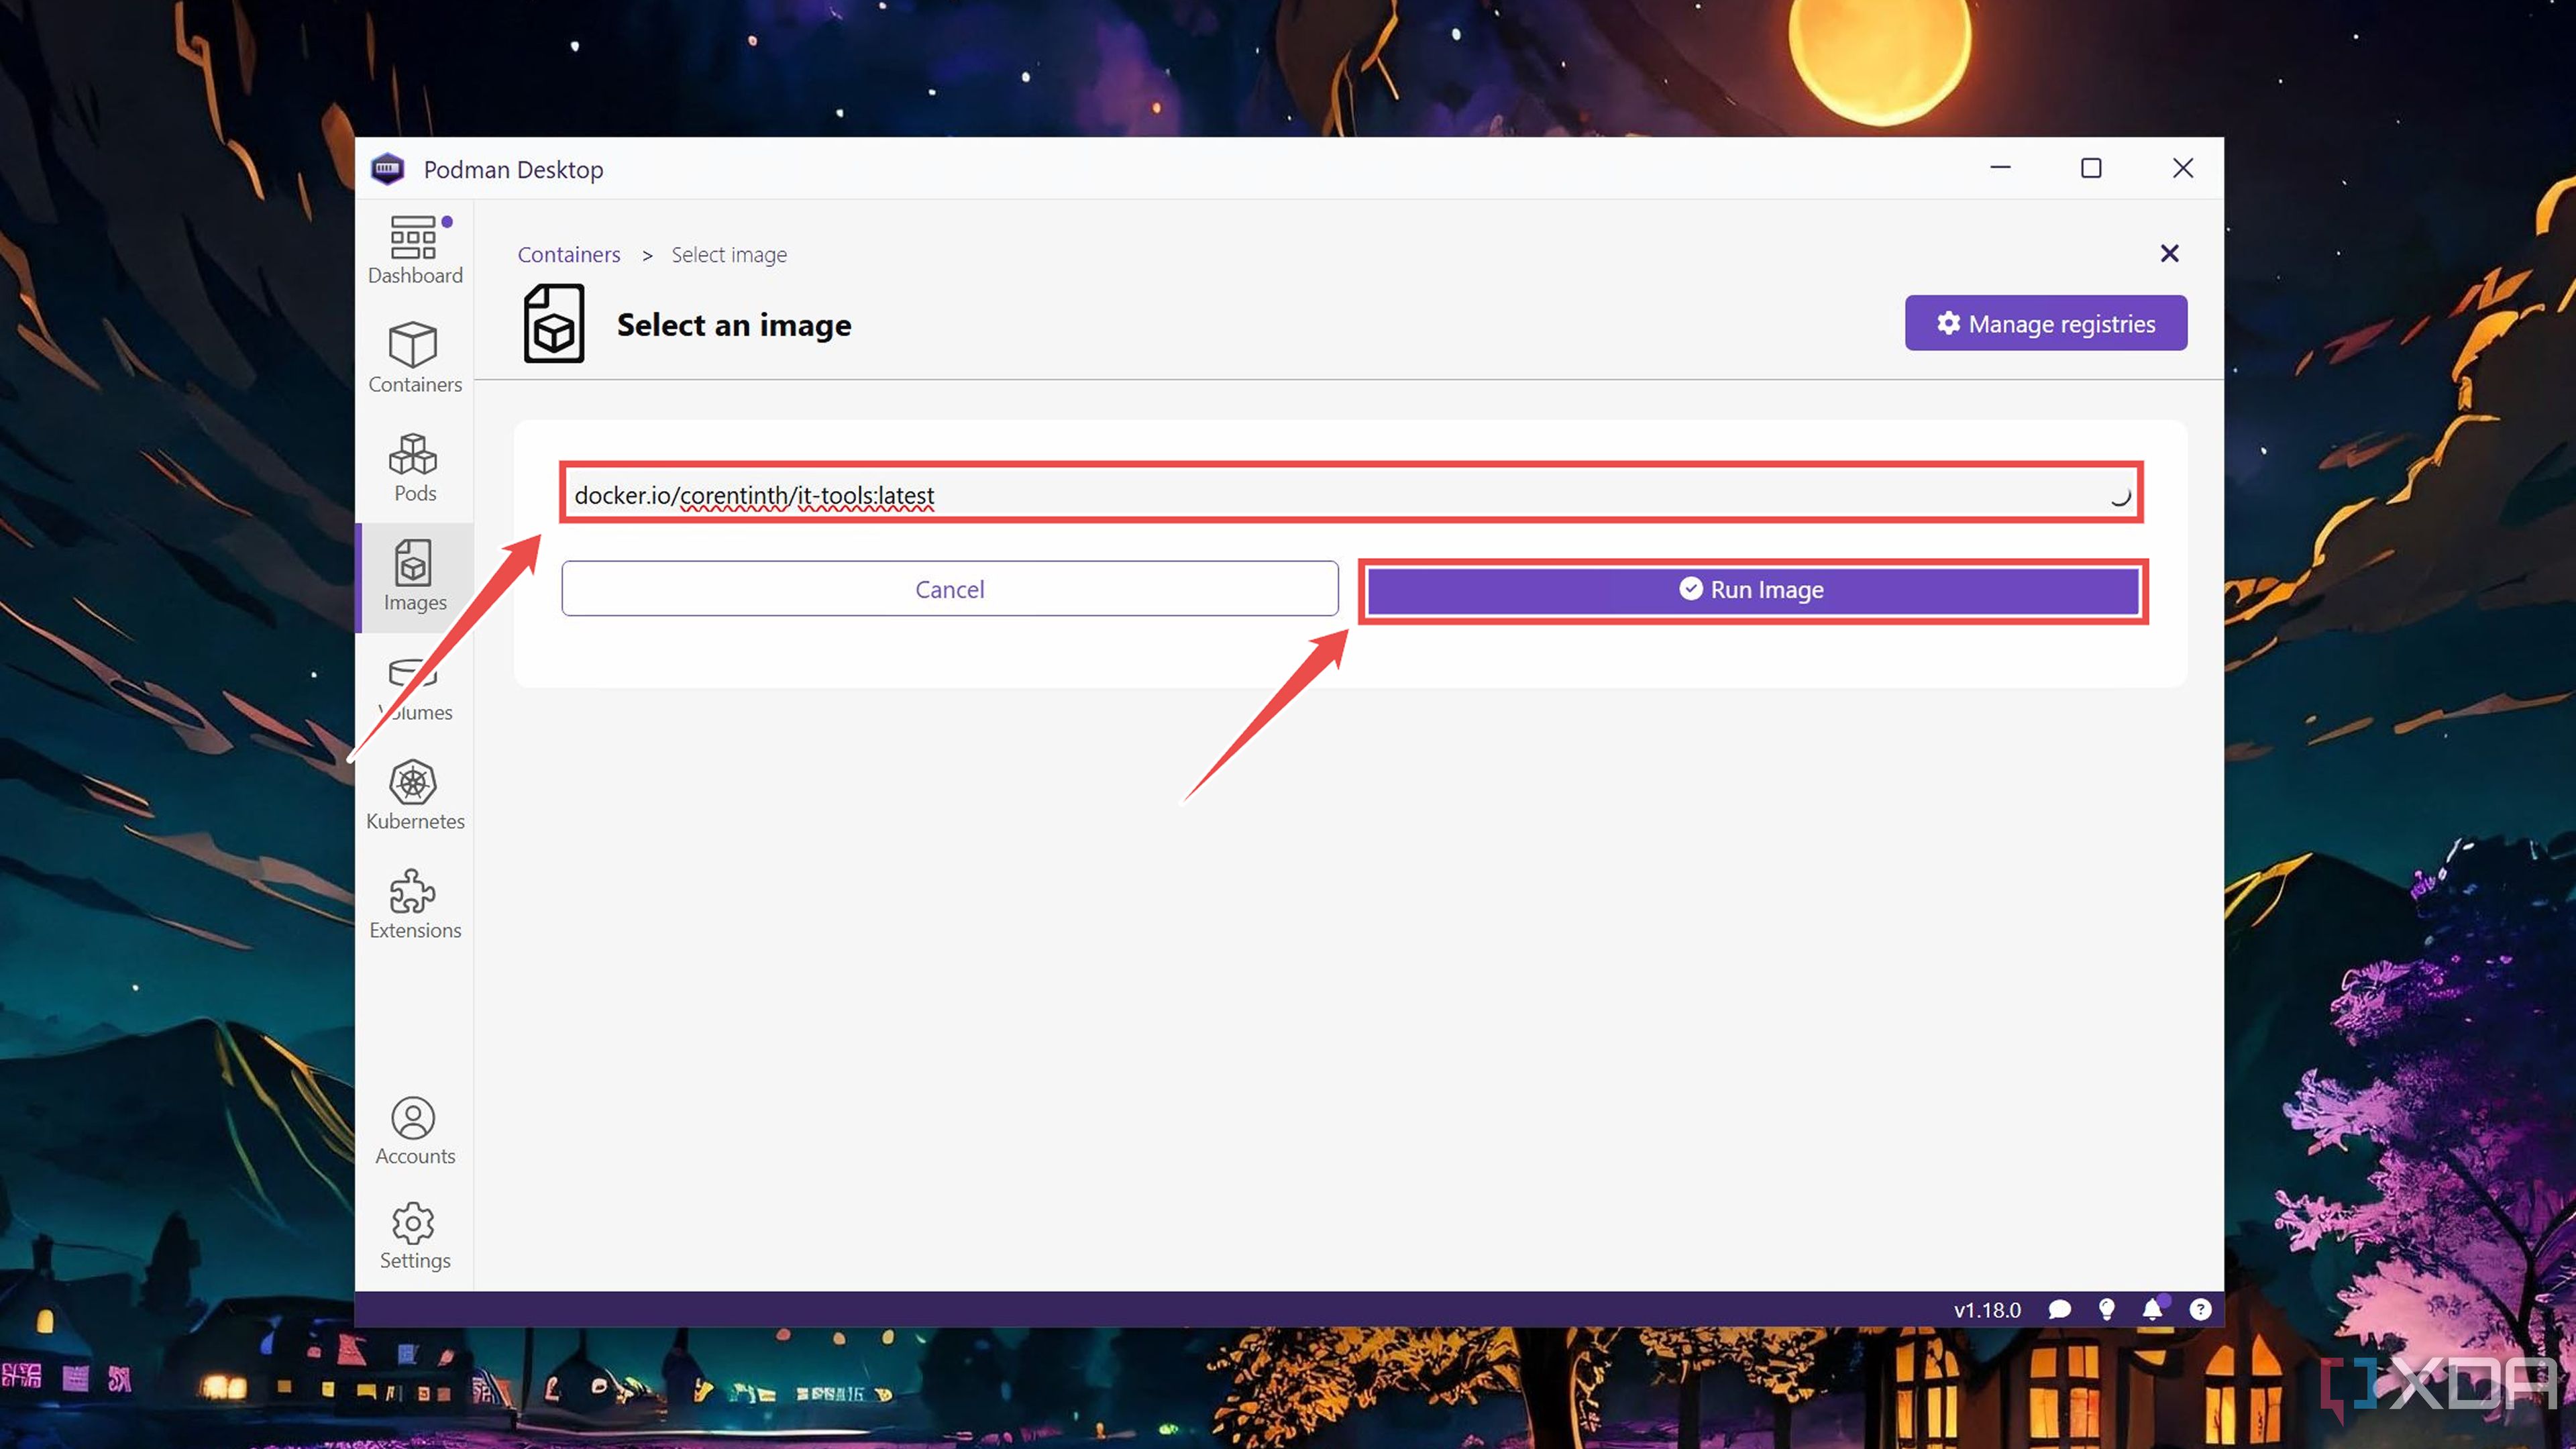
Once Podman Desktop has pulled the image, switch to the Containers tab, tap the Create button, and choose Existing image inside the pop-up window.
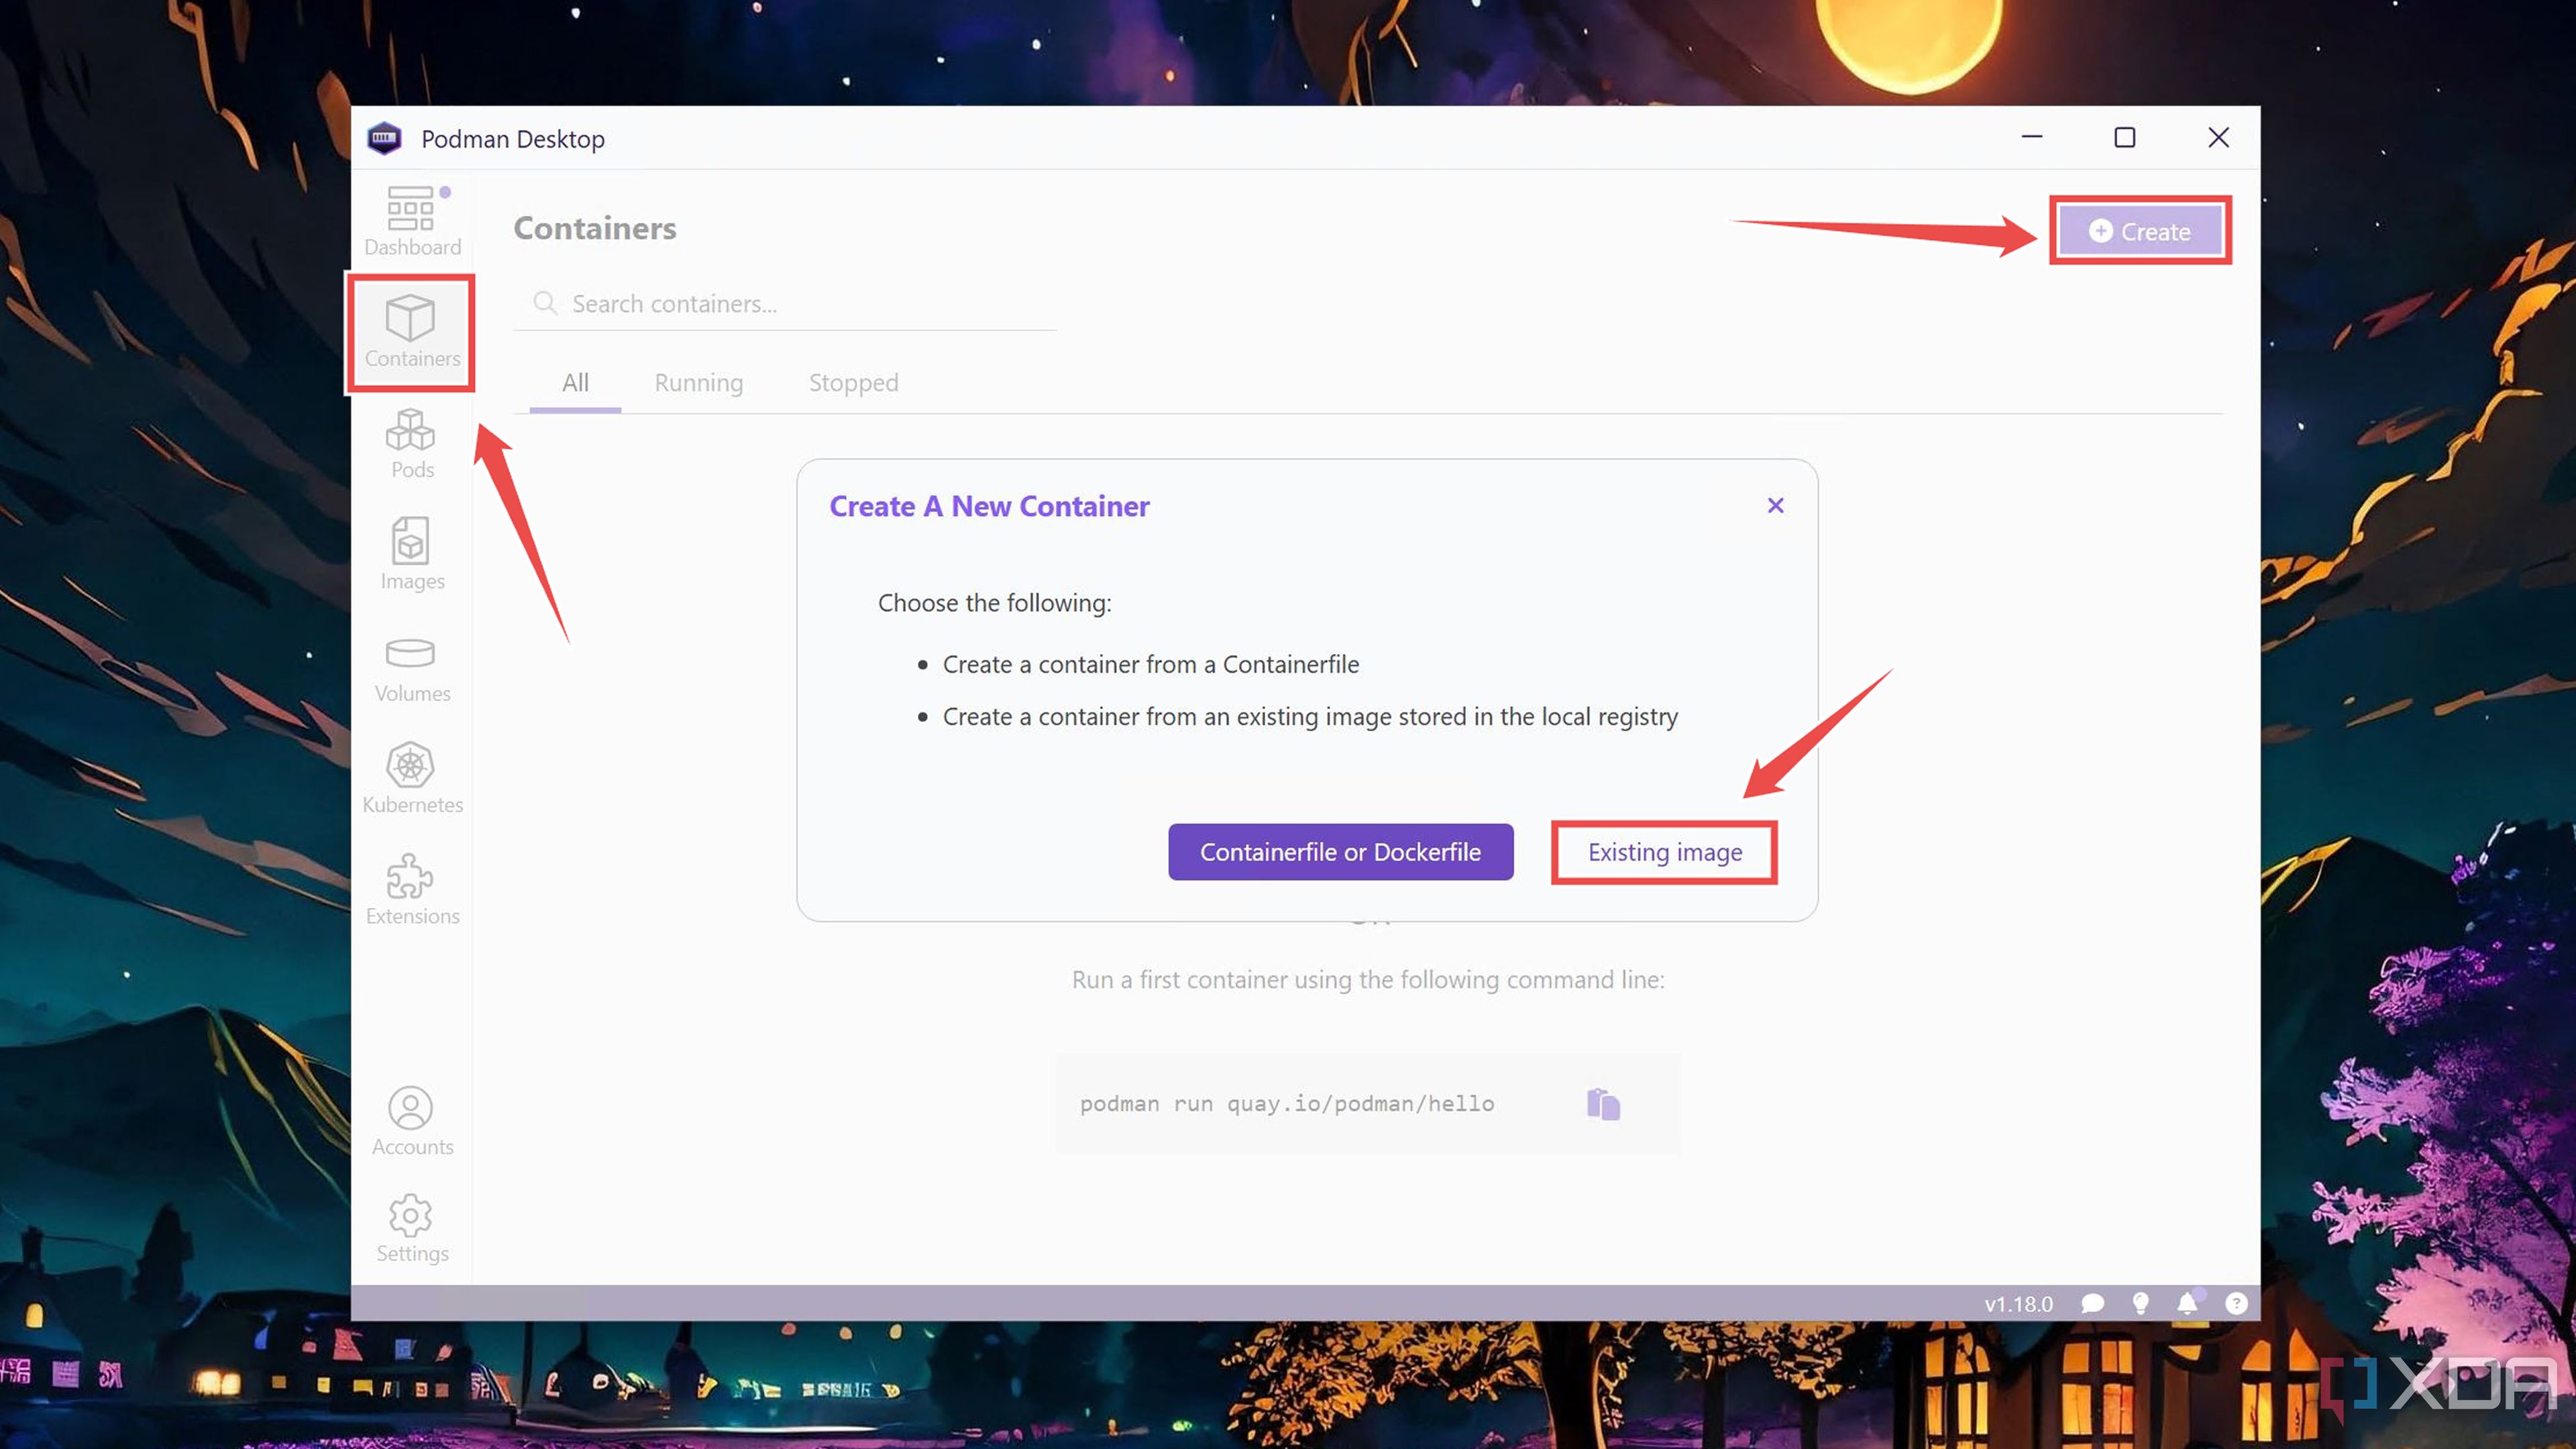
-
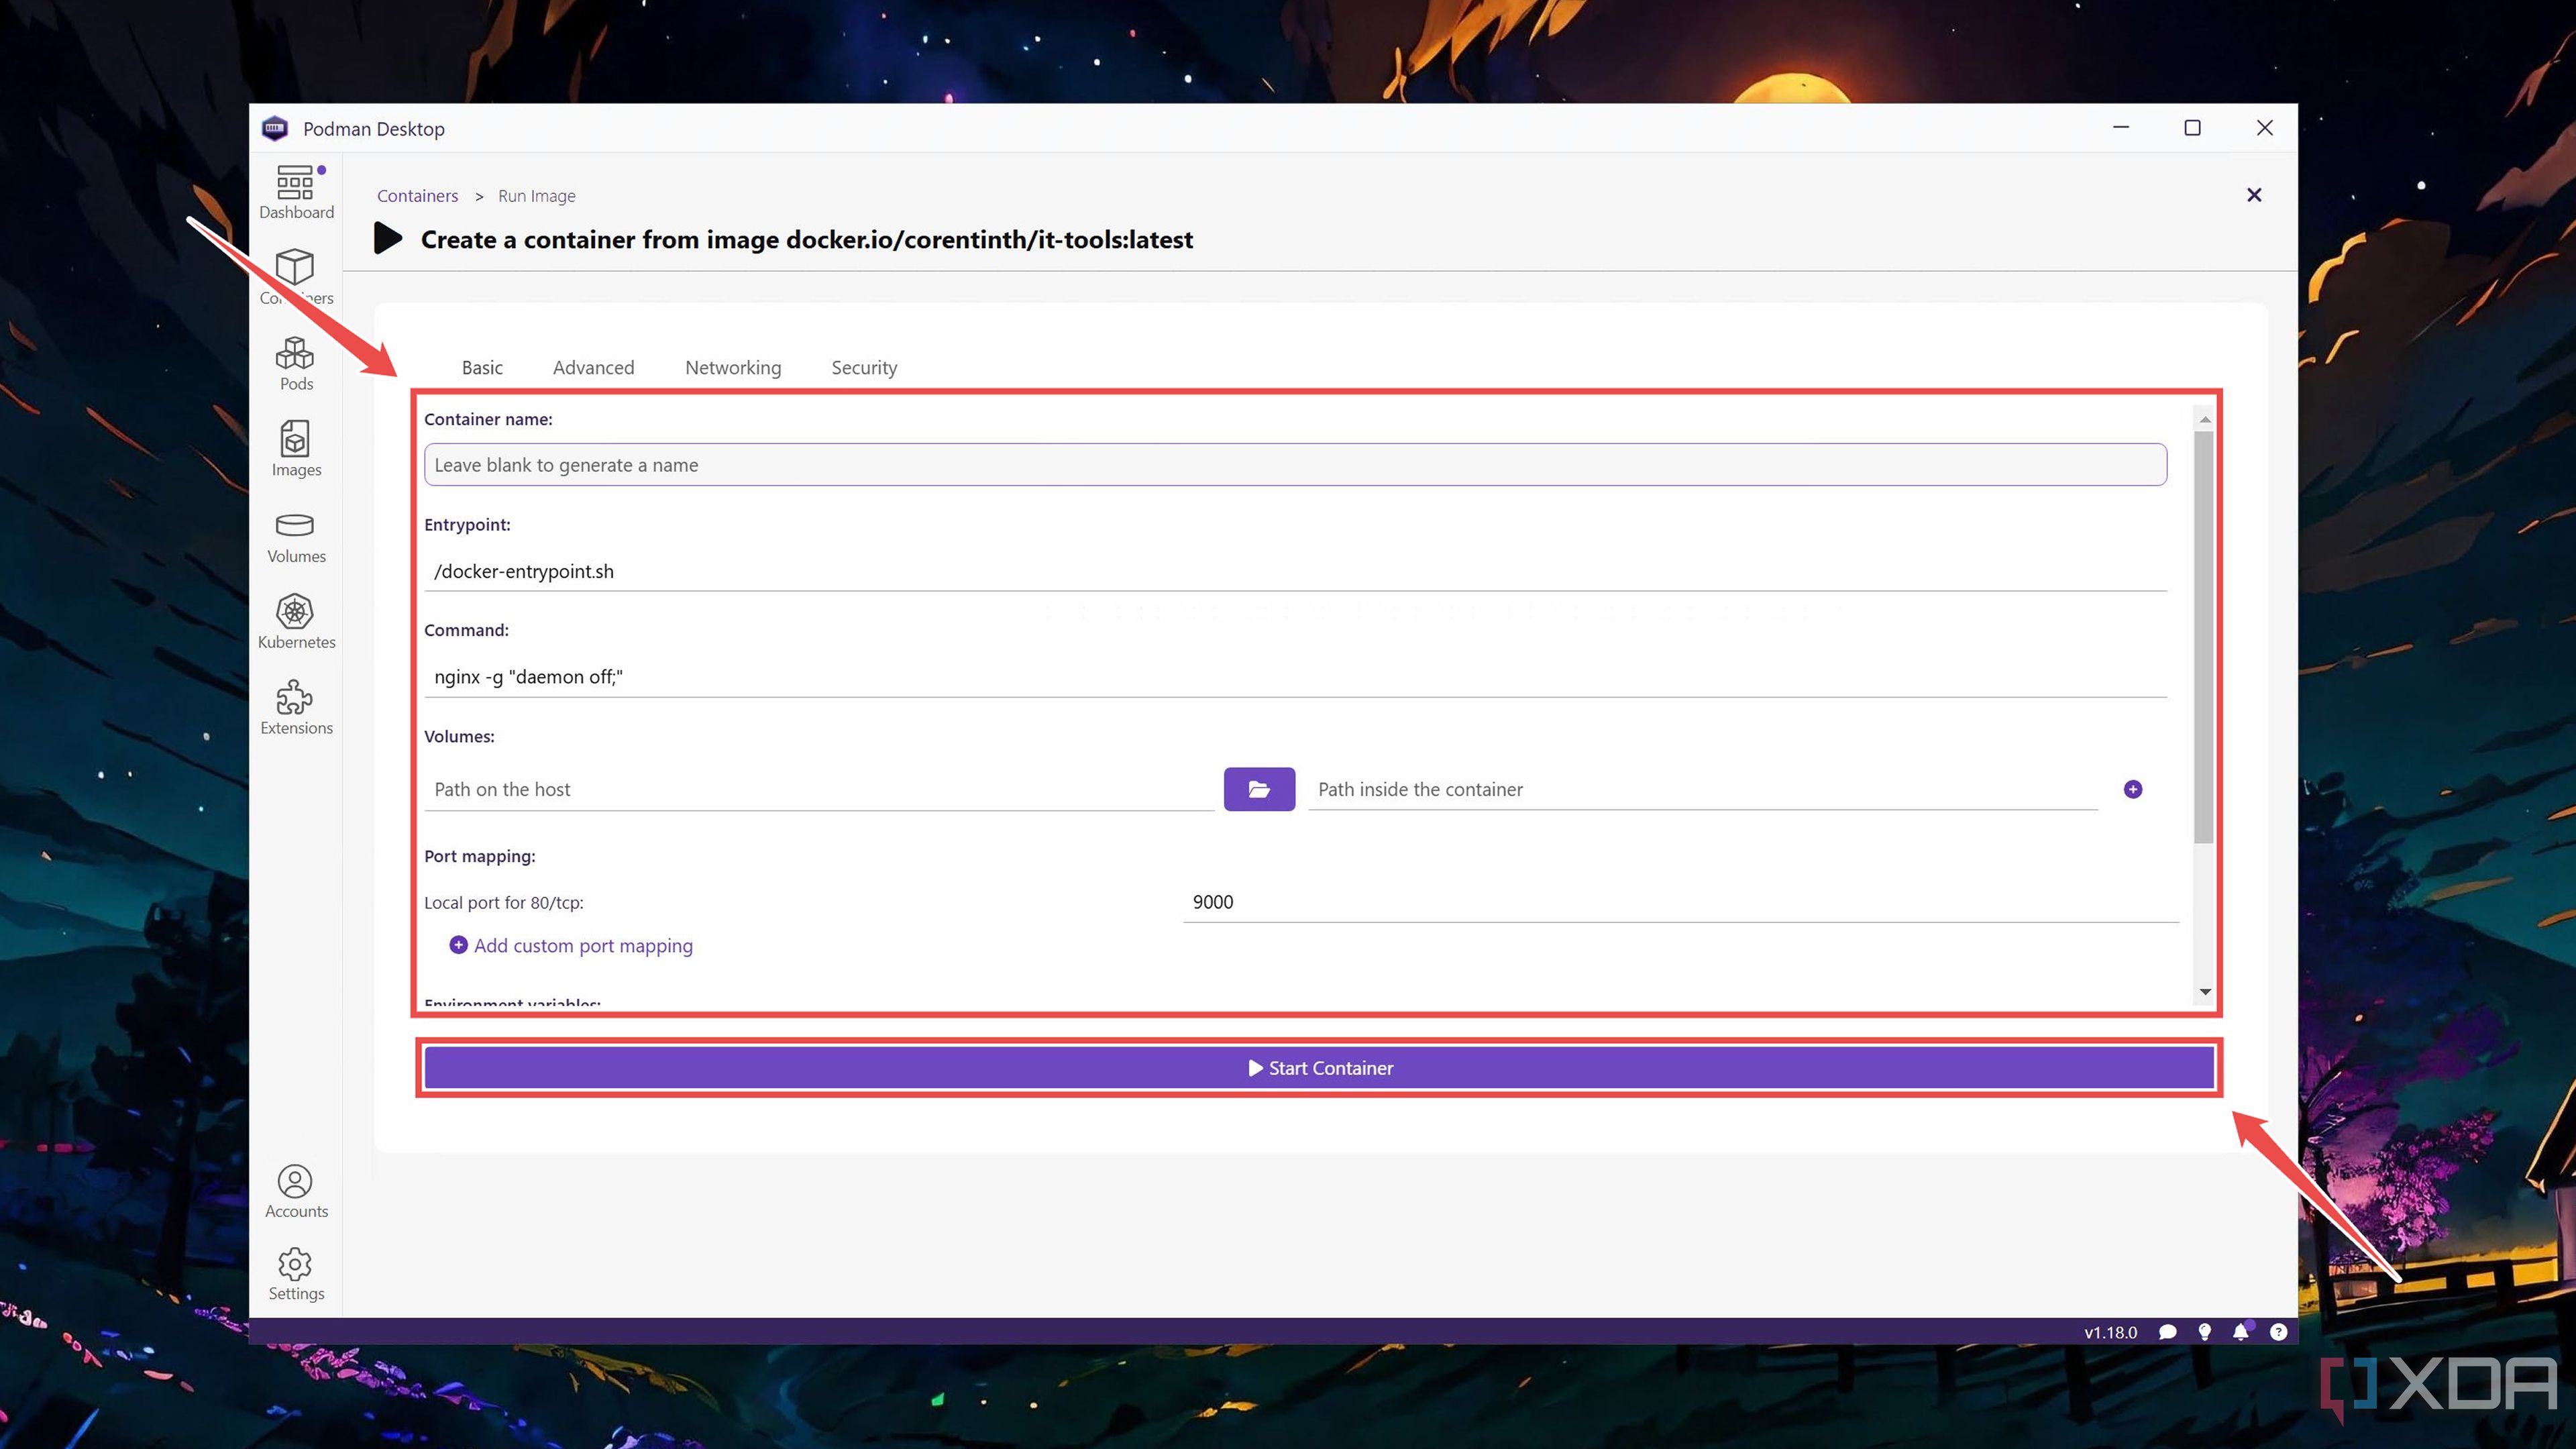
Pick the Image you pulled earlier and click on Run Image.
-
Enter the Container name, choose the directory path you wish to use as its (storage) Volume, select the port number associated with the service, and tap Start Container.


Turn Windows 11 into a reliable Podman Desktop server
Assuming you’ve followed the steps correctly, Podman Desktop will deploy the container with the image. If you want to access its web UI, you can type localhost:9000 into your web browser. By default, Podman Desktop includes Red Hat Quay, GitHub, and Google Container Registry in addition to Docker Registry, and you might want to check them out if you want more images for your container.
Alternatively, you can whip up a container from Dockerfile or Containerfile instead of images, though I prefer using the latter since they’re easier to pull. If you’re still a staunch follower of the Docker faction, you can use the container runtime inside Podman Desktop by grabbing its extension. While we’re on the subject, the app includes extensions for Kubernetes, Headlamp, Kreate, Quadlets, and a bunch of other useful services, so you can transform your Windows 11 desktop into a self-hosting war machine by tweaking a couple of settings inside Podman Desktop.

Related
Docker Swarm vs. Kubernetes: Battle of the container orchestration platforms
One’s a beginner-friendly utility designed for smaller setups, the other’s a robust production tool that’s just as useful for home labs


")


")
