


Summary
- Swapping microSD for SSD on Raspberry Pi dramatically boosts speed and reliability, crucial for resource-intensive projects.
- Minimal components needed for the upgrade include Raspberry Pi 4/5, SSD, USB enclosure, powerful PSU, and cloning tools.
- Go through system patching, EEPROM update, OS flashing, cloning, boot order setting, SSD attachment, and verification for seamless transition.
For years, I relied on microSD cards as the go-to storage for all my Raspberry Pi projects. They’re cheap, easy to swap, and get the job done — for a while. But the more I leaned on my Pi for actual services, not just hobby experiments, the more the cracks started to show. Performance lagged, and I hit the wall with corrupted cards way too often.
Eventually, I’d had enough. I switched to SSD booting, and I haven’t looked back. It wasn’t just a quality-of-life upgrade — it made my Pi feel like a full-fledged computer. Here’s what pushed me to abandon SD cards, what you need to make the change, and exactly how I pulled it off.

Related
5 devices you can connect to the PCIe slot on the Raspberry Pi 5
The PCIe interface lets you add some cool and wacky peripherals to your Raspberry Pi 5
Why I ditched microSD cards and switched to SSD storage
Slow cards sabotaged my favorite projects
My Raspberry Pi has powered everything from a Home Assistant hub to a personal Git server, yet microSD cards constantly mess with my uptime. They corrupted after power flickers, dragged through package updates, and throttled whenever the root file system filled up. Each failure sent me hunting through logs on a different machine because the Pi refused to mount cleanly. After the third late-night rescue in as many months, I decided the fragile flash had to go. An SSD felt like the obvious upgrade waiting for me to act on it.
A quick benchmark sealed the decision. An entry‑level SATA SSD in a USB 3.0 enclosure hit 300MB/s reads — roughly ten times my best‑performing microSD card. Write speeds jumped even more, which matters when databases or log files hammer the drive. Those numbers were not just vanity metrics; they translated into smoother Plex streaming and faster Home Assistant restarts. Once I tasted that extra headroom, returning to a card felt unthinkable.
Gear you need for SSD booting your Raspberry Pi 4B or 5
Affordable parts that work without surprises
Switching to SSD booting only takes a handful of components you might already own. First on the list is a Raspberry Pi 4 or the newer Pi 5 running the latest bootloader firmware; earlier boards cannot boot USB devices natively. Next, grab a 2.5‑inch SATA or M.2 SATA SSD—120 GB or larger gives plenty of room for Docker layers and backups. Pair the drive with a powered USB 3.0 enclosure for the Pi 4 or a PCIe‑to‑M.2 HAT if you are lucky enough to have a Pi 5.
Do not forget a solid 3‑amp (or higher) USB‑C power supply, because undervoltage warnings can sneak in when an SSD draws more current during heavy writes. Finally, keep a second computer handy for flashing images and cloning data. The entire bundle costs less than two premium microSD cards, yet the boost in reliability and speed is dramatic.
Step‑by‑step move to SSD boot
Follow along and avoid rookie mistakes
The process takes about 20 minutes, including coffee‑refill time. Read the rundown once, then march through each step to avoid surprises.
-
Fully patch the system on microSD by running
sudo apt update && sudo apt full-upgradeto bring your OS and firmware up-to-date.
-
Update the EEPROM with the command
sudo rpi-eeprom-update -ato enable USB or PCIe boot on Pi 4 and Pi 5; reboot afterward.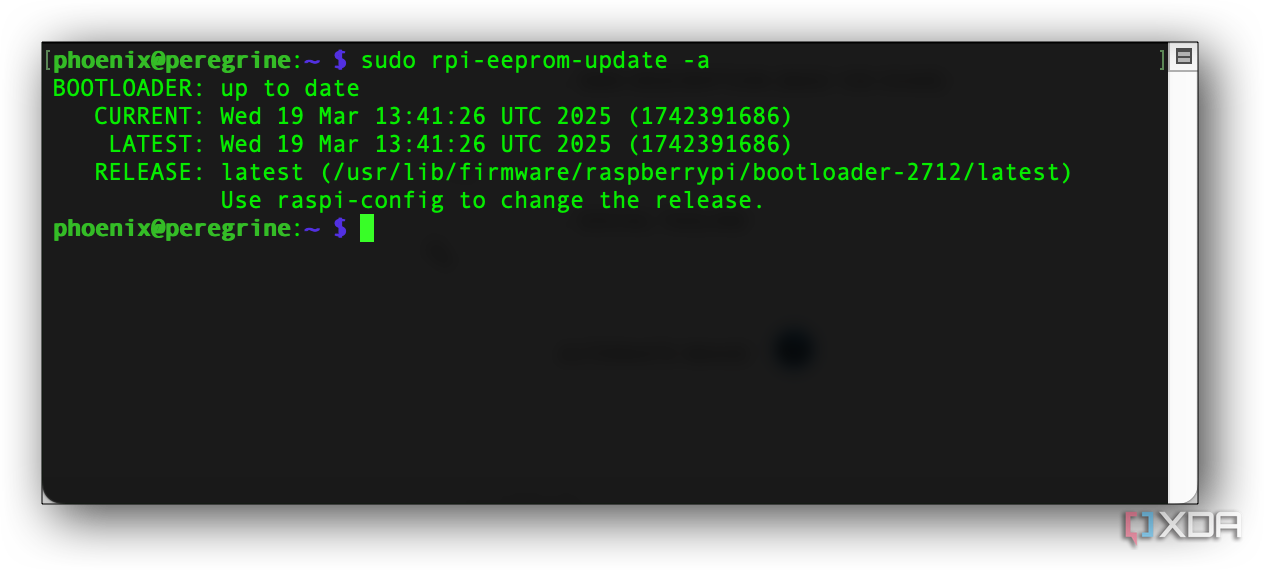
-
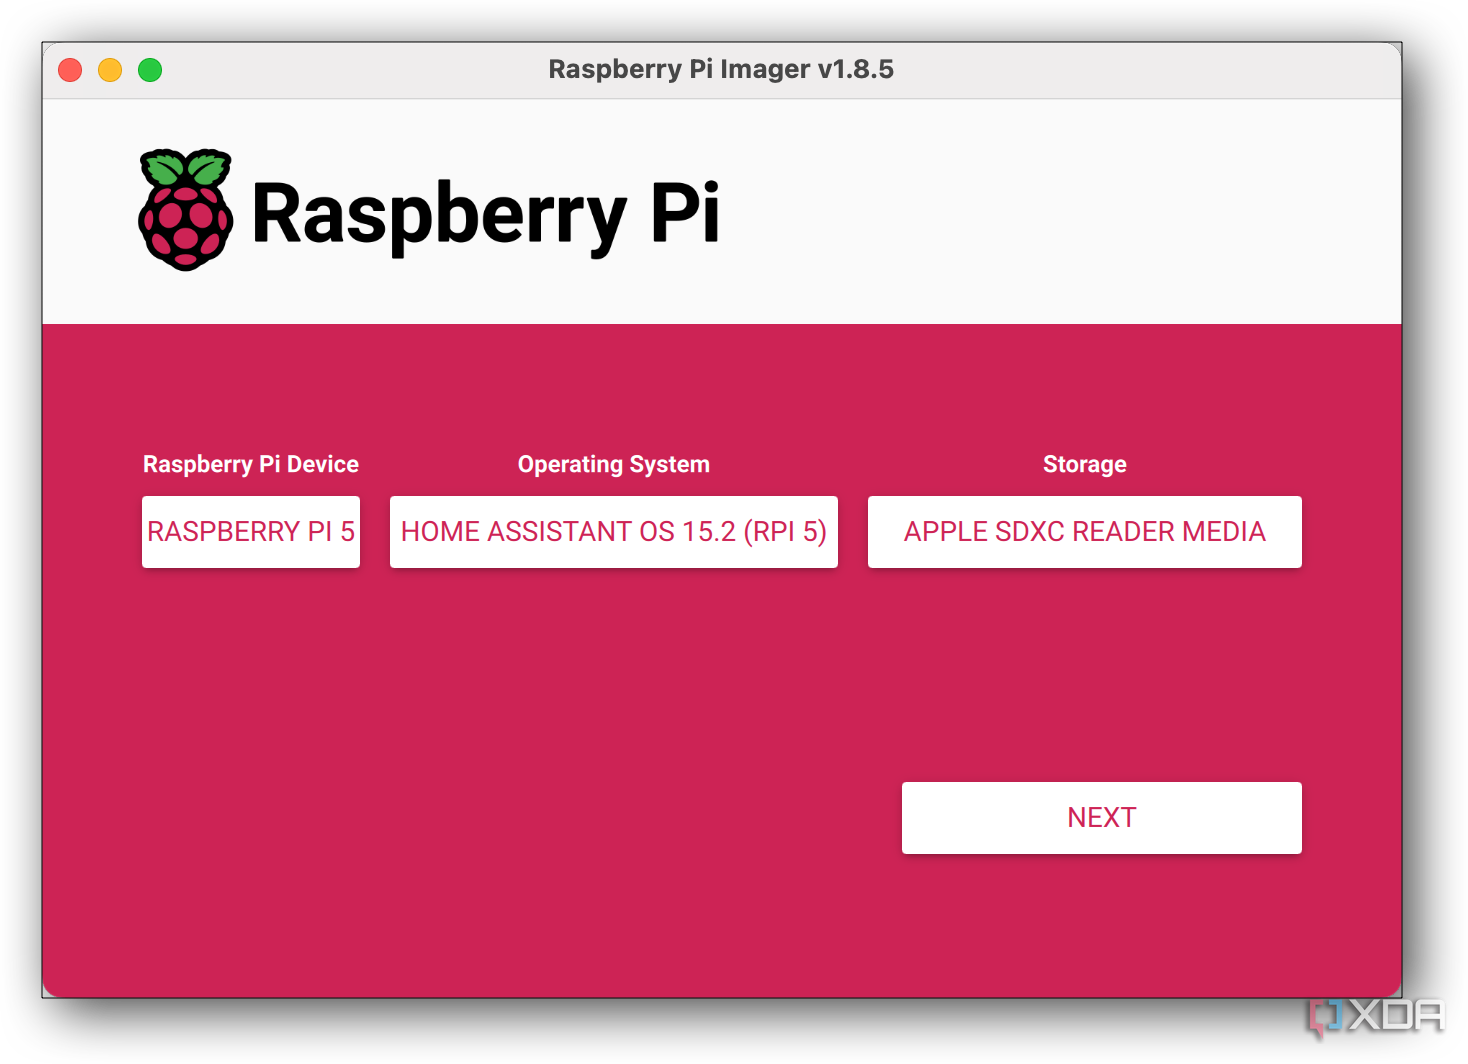
Flash Raspberry Pi OS to the SSD using Raspberry Pi Imager or Balena Etcher, selecting the same OS release you already like.
-
Optionally, clone your existing install. You can use the SD card cloning utility included in Raspberry Pi OS. Alternatively, if you’d rather take the command-line junkie route, mount the new SSD as
/mnt/ssdand sync withsudo rsync -aAXv / /mnt/ssd. -
Set boot order, using
sudo raspi-config, Open Advanced Options -> Boot Order, and choose USB or PCIe first.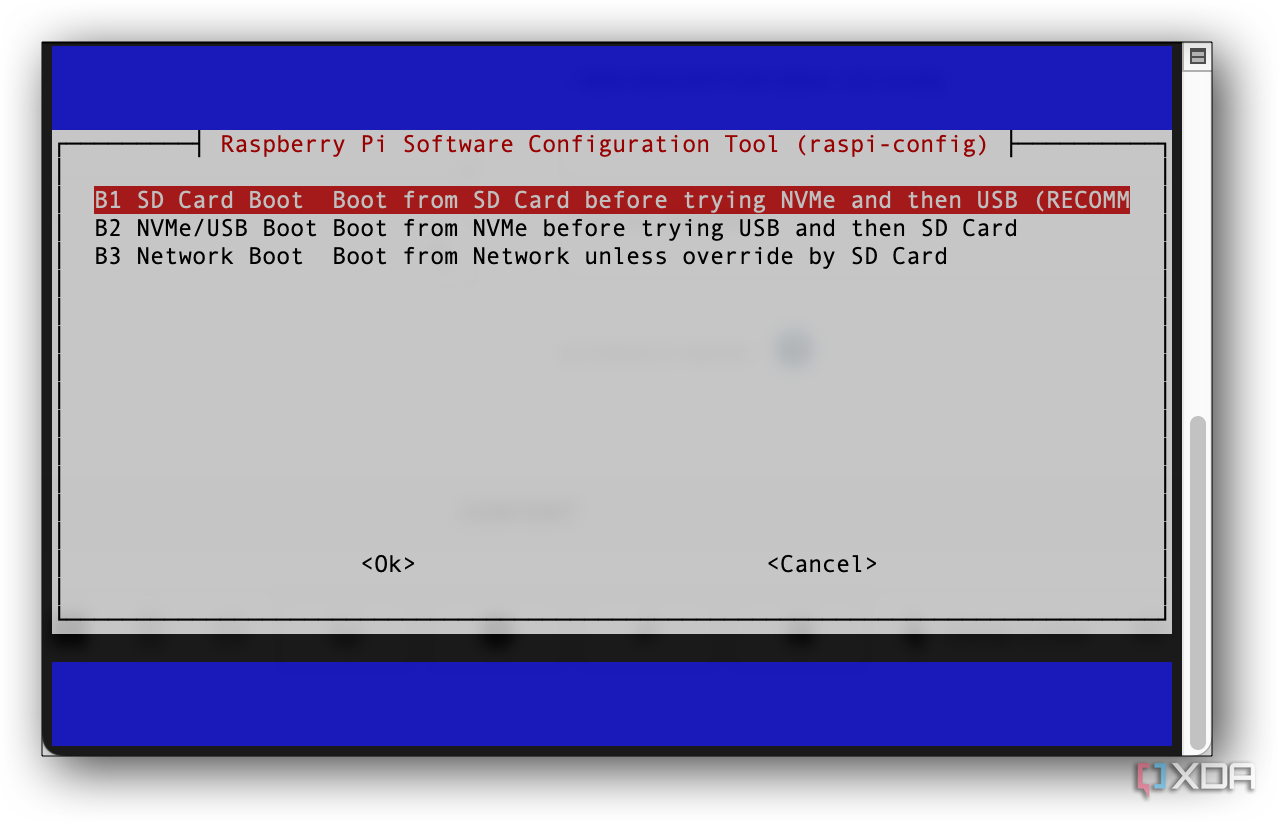
- Shut down, remove the card, attach the SSD: Power off, your Raspberry Pi, pull the microSD, and plug in the SSD. Then, power on the Raspberry Pi.
-
Verify the switch by running
lsblk -formount | grep "https://www.xda-developers.com/"; you should see/dev/sda2(or/dev/nvme0n1p2) as the root.


Real‑world benefits after the switch
Every workload feels instantly more responsive

My first boot from SSD took about twelve seconds from power‑on to the login prompt — half the time I measured with the fastest card I owned. System upgrades that once crawled are now finished before my coffee is. GitLab Runner jobs are completed more quickly because large Docker layers are unpacked at SSD speeds, freeing the CPU from waiting on I/O bottlenecks. Even routine tasks like apt list — upgradable feel snappy, confirming the storage subsystem is no longer the weak link.
Media playback and home‑automation scenes were also improved. Plex no longer pauses when another service writes a large log file, and Home Assistant restarts in under twenty seconds instead of ninety. Those gains translate into a smoother smart home experience, as lights respond faster, dashboards load instantly, and I’m even able to stream media from the Pi, without buffering, while my nightly backups complete.
Pitfalls and how I solved them
Heat, power, and clutter are all manageable tweaks
Running an external SSD adds a few degrees to the Pi’s operating temperature, especially inside a case. I fixed that by switching to a fan‑assisted aluminum enclosure that doubles as a heat sink. Temps settled five degrees cooler than with my previous plastic shell, and the fan stays whisper‑quiet. On a Pi 5 with a PCIe HAT, thermal throttling disappeared once I stuck a slim heatsink on the controller chip.
Power draw creeps up by roughly one watt during idle and peaks near three watts under sustained writes. A beefier 27W Raspberry Pi adapter banished the recurring lightning‑bolt icon entirely. Finally, USB cable sprawl annoyed me, so I hid the enclosure under the Pi’s case with Velcro straps and a right‑angle connector. The setup looks cleaner than when a microSD card peeked out of the slot.
SSD booting supercharged my Raspberry Pi
Switching from a microSD card to SSD booting has been one of the most practical upgrades I’ve made to my Raspberry Pi setup. It eliminated the reliability issues I had tolerated for too long and substantially boosted speed and stability. Whether I’m running Docker containers, hosting media, or doing dev work, the Pi handles it all without dragging. Sure, it took a little setup and a bit of extra power overhead, but the payoff is enormous. This upgrade is worth doing if you rely on your Pi for anything beyond tinkering.


